Ninja Creami Protein Ice Cream
This post may contain affiliate links. See our disclosure policy for more details.
Try our Ninja Creami protein ice cream recipe – it is a game-changer – creamy, customizable, and packed with protein!
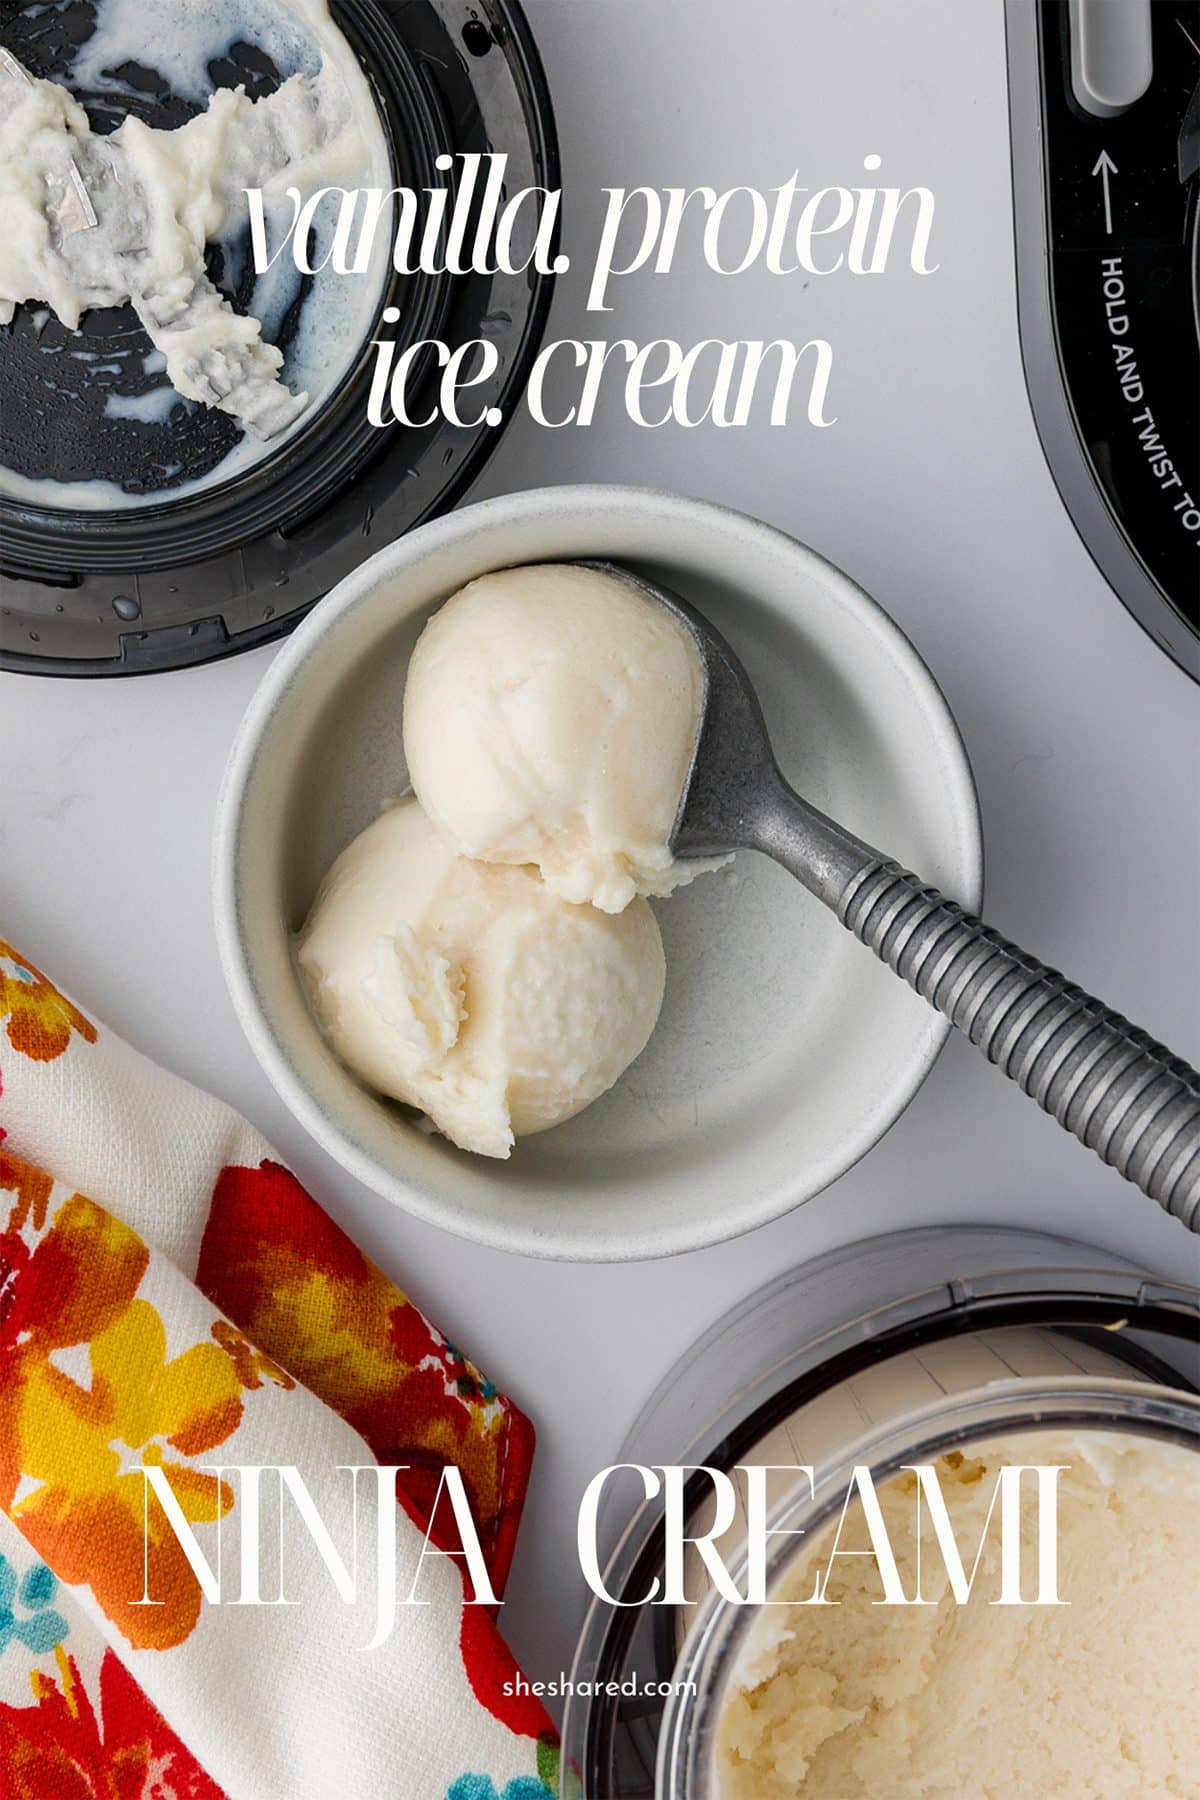
Raise your hand if you’ve ever felt the siren call of the ice cream aisle, only to be crushed by the sugar and fat content. 🙋♀️ Same! As moms constantly on the go, we need quick and easy solutions that fuel our bodies and satisfy our sweet tooths. That’s why we are OBSESSED with our Ninja Creami ice cream makers. This kitchen appliance has become our go-to secret weapon for whipping up healthy, high-protein ice cream in a flash.
Before we start flinging all the Ninja Creami recipes your way, you might first want to read our honest Ninja Creami review to find out why we love this brilliant frozen dessert machine so much! We think every kitchen needs one, and recipes like these protein packed ice cream treats are the icing on the cake, if you will!
Why Ninja Creami Protein Ice Cream is a Mom’s BFF:
Let’s be real, traditional ice cream is loaded with sugar and unhealthy fats. And while some store-bought protein ice creams exist, they often lack flavor and have that artificial aftertaste. But the Ninja Creami is different! It allows you to create your own protein ice cream with simple ingredients you control.
- High Protein, Low Guilt: This is a great way to sneak in extra protein for you or your kids. We all know protein is essential for energy, muscle growth, and feeling full. With this recipe, you can hit your protein goals without sacrificing taste.
- Customizable Flavors: The possibilities are endless! You can use vanilla protein powder as a base or try chocolate protein powder, peanut butter powder, or even a protein shake. Add your favorite mix-ins like chocolate chips, fruit, nuts, or even a drizzle of peanut butter.
- Dairy-Free Options: If you’re lactose intolerant or following a vegan diet, simply swap out the milk for almond milk, coconut milk, soy milk, or any other dairy-free milk you prefer.
And the best part? You can get creative and experiment with different flavors and ingredients to find your perfect combination.
Ninja Creami Magic: How to Make Protein Ice Cream in a Flash
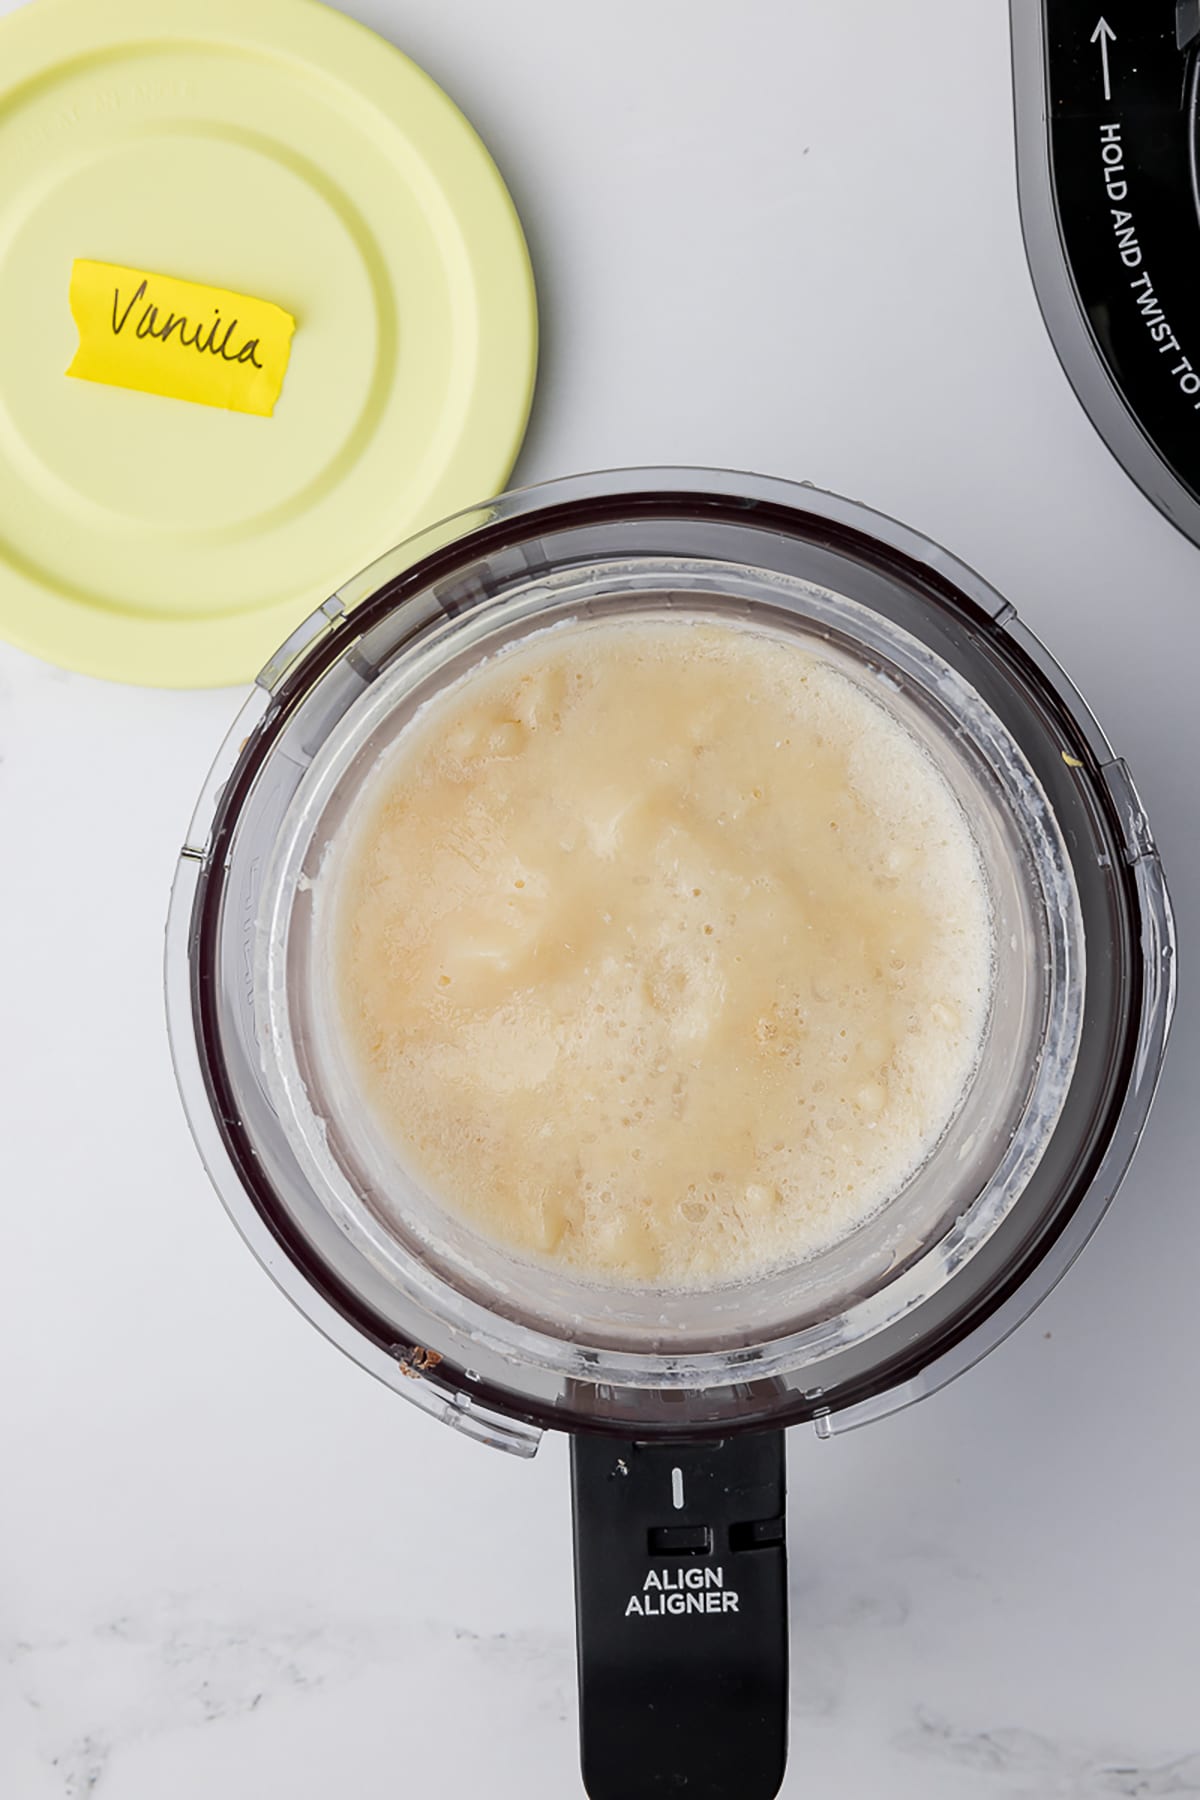
- I love to batch prep by doing prepping all my containers at once. This way I always have a frozen treat ready to go when a craving strikes! To keep track of what’s what, I use a bit of painter’s tape on each lid to label the base flavor.
- In each container, combine your base (protein powder and milk, Greek yogurt, etc.), stabilizer (guar gum, pudding mix, etc.), sweetener (maple syrup, honey, etc.), and any flavorings you like. For the smoothest results, I recommend using a standard or immersion blender.
- Securely fasten the lid on each container and pop them in the freezer for at least 24 hours. Trust me, patience is key for the creamiest Ninja Creami ice cream!
- After 24 hours, take your container out of the freezer. Depending on your freezer temperature, you may need to let the container sit at room temperature for 5-10 minutes to soften slightly. If your ice cream tends to be icy, this thawing step is crucial! Then, place the container directly into your Ninja Creami, lock it in place, and press the desired button.
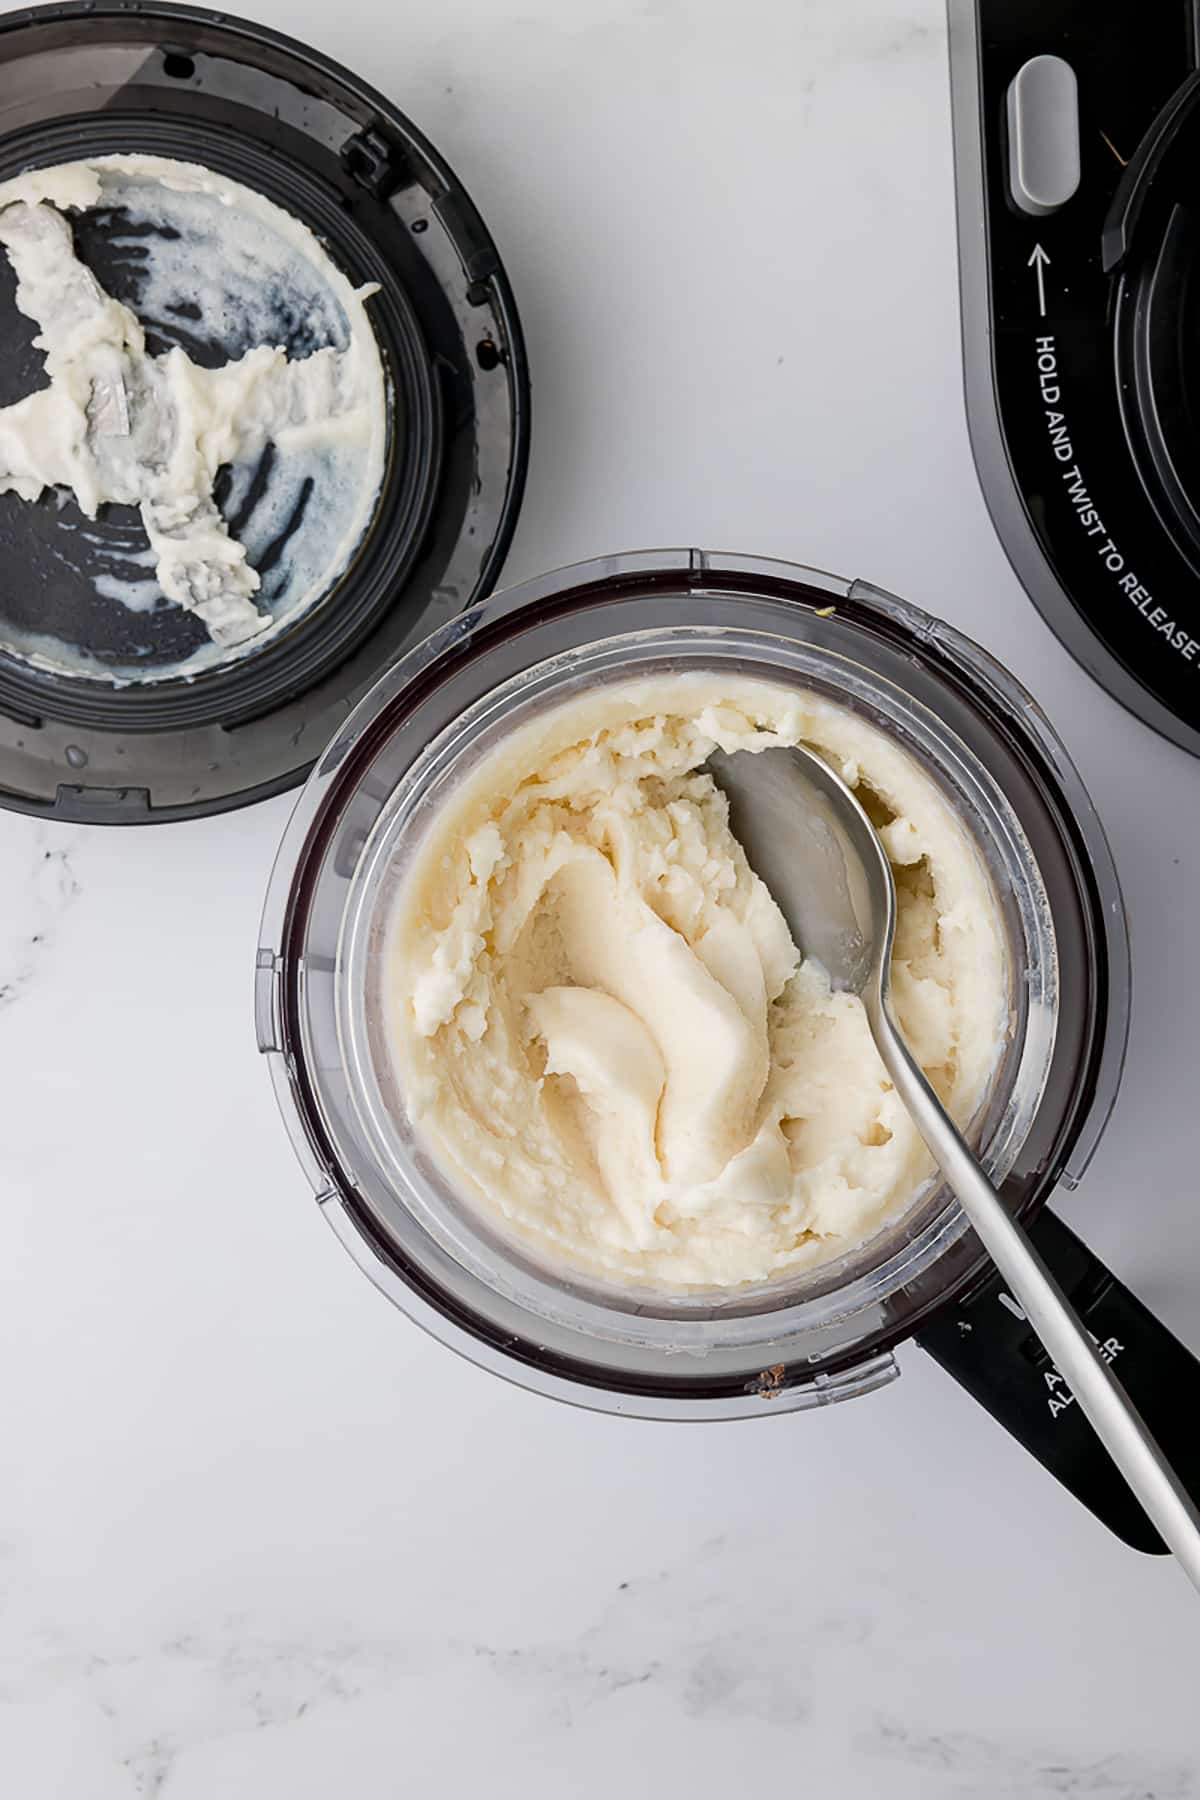
- After the initial spin, check the texture. If it’s a bit icy or crumbly, no worries! Just add a splash of your liquid base (milk, almond milk, etc.). Replace the lid, lock the container back in, and press the “Re-spin” button.
- If you’re adding mix-ins, create a small well in the center of your ice cream and add them in. Secure the lid, lock the container back in, and press the “Mix-in” button to evenly distribute the goodies.
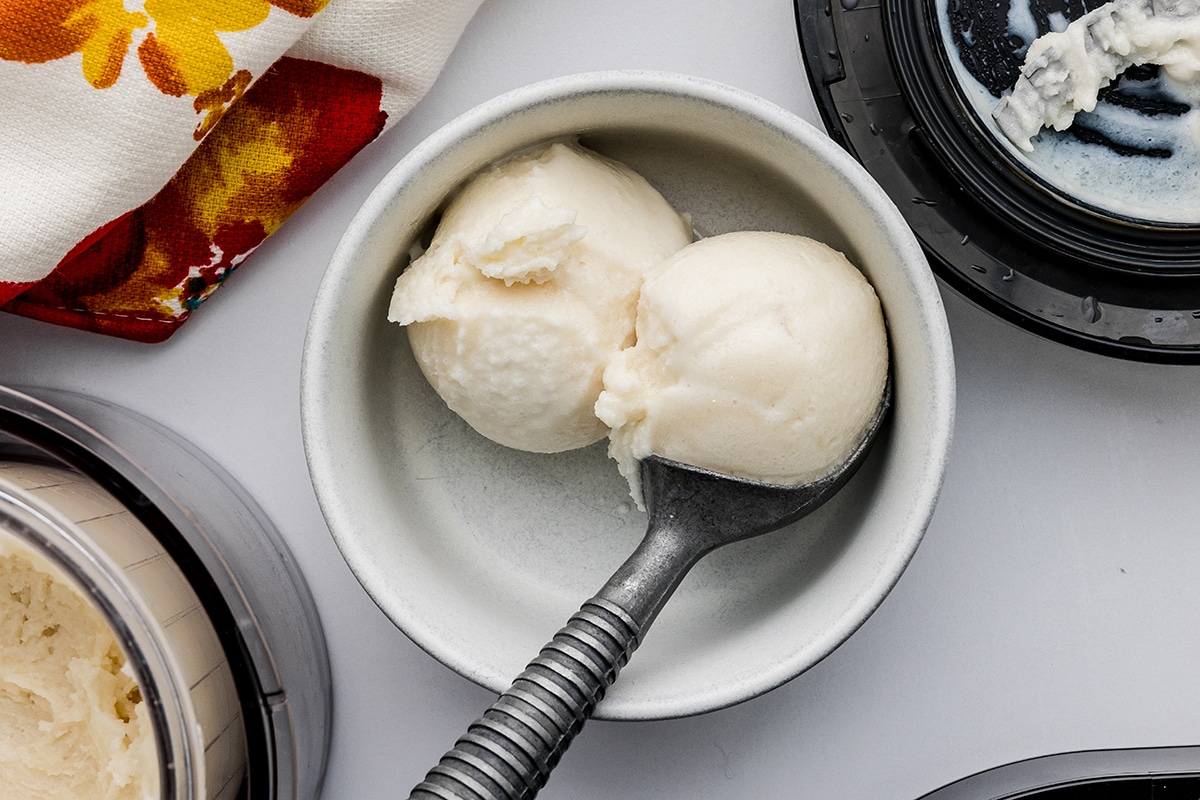
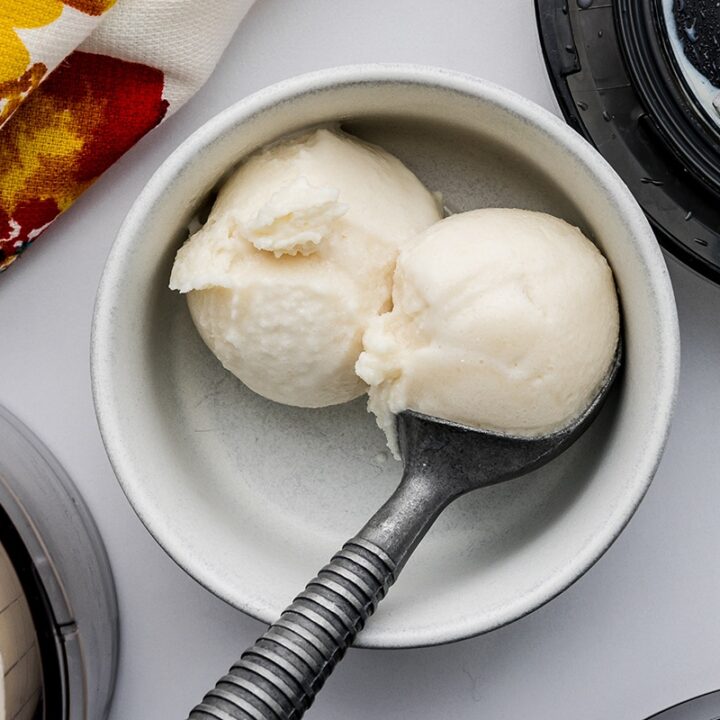
- Finally, it’s time to indulge! Savor every spoonful of your delicious, healthy, and customized ice cream. Store any leftovers in the freezer with the lid on to prevent freezer burn.
Before we dive into the recipe, let’s quickly chat about the three essential components of any Ninja Creami ice cream creation:
- Base: This is the foundation of your ice cream, providing the main flavor and texture. Popular options include protein powder and milk (dairy or dairy-free), Greek yogurt, fruit purees, oatmeal, or even avocado!
- Stabilizer: Stabilizers help prevent ice crystals from forming and create a smoother, creamier texture. Common choices include guar gum or xanthan gum (used in tiny amounts), instant pudding mix, cream cheese, coconut cream, or cornstarch.
- Sweetener: This is where you can adjust the sweetness level to your liking. Natural sweeteners like maple syrup, honey, or agave are great options. If you prefer, you can also use stevia or regular sugar.
Now that you understand the basics, let’s get to the fun part – making your own delicious and healthy Ninja Creami protein ice cream!
The Easiest Ninja Creami Protein Ice Cream Recipe EVER:
You won’t believe how simple this is! It’s seriously one of the easiest ways to make protein ice cream that tastes amazing.
Ingredients:
- 1 scoop vanilla protein powder (about 25-30g protein)
- 14 oz Core Power Vanilla high protein milkshake
- 2 tablespoons monk fruit (adjust to taste)
- Pinch of guar gum or xanthan gum (optional, for extra creaminess)
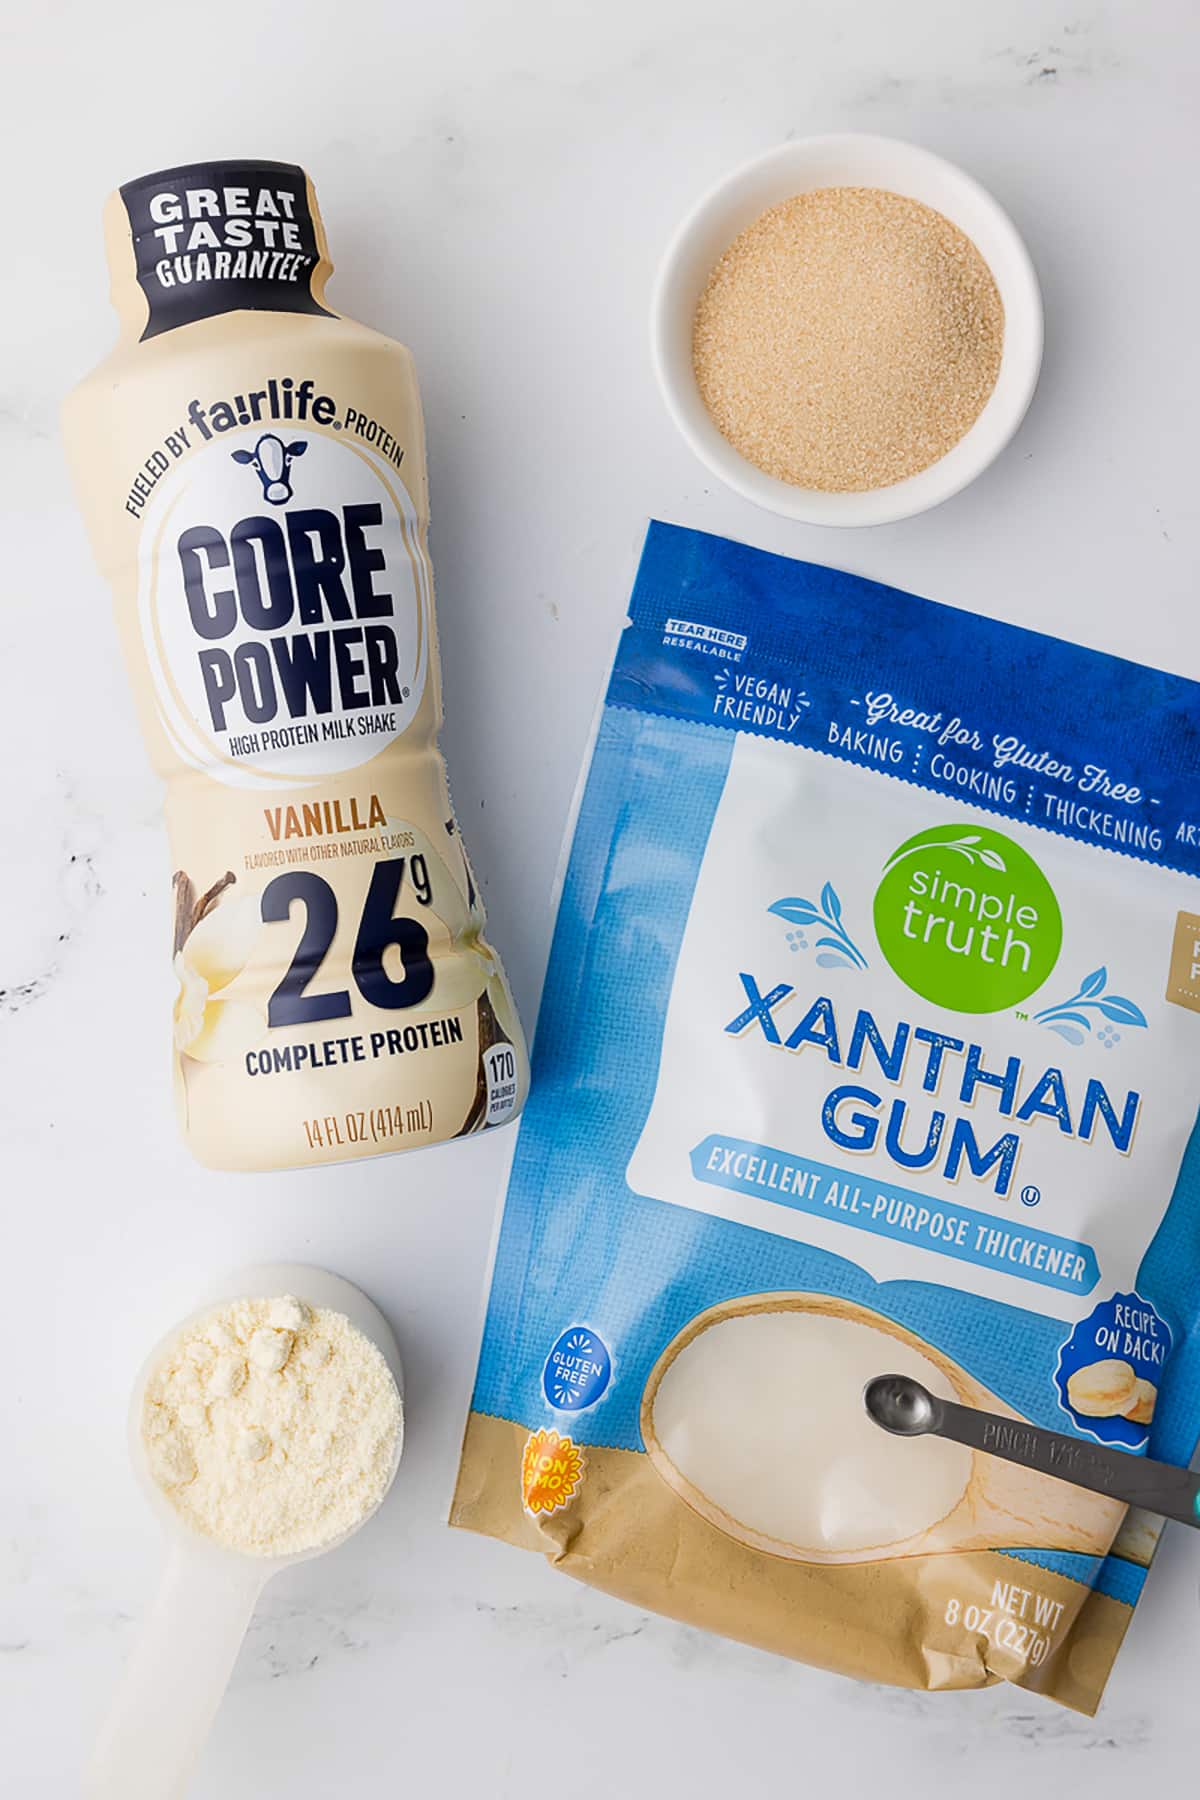
Equipment:
- Ninja Creami ice cream machine
- Ninja Creami pint container
- Immersion blender (optional, but super handy)
Instructions:
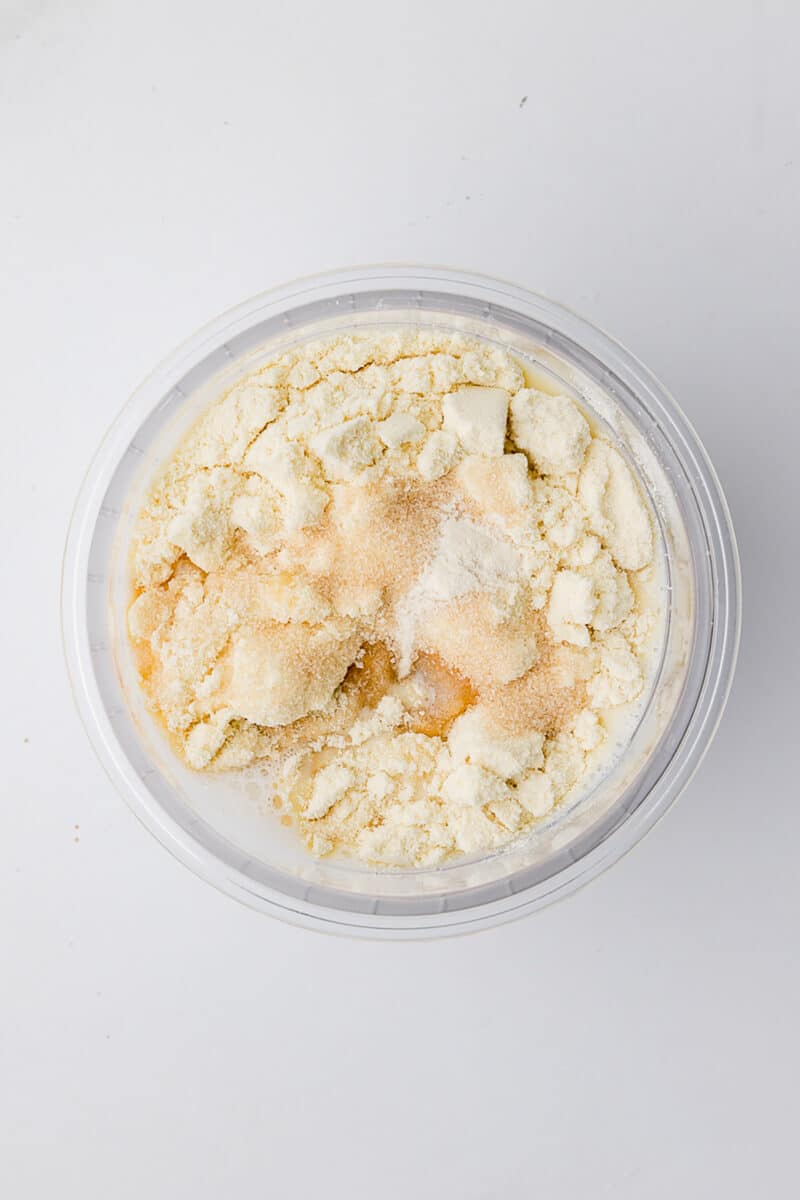
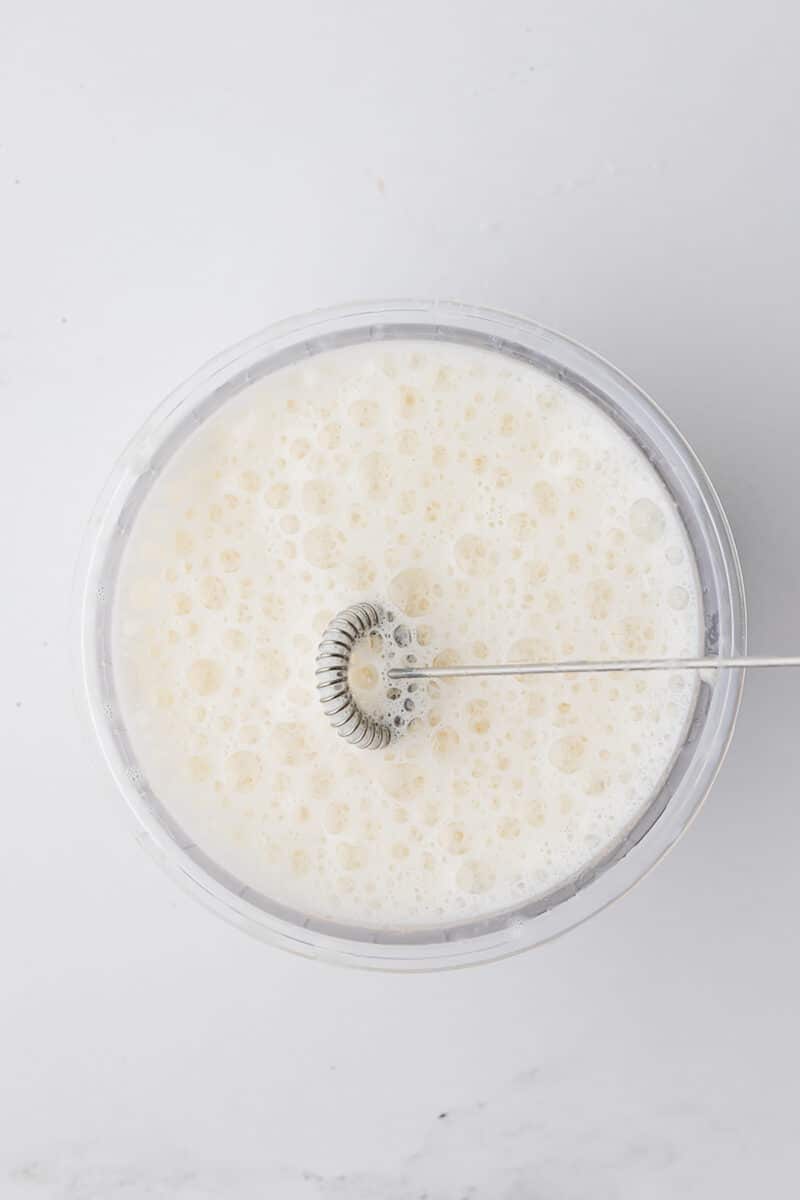
1. To mix the Base, combine all the ingredients in the Ninja Creami pint container. Use an immersion blender or whisk to ensure everything is smooth and well combined.
2. Pop on the storage lid and freeze the mixture for at least 24 hours. This gives it time to solidify and develop those icy edges that the Ninja Creami loves to transform.

3. After 24 hours, take the pint out of the freezer and remove the storage lid. Place the pint in the outer bowl of the Ninja Creami machine, attach the outer bowl lid, and spin using the “Lite Ice Cream” function.
4. Re-spin & Add-Ins (Optional): After the first spin, you might see some crumbly bits. This is totally normal! Add a splash of milk (about a tablespoon) and hit the “Re-spin” button a couple of times until it reaches your desired creamy consistency. If you’re adding mix-ins, gently fold them in with a spoon or use the “Mix-in” function.
5. Time to dig in! Also, don’t forget to top your creamy creation with your favorite toppings and savor every spoonful. Store any leftover ice cream in the freezer with the storage lid on to prevent freezer burn.
Ninja Creami Troubleshooting:
- Too Icy? Don’t worry, this happens sometimes! Just scoop out the ice cream, place it in a separate bowl, and add a splash of cream or milk. Blend it with a spoon or immersion blender until smoother, then return it to the Ninja Creami pint and re-spin a few times.
- Too Melty? If the ice cream is too soft, simply pop it back in the freezer for a bit to firm up before spinning.
- Not Creamy Enough? If your protein powder has a high fiber content, it might create a less creamy texture. Next time, try adding a small amount of full-fat Greek yogurt for extra creaminess.
Pro Tips & Flavor Variations:
- Chocolate Lovers: For a rich chocolate treat, swap the vanilla protein powder for chocolate protein powder and add a few tablespoons of cocoa powder.
- Peanut Butter Power: Mix in a spoonful of peanut butter or use a peanut butter flavored protein powder for a protein-packed twist.
- Fruity Fun: Add frozen or fresh fruit like berries, mango, or banana for a refreshing burst of flavor and added nutrients. Subsequently, try all of the things!!
- Experiment: Don’t be afraid to get creative! Try different milk alternatives, sweeteners, and toppings until you find your perfect combination. Undeniably, experimenting has been my favorite thing about the Ninja Creami!
FAQs:
- Can I make regular ice cream with the Ninja Creami? Absolutely! You can use any store-bought ice cream mix or create your own base using milk, cream, sugar, and flavorings. The Ninja Creami isn’t just for healthy treats, occasionally I love to make a totally calorie packed ice cream as well!
- What is the difference between the “Lite Ice Cream” and “Ice Cream” buttons? The “Lite Ice Cream” button is designed for lower-fat and lower-sugar bases, while the “Ice Cream” button is better suited for richer recipes. However, if you’re not sure, start with “Lite Ice Cream” and re-spin if needed.
- Why does my Ninja Creami pint have a fill line? The fill line indicates the maximum amount you should fill the pint container. Otherwise, overfilling can lead to messy spills during processing.
- Can I use frozen fruit in my Ninja Creami? Yes! Frozen fruit is a great way to add flavor and texture to your creations.
- How often should I wash my Ninja Creami? You should wash the pint container, lid, and paddle after each use. Wipe down the outer bowl and base as needed.
- Why is my ice cream still crumbly? If it’s still crumbly after a few re-spins, add a little more milk, a bit at a time, and re-spin until smooth.
- How long will the ice cream stay fresh in the freezer? It’s best to consume the ice cream within a few days for optimal freshness.
Now, go forth and create your own Ninja Creami protein ice cream masterpieces! Trust us, this healthy ice cream recipe is a total game-changer for busy moms who want to satisfy their sweet tooth without the guilt.
Your Turn:
We’d love to hear from you! What are your favorite flavor combinations? Have you discovered any secret tips or tricks? Share your experiences in the comments below!
Don’t forget to pin this recipe and subscribe to my blog for more easy, healthy recipes that the whole family will love.
Ninja Creami Protein Ice Cream
Raise your hand if you've ever felt the siren call of the ice cream aisle, only to be crushed by the sugar and fat content. 🙋♀️ Me too! As a mom constantly on the go, I need quick and easy solutions that fuel my body and satisfy my sweet tooth. That's why I'm OBSESSED with my Ninja Creami ice cream maker. This kitchen appliance has become my secret weapon for whipping up healthy, high-protein ice cream in a flash.
Ingredients
- 1 scoop vanilla protein powder (about 25-30g protein)
- 14 oz Core Power Vanilla high protein milkshake
- 2 tablespoons monk fruit (adjust to taste)
- Pinch of guar gum or xanthan gum (optional, for extra creaminess)
Instructions
Equipment:
Ninja Creami ice cream machine
Ninja Creami pint container
Immersion blender (optional, but super handy)
Instructions:
1. To mix the Base, combine all the ingredients in the Ninja Creami pint container. Use an immersion blender or whisk to ensure everything is smooth and well combined.
2. Pop on the storage lid and freeze the mixture for at least 24 hours. This gives it time to solidify and develop those icy edges that the Ninja Creami loves to transform.
3. After 24 hours, take the pint out of the freezer and remove the storage lid. Place the pint in the outer bowl of the Ninja Creami machine, attach the outer bowl lid, and spin using the "Lite Ice Cream" function.
4. Re-spin & Add-Ins (Optional): After the first spin, you might see some crumbly bits. This is totally normal! Add a splash of milk (about a tablespoon) and hit the "Re-spin" button a couple of times until it reaches your desired creamy consistency. If you're adding mix-ins, gently fold them in with a spoon or use the "Mix-in" function.
5. Time to dig in! Also, don't forget to top your creamy creation with your favorite toppings and savor every spoonful. Store any leftover ice cream in the freezer with the storage lid on to prevent freezer burn.
Notes
Ninja Creami Troubleshooting:
- Too Icy? Don't worry, this happens sometimes! Just scoop out the ice cream, place it in a separate bowl, and add a splash of cream or milk. Blend it with a spoon or immersion blender until smoother, then return it to the Ninja Creami pint and re-spin a few times.
- Too Melty? If the ice cream is too soft, simply pop it back in the freezer for a bit to firm up before spinning.
- Not Creamy Enough? If your protein powder has a high fiber content, it might create a less creamy texture. Next time, try adding a small amount of full-fat Greek yogurt for extra creaminess.
Pro Tips & Flavor Variations:
- Chocolate Lovers: For a rich chocolate treat, swap the vanilla protein powder for chocolate protein powder and add a few tablespoons of cocoa powder.
- Peanut Butter Power: Mix in a spoonful of peanut butter or use a peanut butter flavored protein powder for a protein-packed twist.
- Fruity Fun: Add frozen or fresh fruit like berries, mango, or banana for a refreshing burst of flavor and added nutrients. Subsequently, try all of the things!!
- Experiment: Don't be afraid to get creative! Try different milk alternatives, sweeteners, and toppings until you find your perfect combination. Undeniably, experimenting has been my favorite thing about the Ninja Creami!
Nutrition Information:
Yield: 2 Serving Size: 1Amount Per Serving: Calories: 976Total Fat: 7gSaturated Fat: 4gTrans Fat: 0gUnsaturated Fat: 2gCholesterol: 30mgSodium: 321mgCarbohydrates: 80gFiber: 2gSugar: 74gProtein: 32g
*This calculation is just an estimate ~ results may vary!
4 Comments