Panoramic Sugar Easter Eggs
This post may contain affiliate links. See our disclosure policy for more details.
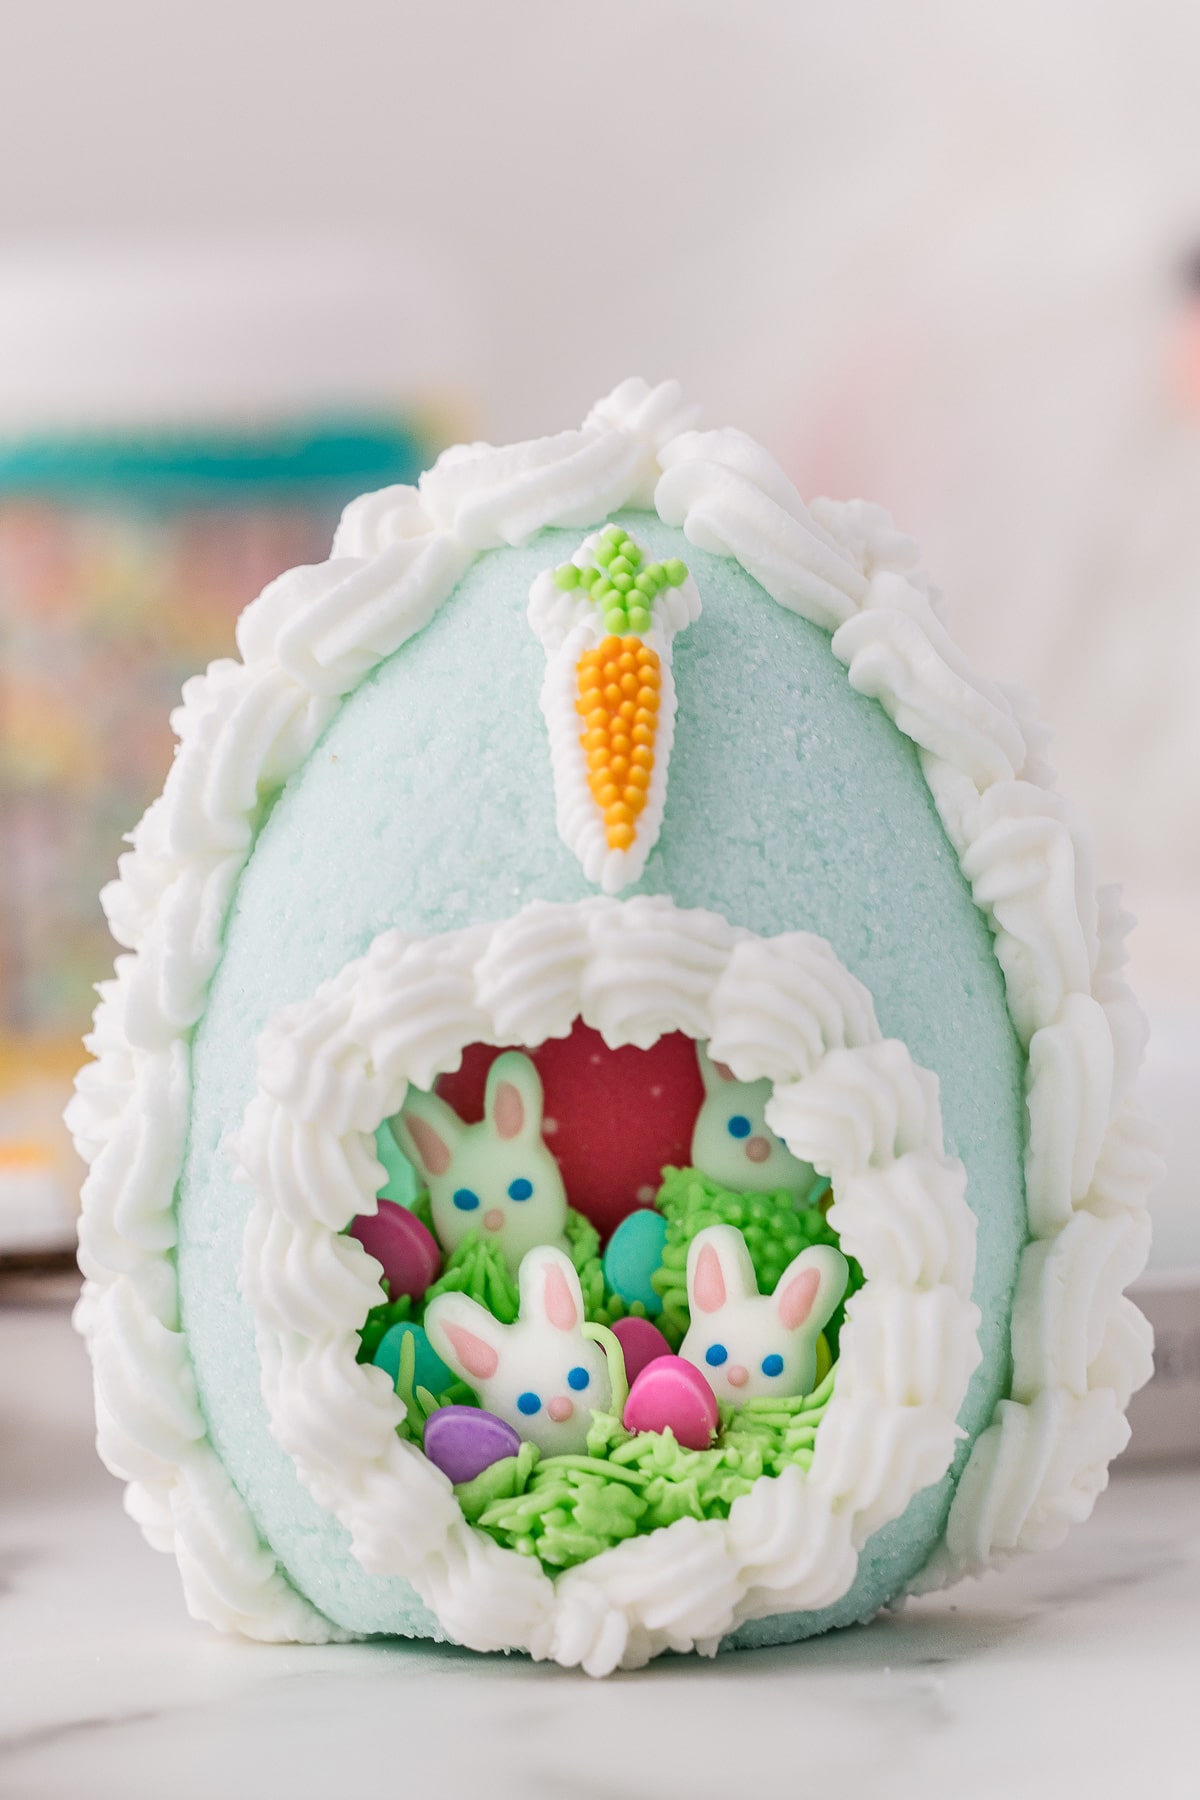
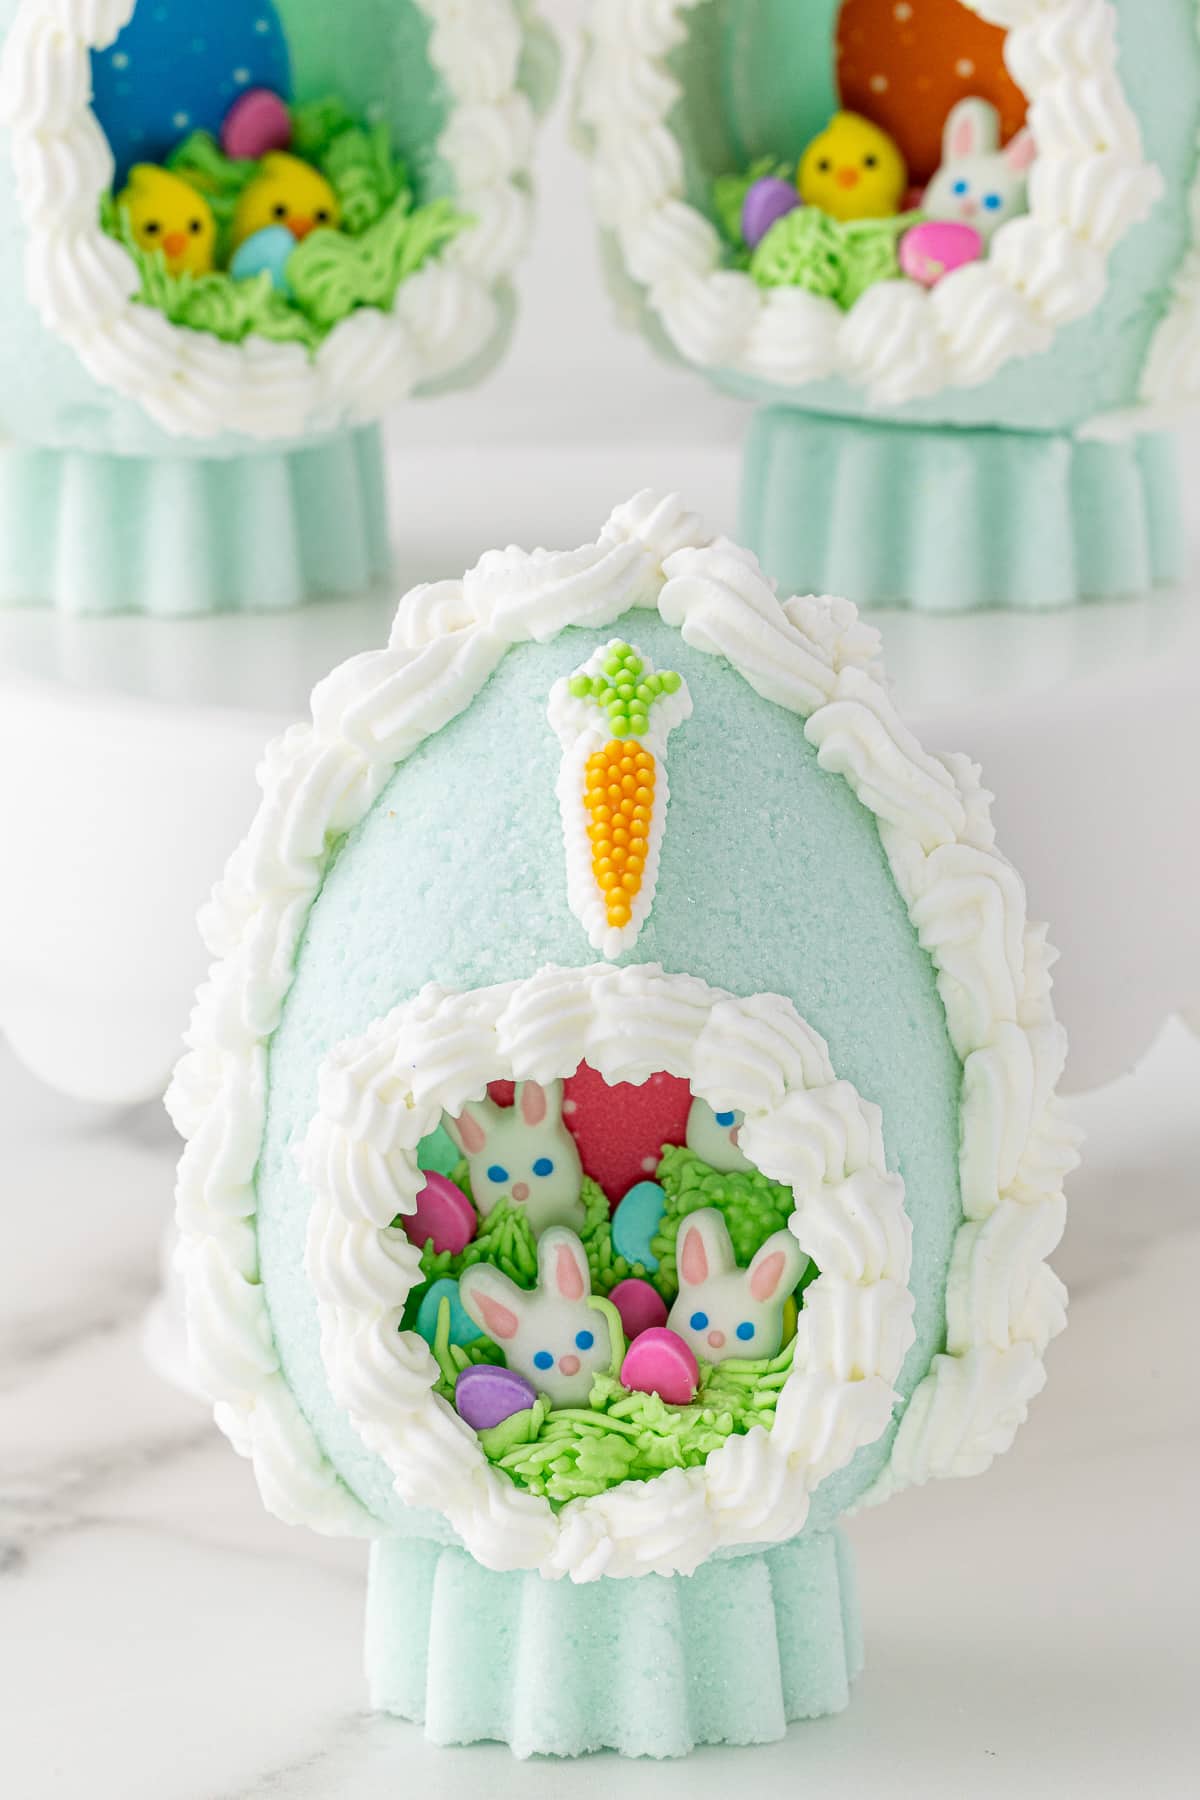
Did anyone else grow up thinking that these Panoramic Sugar Easter Eggs were the coolest thing ever? Made with hollowed out sugar, this is a fun Easter activity you can do right at home!
They look so fancy but guess what? These darling candy eggs are actually pretty easy to make! I’m excited to share with this tutorial to show you how to make panoramic Easter eggs!
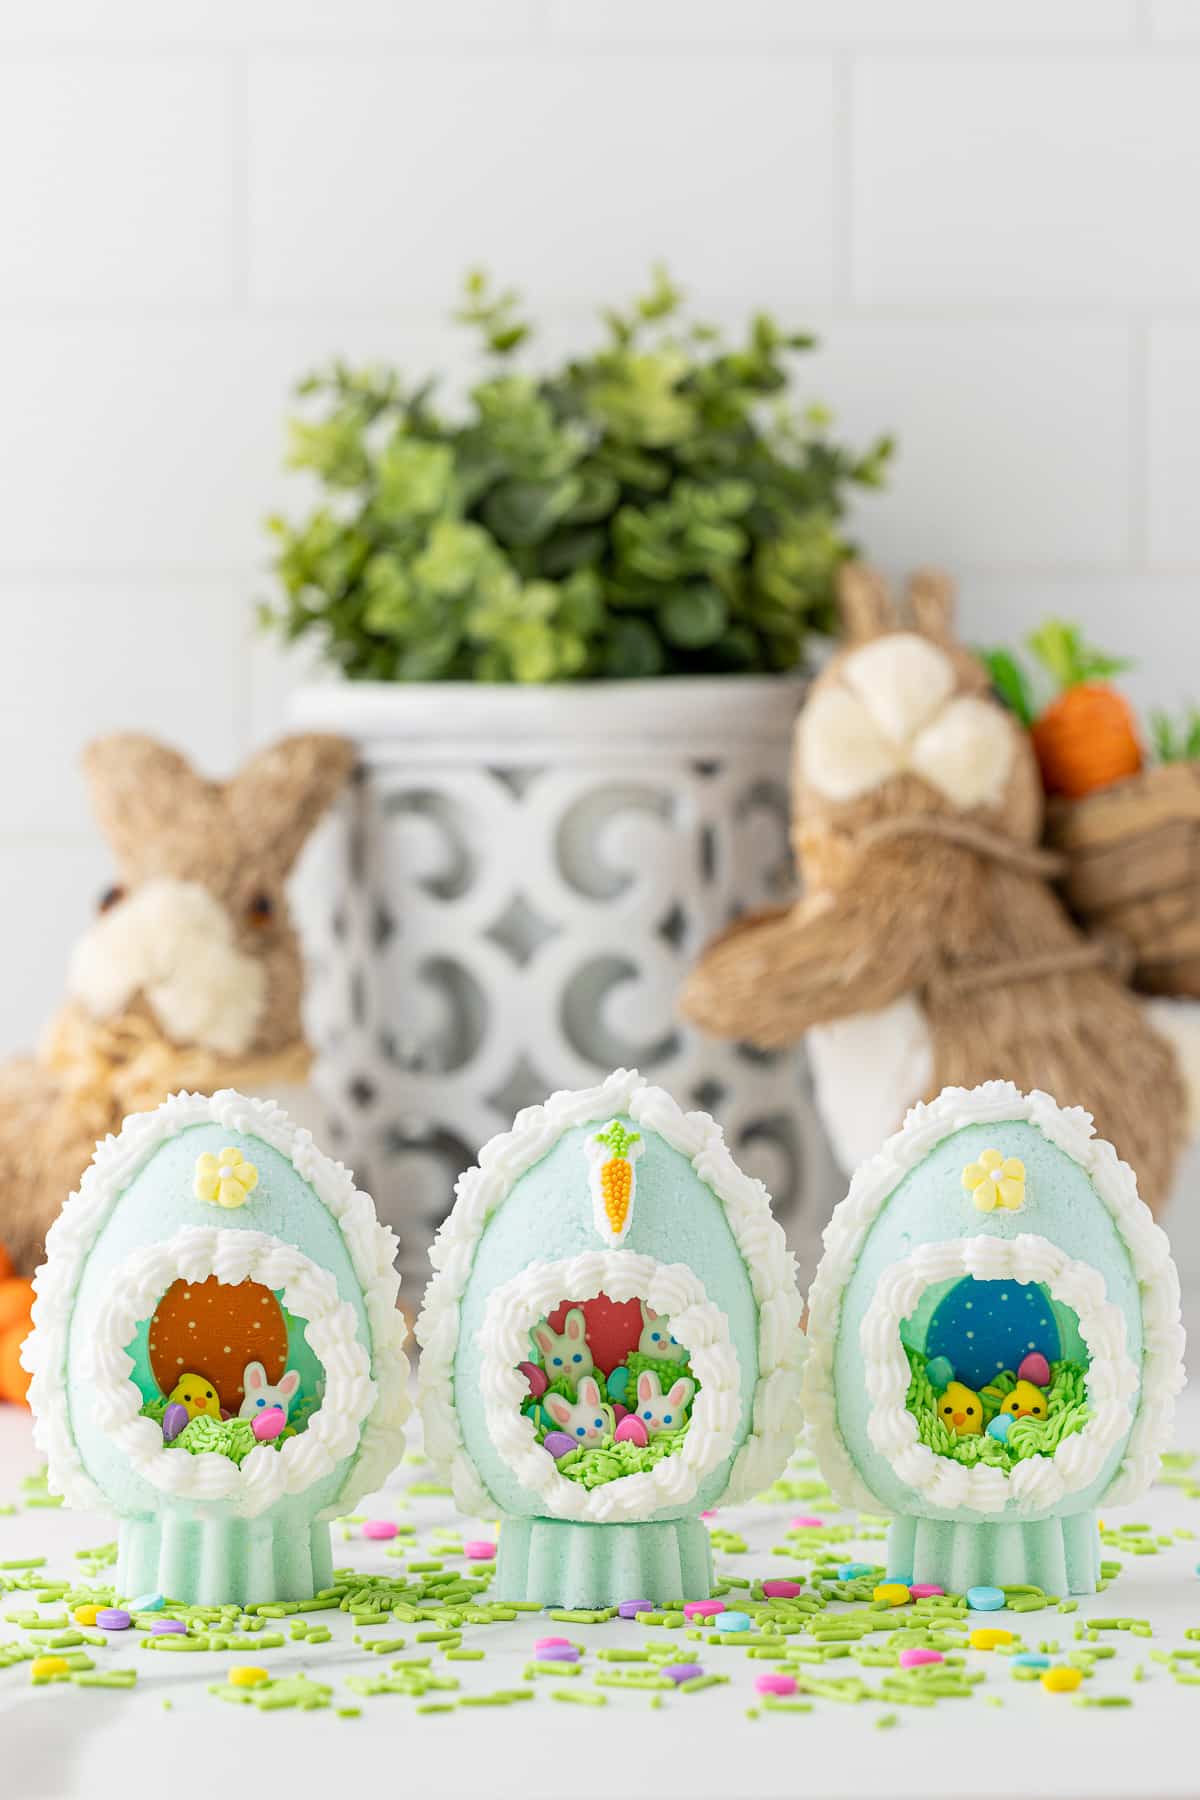
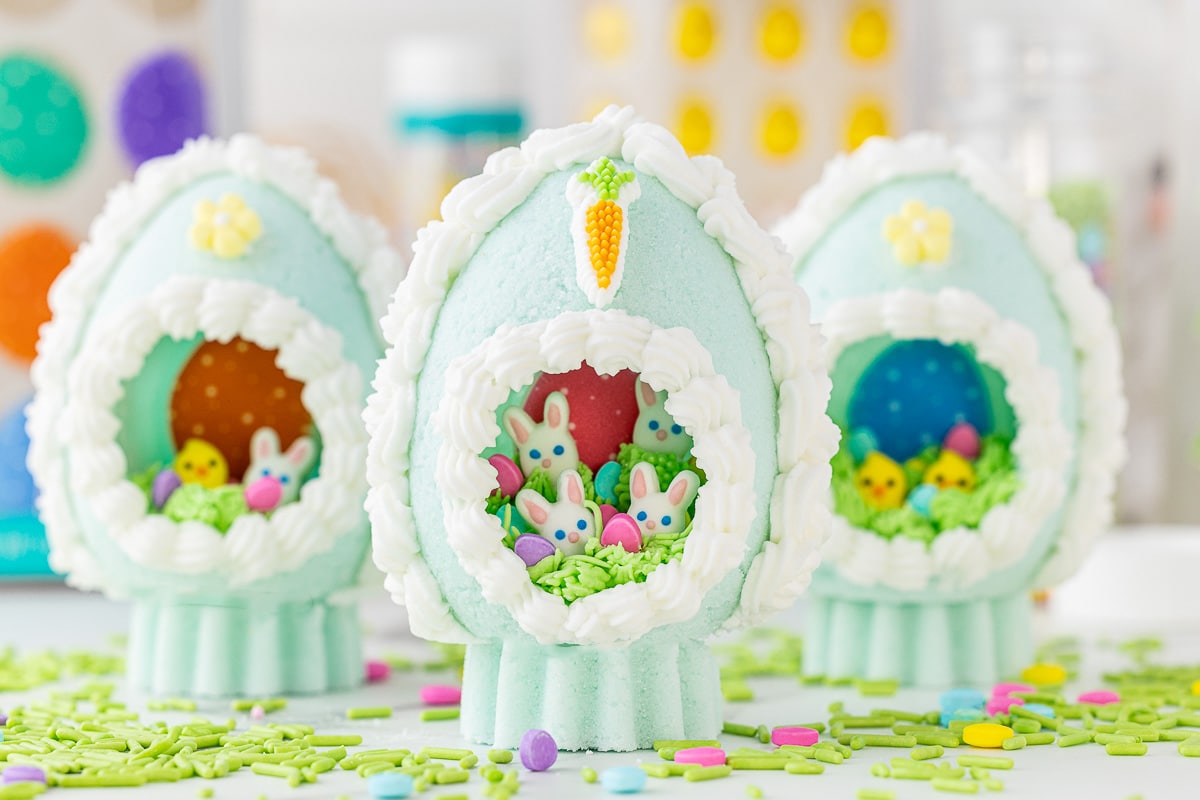
Easter is such a fun time of year and these homemade sugar eggs will look so beautiful in an Easter basket or as part of your Easter table decoration or place settings.
Panoramic Sugar Easter Eggs
What a wonderful Easter tradition it would be to make these sugar shell eggs with the kids! In addition, imagine the excitement of getting them out every year!
By the time you make these once, you’ll be excited about making them for family and friends!
Our favorite part about panoramic sugar eggs is that they are so much easier to make than most people think.
Supplies for Making Sugar Eggs
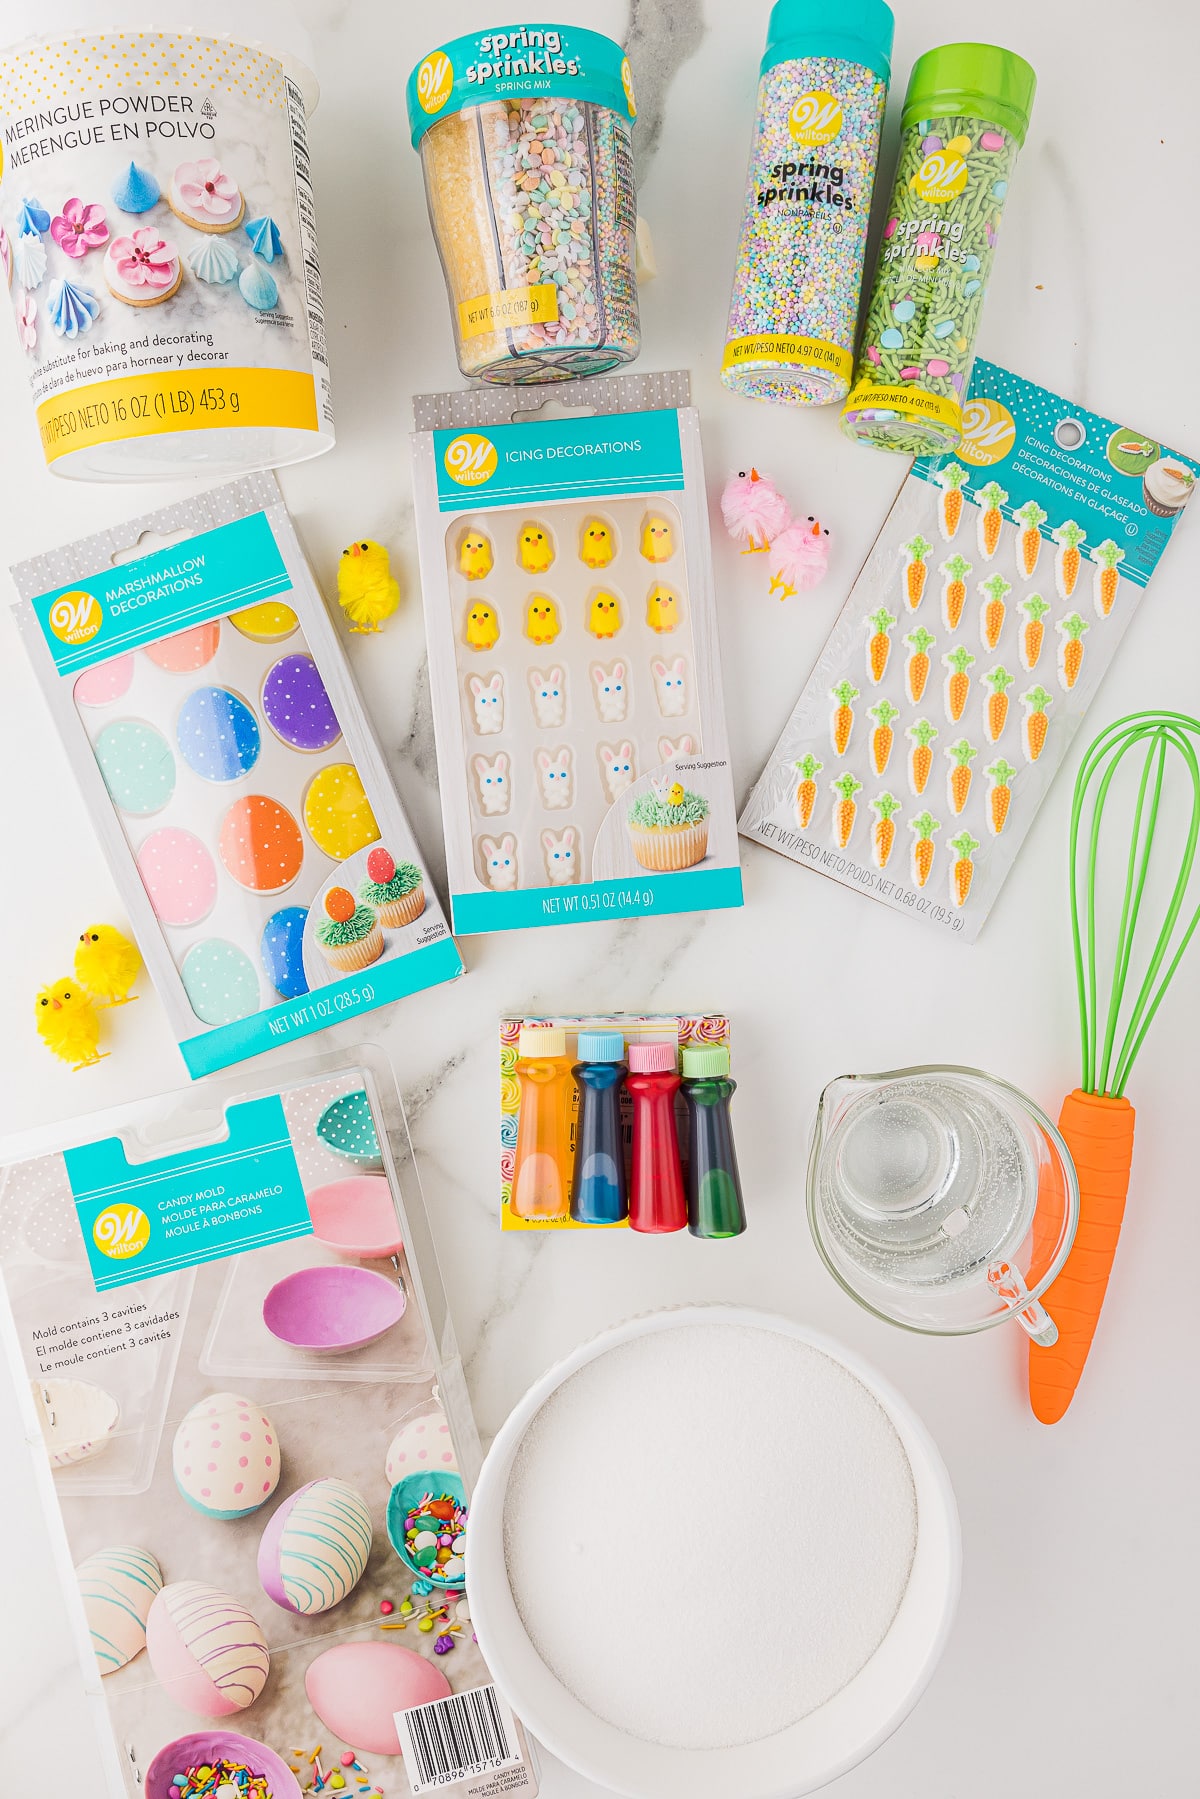
We love Wilton products and are excited to have worked with them in partnership to create this fun recipe! Here are some of the product we used:
- Wilton Candy Mold 3D Easter Egg 2 pc
- Meringue Powder, 4 oz. Egg White Substitute
- Wilton Mini Chicks and Bunnies
- Food Coloring
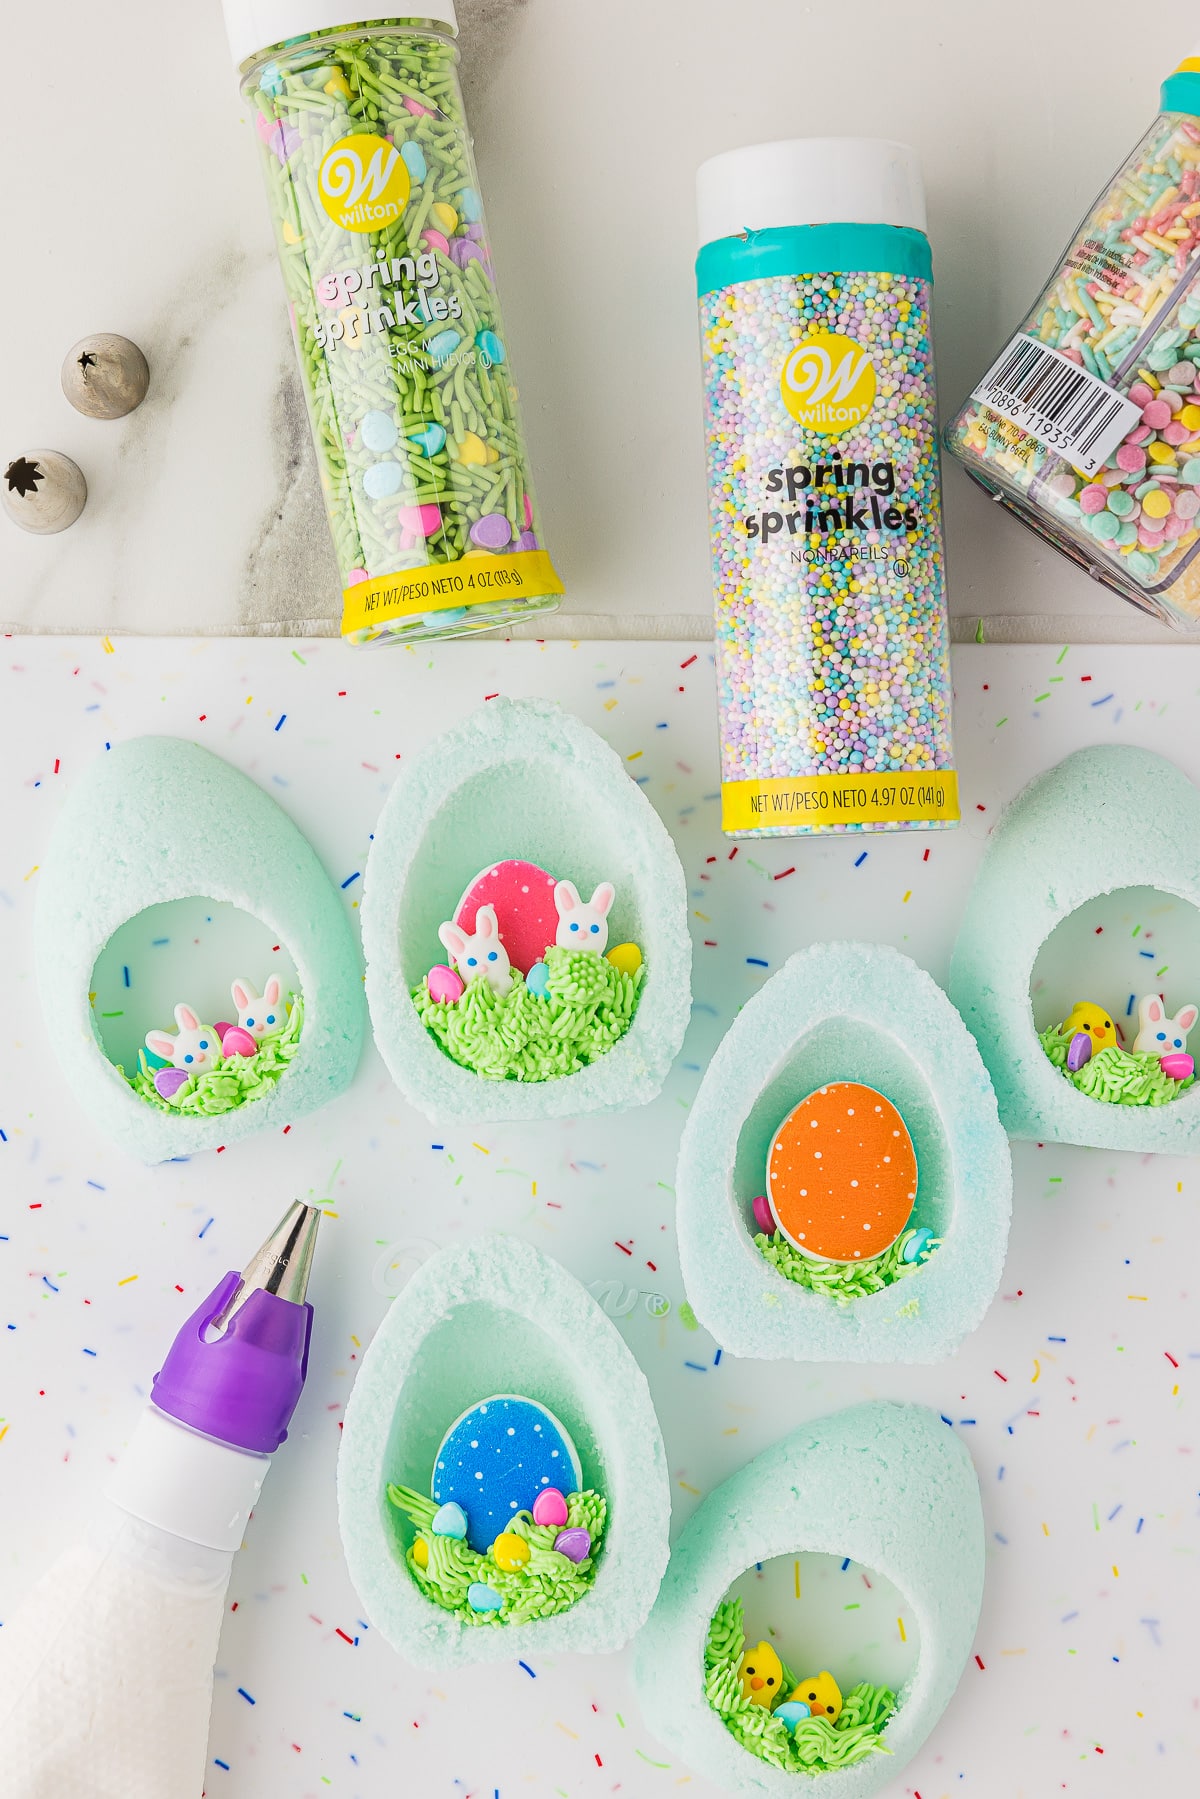
- Wilton Sprinkle Mix-Easter
- More Easter Sprinkles
- Wilton Marshmallow Egg Treat Toppers – Egg Mallow – Pack of 12
- DOT Matrix Icing DEC-Carrots
- Carrot Shaped Whisk
Ingredients for Homemade Sugar Easter Eggs
- 2 ½ cups white granulated sugar
- 3 tablespoons Wilton meringue powder
- 2-4 tablespoons water (the moisture in the air will determine how much you need)
- Food coloring, optional – for colored eggs
- Royal Icing (I used Wilton’s royal icing recipe)
- Sprinkles and Icing Decorations (I used Wilton Carrots, Bunnies & Chicks, Marshmallow eggs, and Flowers)
You will also need a panoramic egg mold – we used the plastic molds from Wilton.
*This will yield 3 complete eggs using the Wilton sized sugar shell egg molds
How to Make Sugar Eggs
1. Preheat oven to 200 degrees F
2. In a medium bowl combine sugar and meringue powder. Whisk sugar mixture together until it is well incorporated.
3. If you would like colored eggs, in a separate small bowl, add food coloring to the water, and stir until it is well combined. Adding the food coloring to the water will help to distribute the color more.
4. Add the water to the sugar/meringue mixture and beat on low with a hand mixer or whisk. If color blobs form, smooth them out with a spatula and continue mixing until the sugar is the consistency of wet sand.
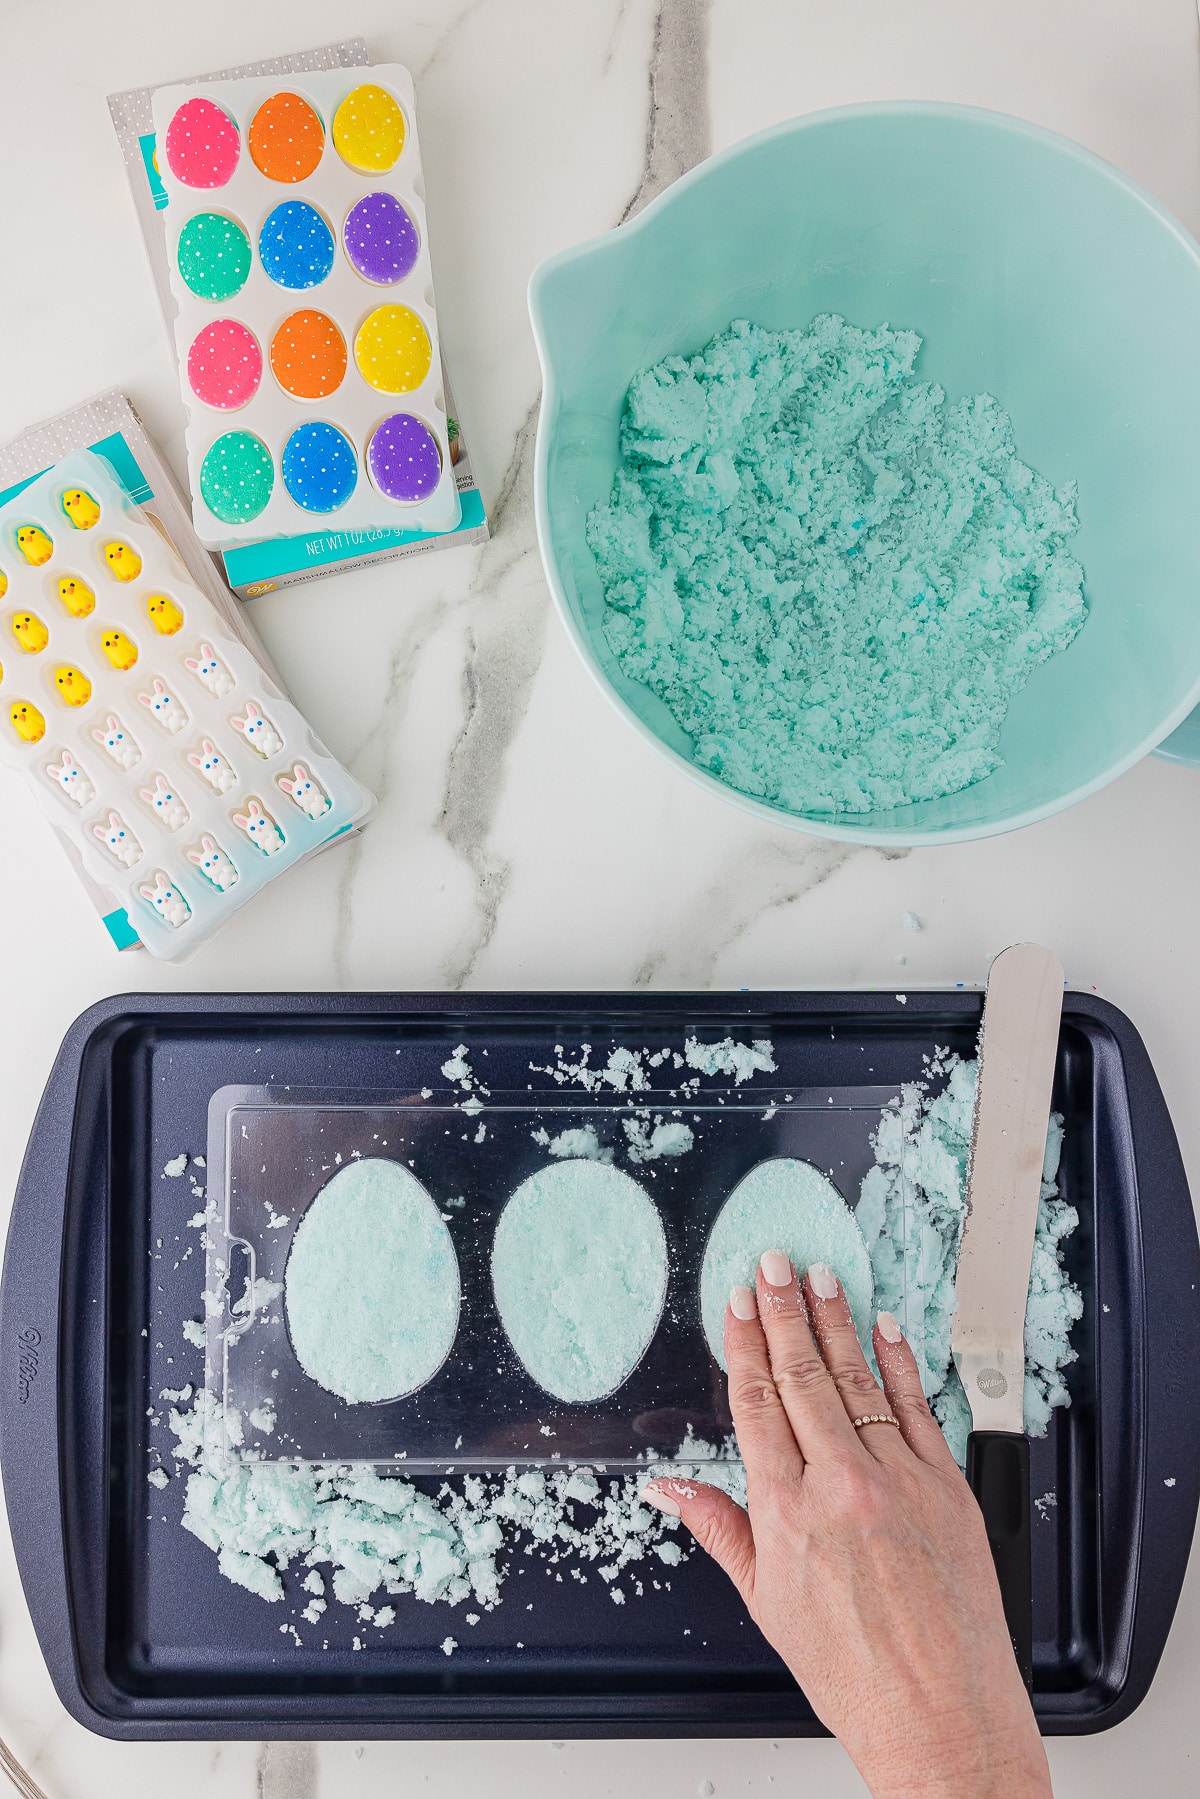
5. Add your sugar to your egg half mold and pack the sugar into every crevice to avoid cracks forming in the finished sugar egg halves. Using an angled spatula, scrape the excess sugar off of the molds.
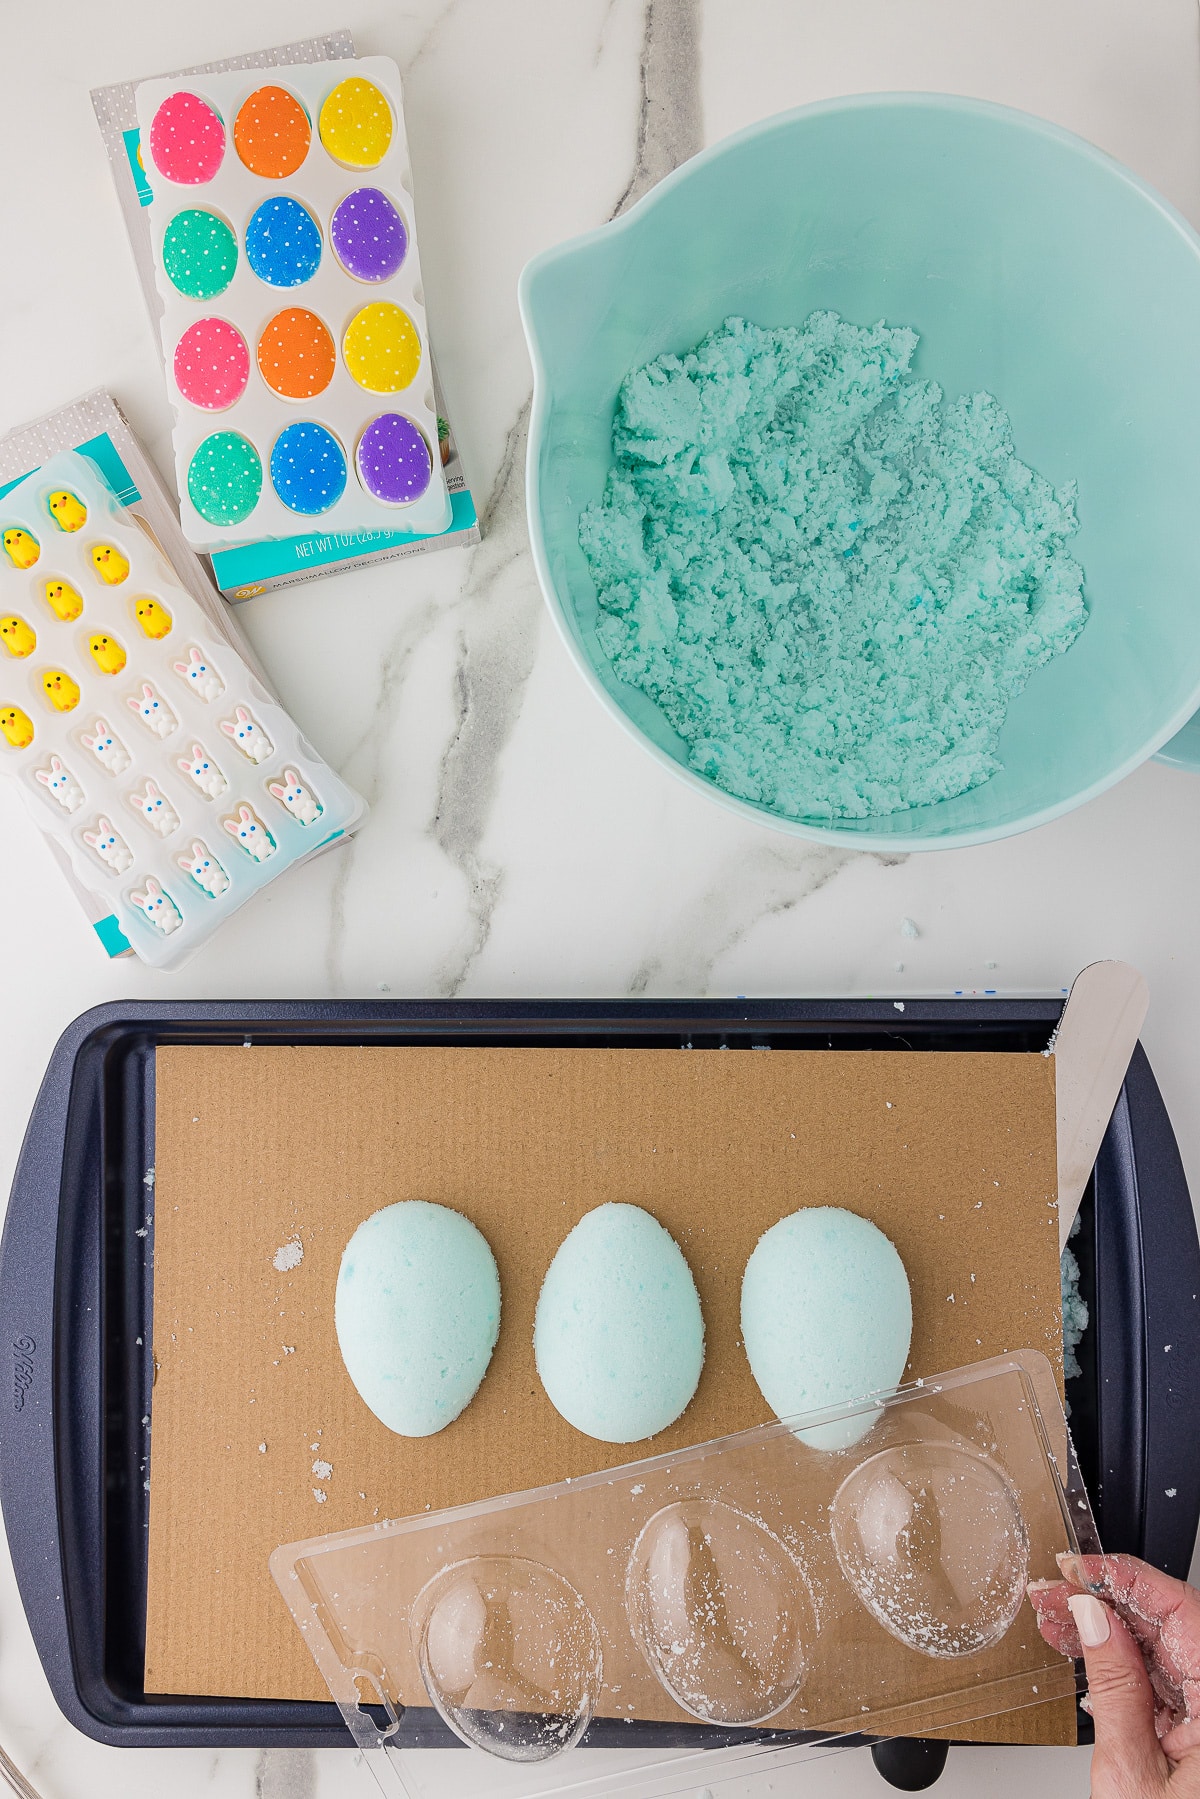

6. Put a piece of cardboard over the mold and flip the mold upside down. Tap the top of the mold to release the sugar (think of turning a pail of sand over to make sand castles).
7. Place the cardboard onto a cookie sheet and carefully line up each pair of eggs. Using the angled spatula, cut off a bottom of a pair of eggs, forming a flat base for the eggs to stand. Repeat for each set of eggs, working in pairs, so that the sets line up when put together.
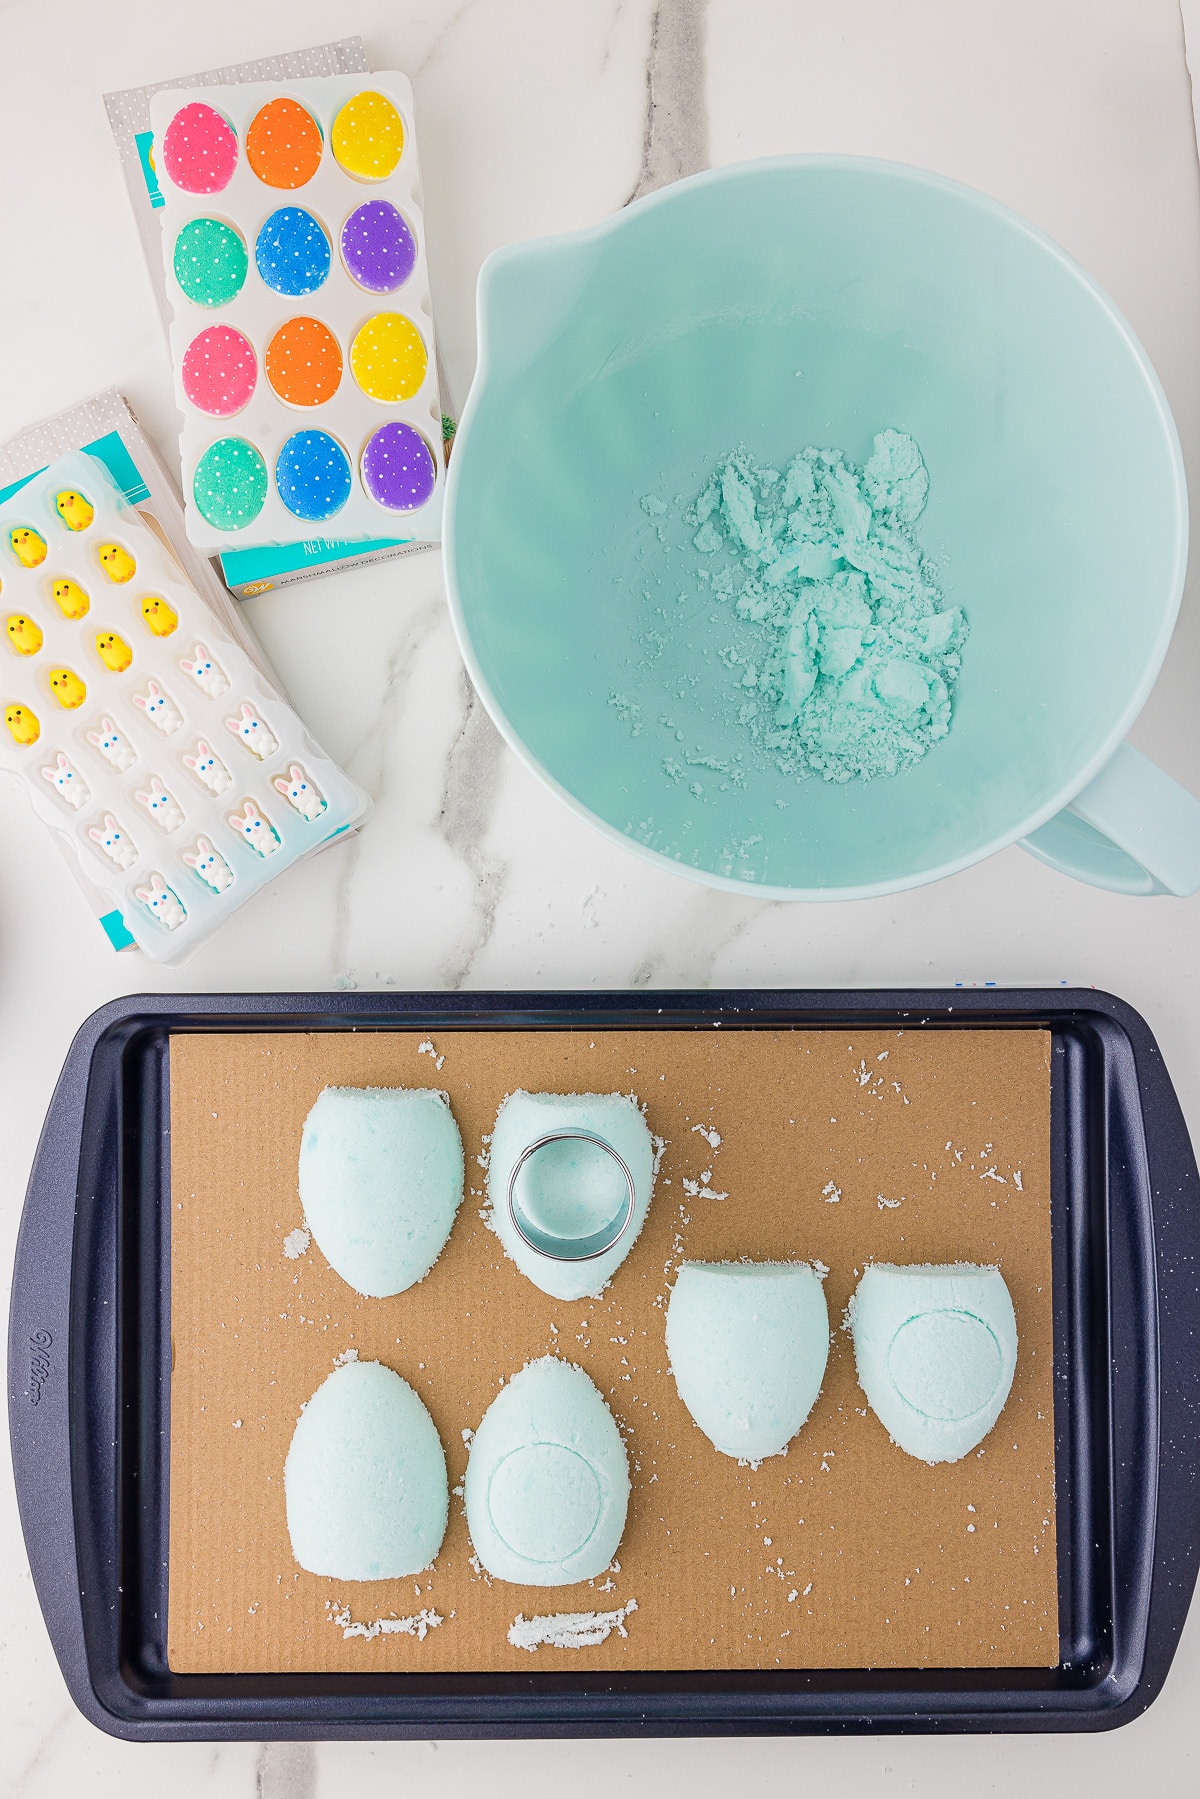
8. Using a circle cookie cutter, or a small glass, make an indention in half of the sugar eggs. This will be the opening to the front of the egg, therefore make sure the indention is obvious.
9. Bake for 10 minutes. Let cool for 10 minutes.
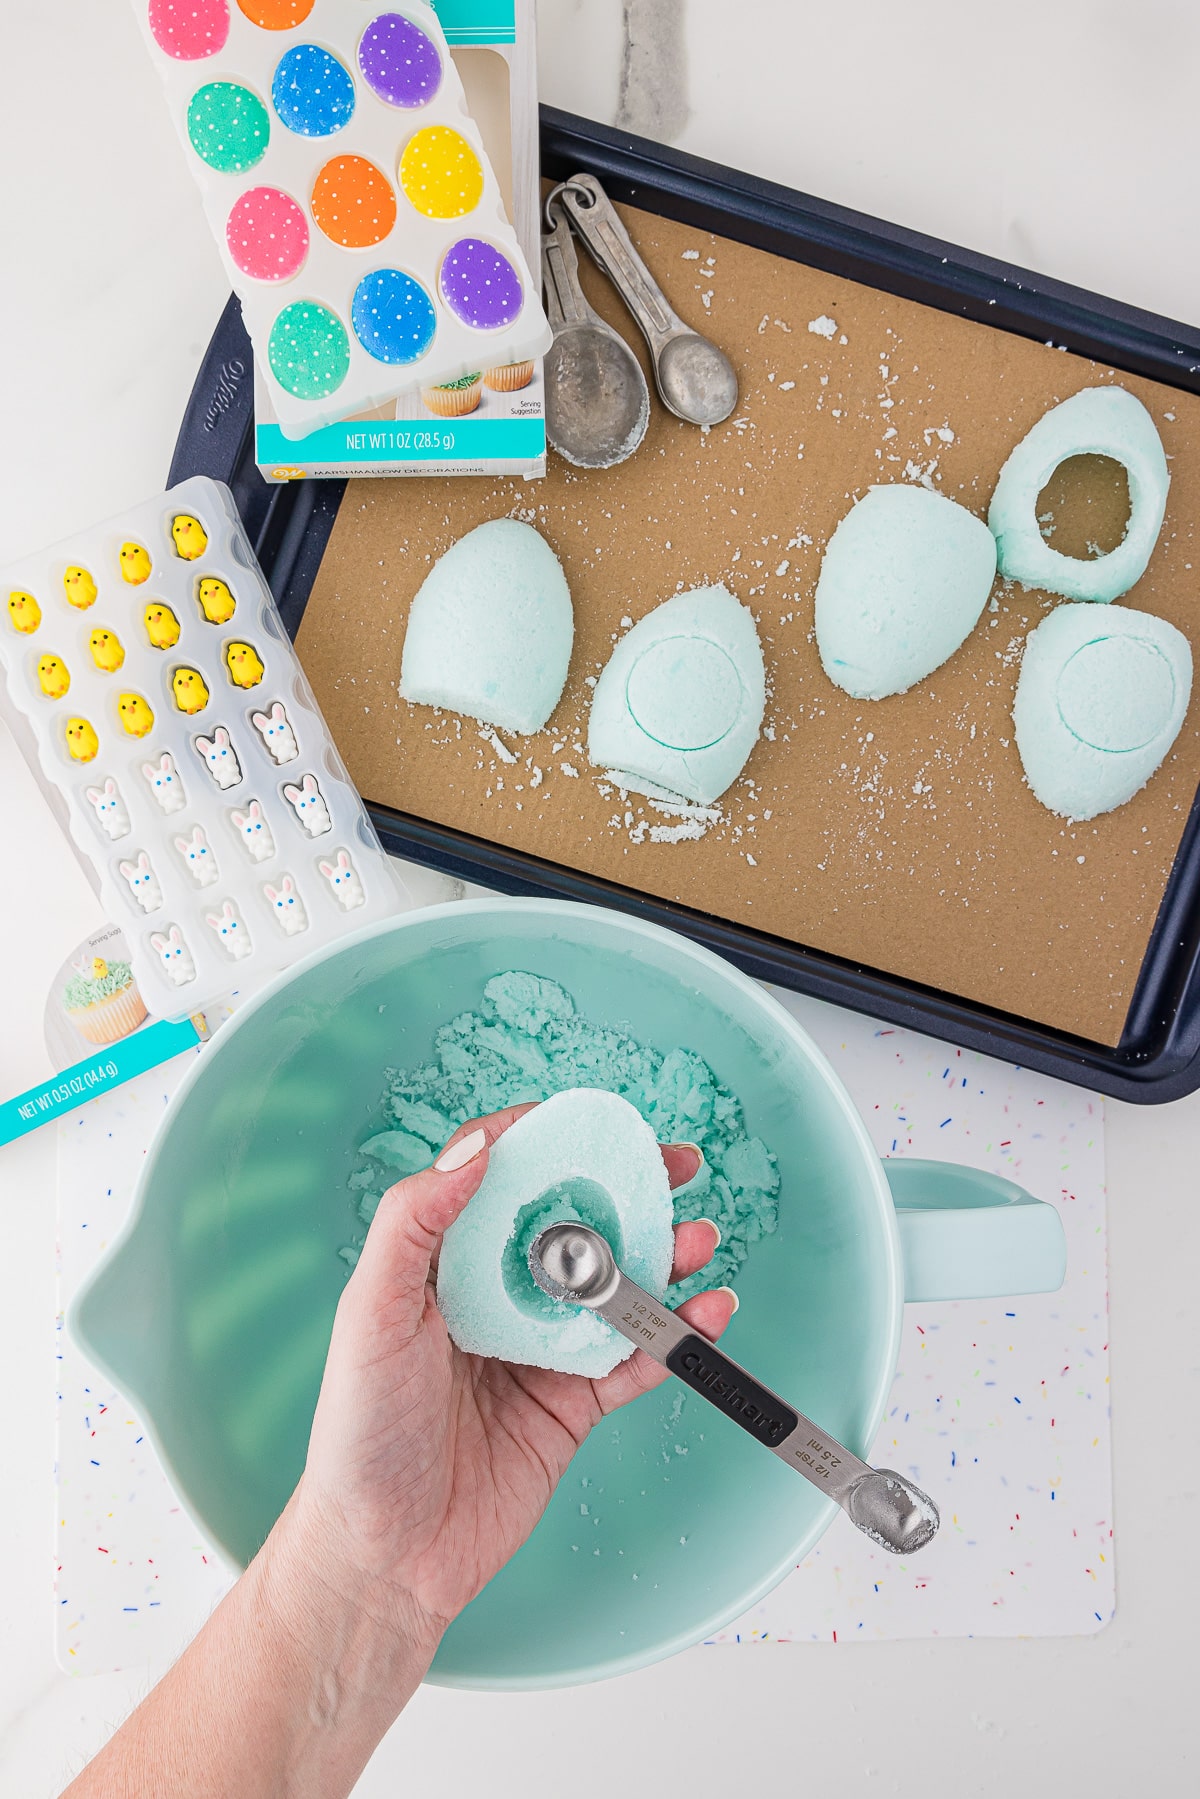
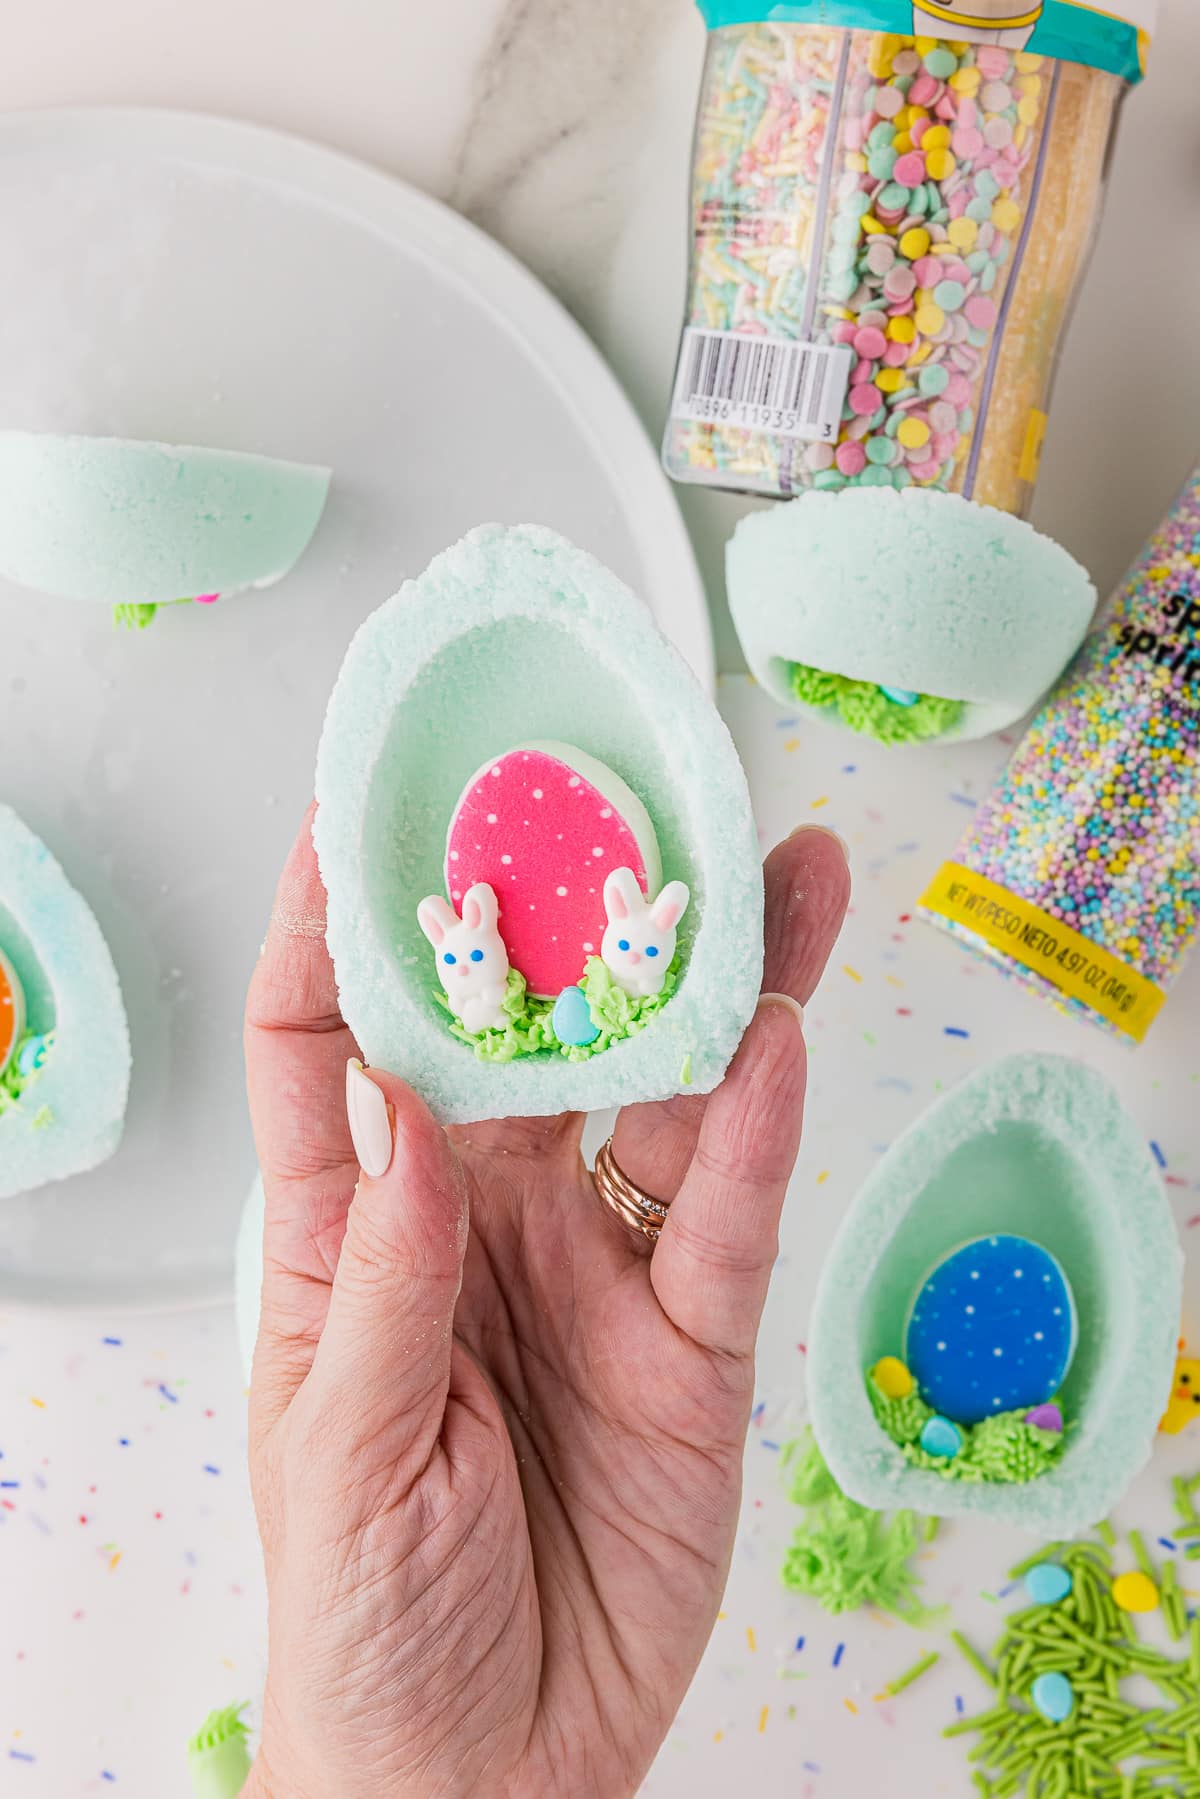
10. Over a bowl, hold the back of the sugar egg and lightly dig out the center of the egg with a spoon, leaving a ¼-½ inch wall. I used the back of a measuring spoon to smooth out the inside. For the front, keep digging out the area where your hole will be until it pops out. Let the eggs air dry for an additional 10 minutes.
Decorating Sugar Eggs
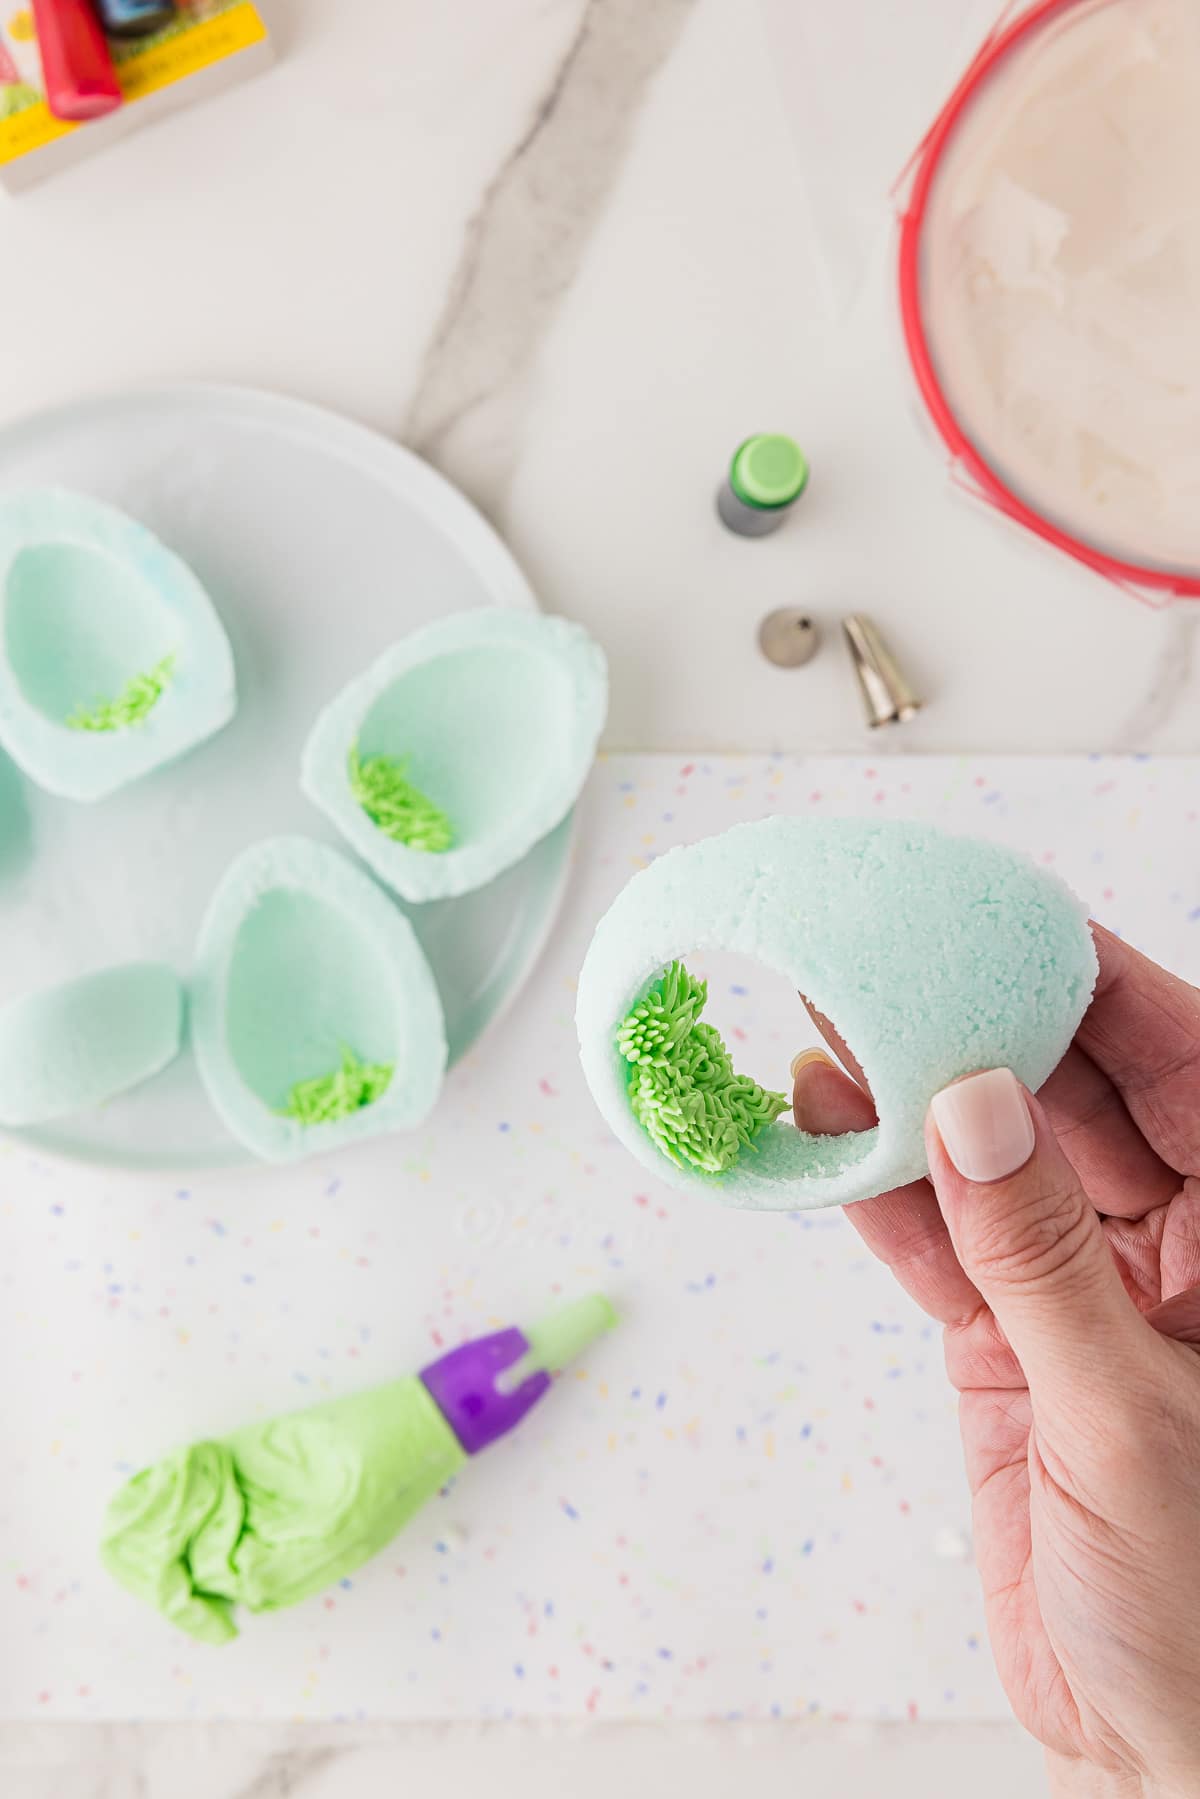
1. In small bowls, color the icing as desired. Fill your piping bags. (I used green for the grass and white for the edges)
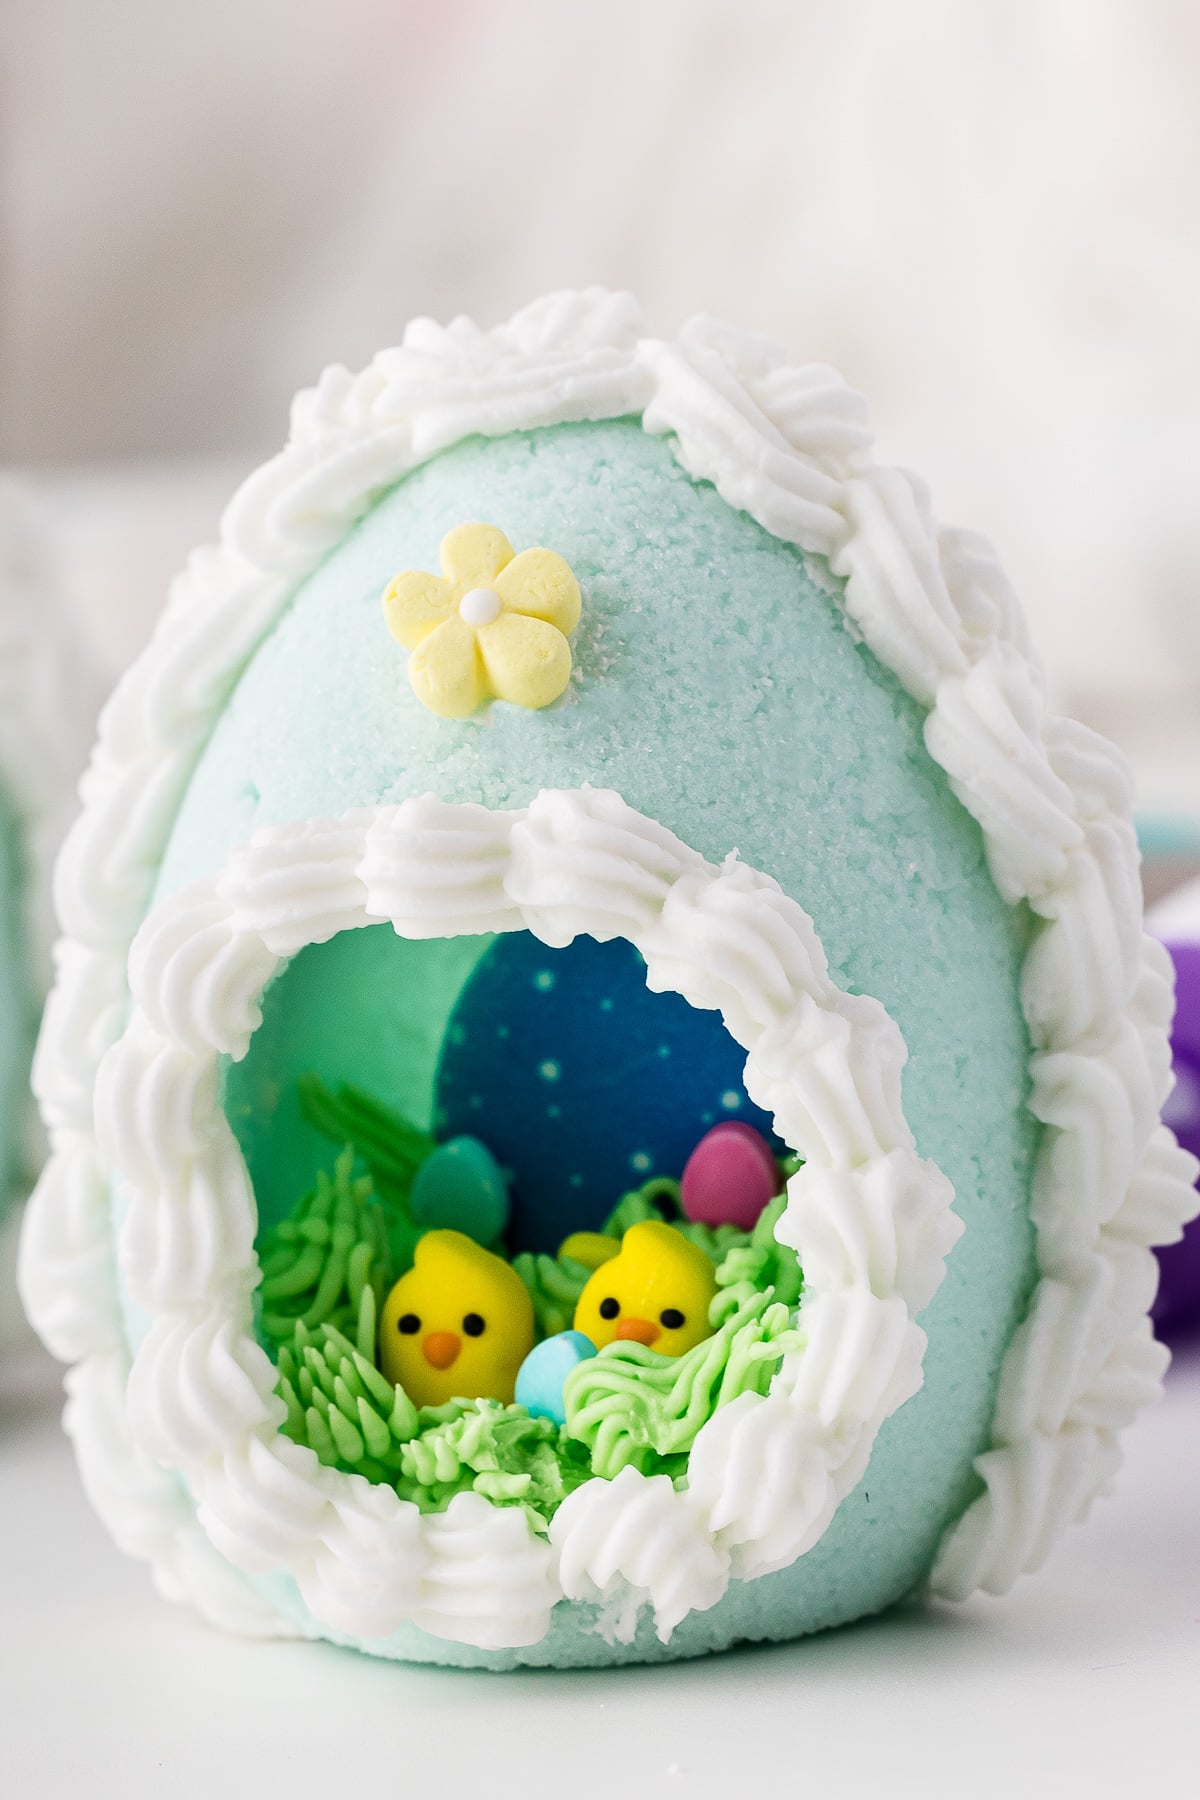
2. Pipe grass on both the front and back halves of your eggs. Create your Easter scene on the interior of the egg and let royal icing harden.
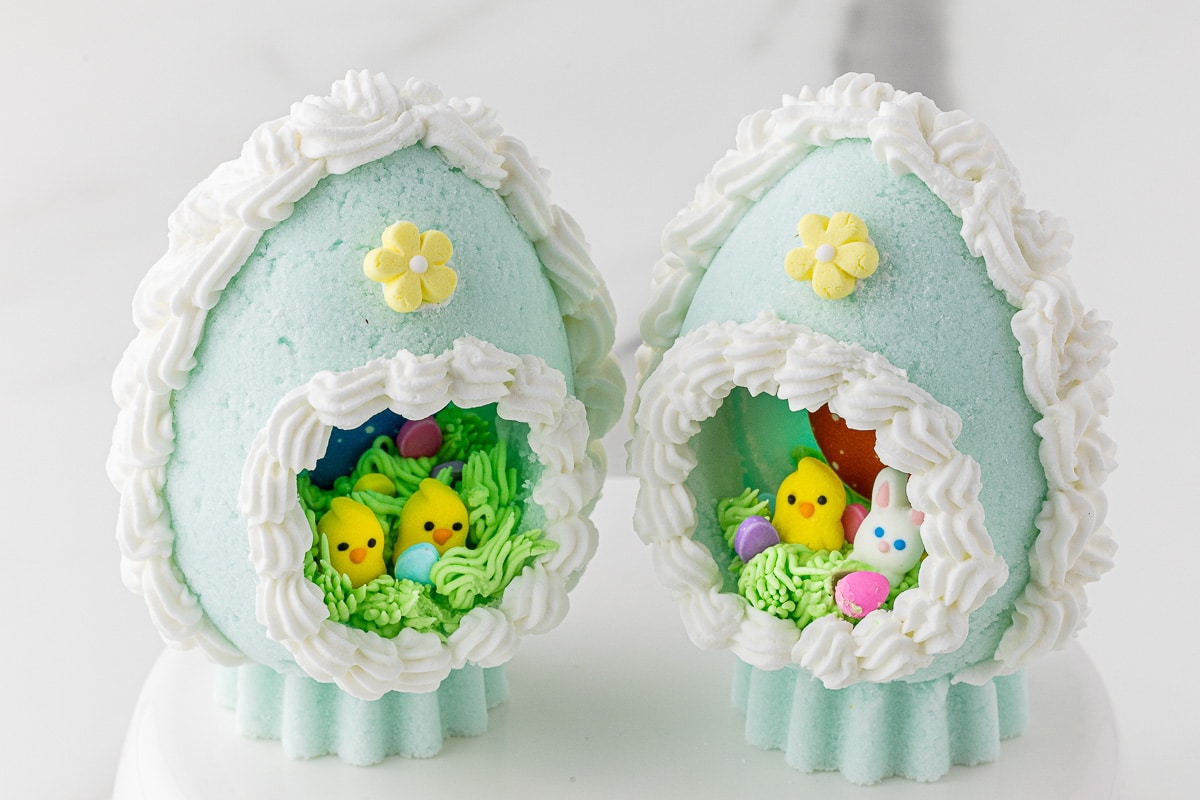
3. Run a “glue line” of icing along the edge and attach the front to the back of the egg. Place upright, making sure that the bottom is flat so that the egg will stand upright. Remove any excess frosting with your finger. However, keep in mind the eggs need to set up. Hence, you’ll want to hold the halves of the egg together for a couple of minutes to make sure it is secure.
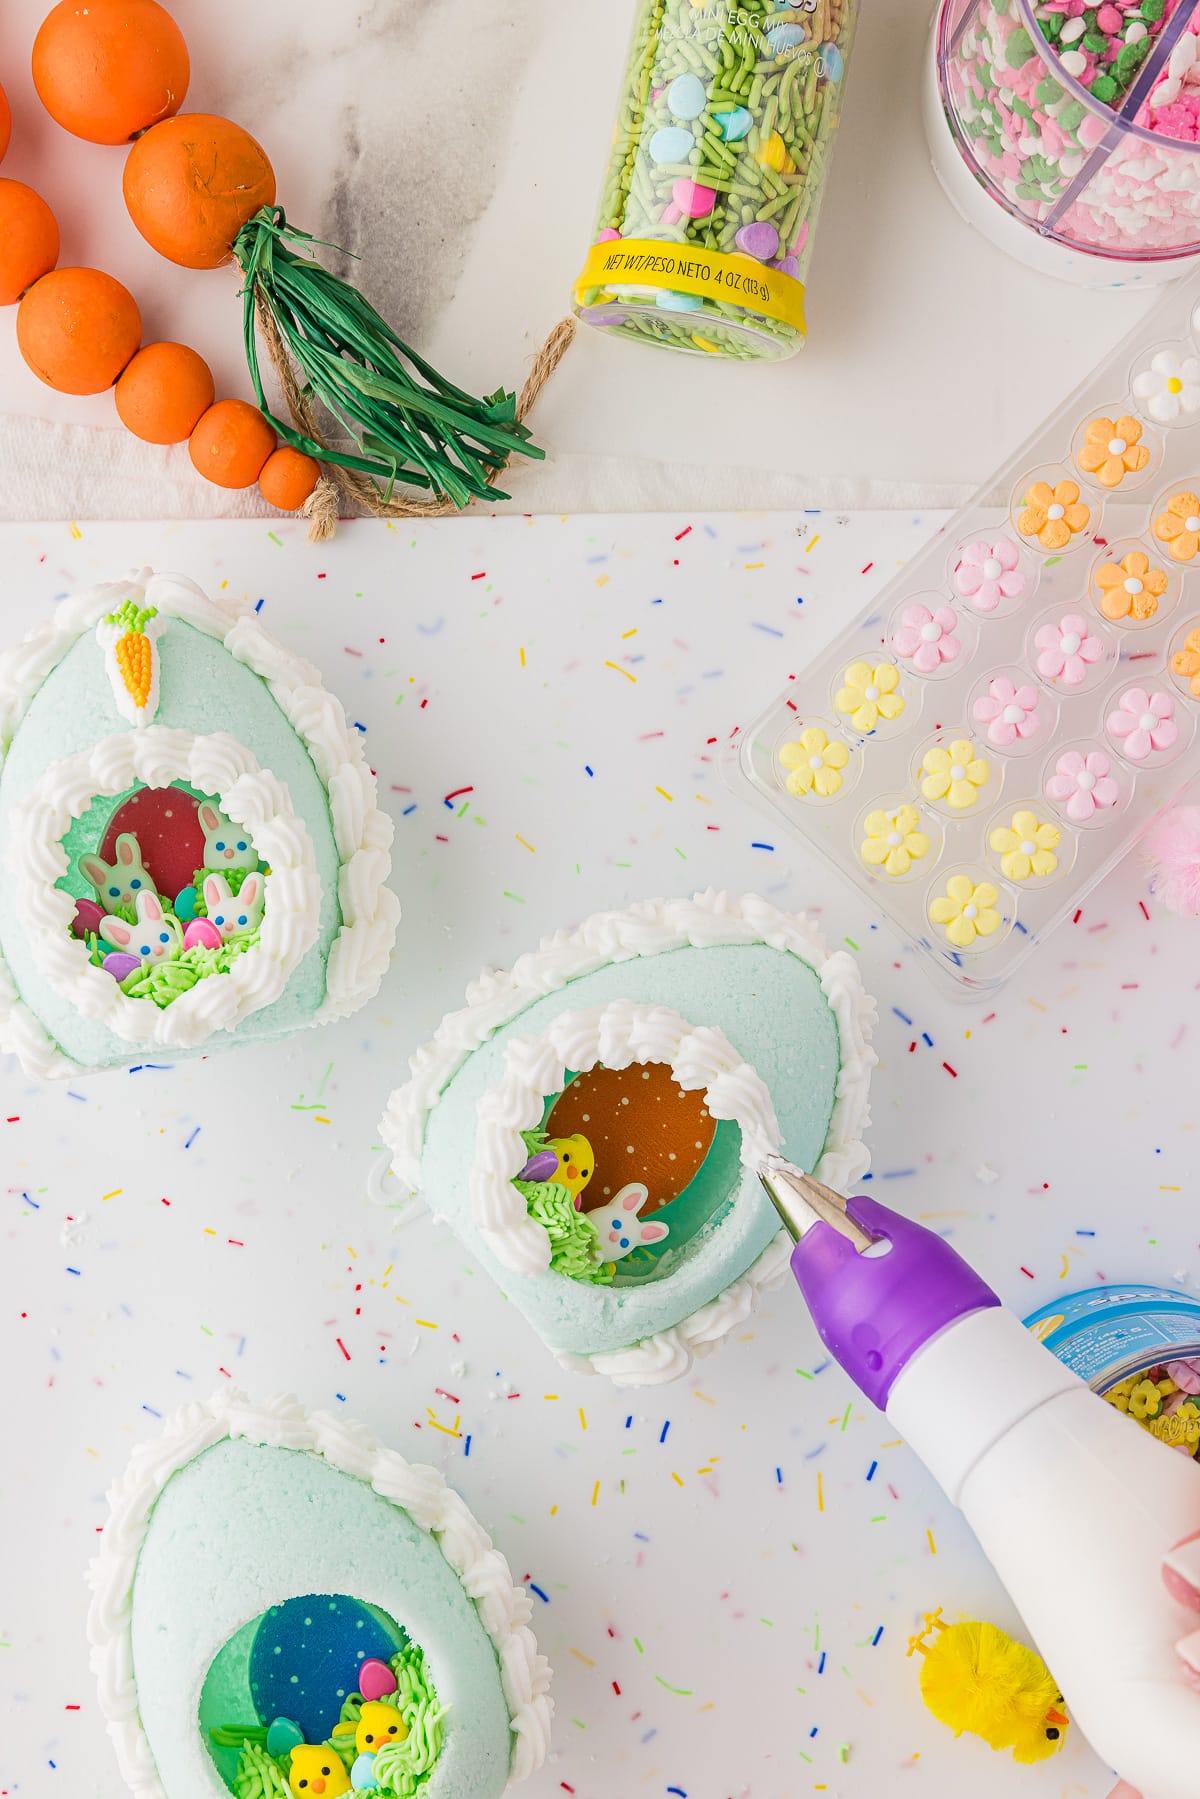
4. With a star tip, pipe a border around the seam. Pipe around the window to finish the edge. Attach a small bead of piping to the icing decorations and decorate the outside.
Tips for making this Hollowed Sugar Egg Recipe
- Reuse the sugar removed from the inside of the eggs to make more eggs. If the sugar has become dry, add more water a few drops at a time.
- Decorate the inside of the eggs from the back forward.
- Press the sugar firmly into the molds. Little hands are perfect for this and the kids will love helping you with these!
- Superfine sugar will take the eggs to the next level, however it might be harder to work with.
Edible or Just for Decoration?
If you are creating your eggs for decorative purposes only, you can use a hot glue gun to piece their sugar egg shells and sugar decorations together. Of course, this is only recommended if you are creating your sugar eggs for decorative purposes. This might be especially helpful if you are making giant sugar eggs as hot glue will definitely be an easier way to create little scenes and hold things in place.
Use as a Cake Decoration
These homemade sugar eggs would also be darling on top of cupcakes or Easter desserts. Imagine an Easter cake topped with a layer of green-tinted coconut and several of these sugar eggs on top sprinkled with Easter candies like jelly beans. How cute would that be?
While these sugar eggs are made with edible ingredients, they aren’t much of an Easter dessert – although kids would probably love to eat them! The end result usually ends up being a final product that is an Easter decoration that can last for years to come.
Ideas for Decorating the Inside of Sugar Eggs
You can use Jelly Belly beans (or other mini jelly beans) to create tiny eggs.
Shredded coconut mixed with a little green food coloring makes good Easter grass.
What To Put Inside Sugar Easter Eggs
You can purchase tiny plastic animals or small figurines, silk flowers or small candies or sugar flowers for decorating the inside of the egg as well. Check local hobby stores for fun miniature items that would be a perfect fit.
Just imagine the excitement of a little one peering through the viewing hole of these Easter sugar eggs.
What a fun way to make Easter Sunday even more special and create a memorable memory and tradition. If you love fun holiday themed recipes, make sure to check out our Easy Patriotic Chocolate Covered Strawberries!
The Origin of Panoramic Eggs
While specifics are unknown, these fancy sugar panoramic eggs are usually attributed to Russia, Italy or Spain and even Eastern Europe.
Panoramic Eggs date back to Victorian times. Can’t you imagine the detail and find features of the vintage versions of these hollowed out sugar eggs.
More Favorite Recipes
Looking for more of our favorite recipes?
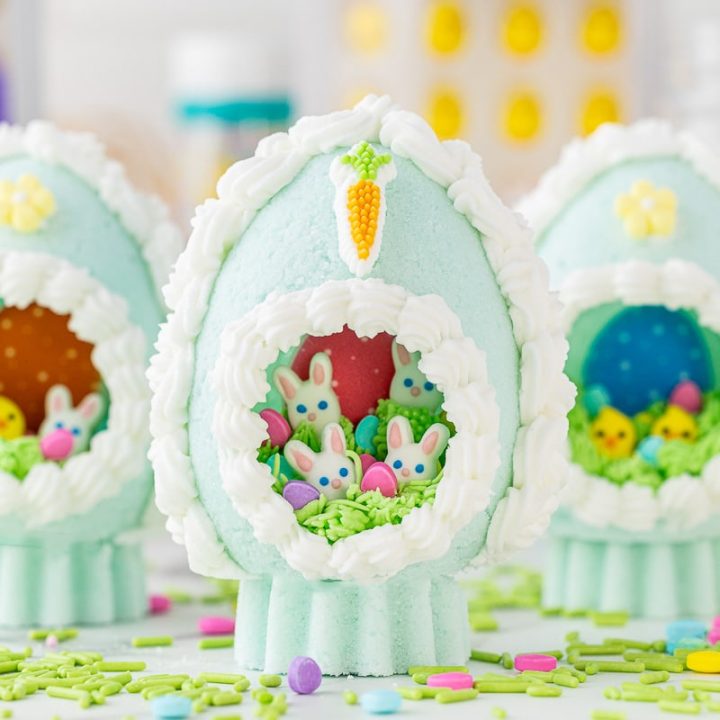
Panoramic Sugar Easter Eggs
Did anyone else grow up thinking that these Panoramic Sugar Easter Eggs were the coolest thing ever? Made with hollowed out sugar, this is a fun Easter activity you can do right at home!
Ingredients
- 2 ½ cups white granulated sugar
- 3 tablespoons Wilton meringue powder
- 2-4 tablespoons water (the moisture in the air will determine how much you need)
- Food coloring, optional - for colored eggs
- Royal Icing
- Sprinkles and Icing Decorations (I used Wilton Carrots, Bunnies & Chicks, Marshmallow eggs, and Flowers)
- You will also need a panoramic egg mold - we used the plastic molds from Wilton.
Instructions
Preheat oven to 200 degrees F
In a medium bowl combine sugar and meringue powder. Whisk sugar mixture together until it is well incorporated.
If you would like colored eggs, in a separate small bowl, add food coloring to the water, and stir until it is well combined. Adding the food coloring to the water will help to distribute the color more.
Add the water to the sugar/meringue mixture and beat on low with a hand mixer or whisk. If color blobs form, smooth them out with a spatula and continue mixing until the sugar is the consistency of wet sand.
Add your sugar to your egg half mold and pack the sugar into every crevice to avoid cracks forming in the finished sugar egg halves. Using an angled spatula, scrape the excess sugar off of the molds.
Put a piece of cardboard over the mold and flip the mold upside down. Tap the top of the mold to release the sugar (think of turning a pail of sand over to make sand castles).
Place the cardboard onto a cookie sheet and carefully line up each pair of eggs. Using the angled spatula, cut off a bottom of a pair of eggs, forming a flat base for the eggs to stand. Repeat for each set of eggs, working in pairs, so that the sets line up when put together.
Using a circle cookie cutter, or a small glass, make an indention in half of the sugar eggs. This will be the opening to the front of the egg.
Bake for 10 minutes. Let cool for 10 minutes.
Over a bowl, hold the back of the sugar egg and lightly dig out the center of the egg with a spoon, leaving a ¼-½ inch wall. I used the back of a measuring spoon to smooth out the inside. For the front, keep digging out the area where your hole will be until it pops out. Let the eggs air dry for an additional 10 minutes.
In small bowls, color the icing as desired. Fill your piping bags. (I used green for the grass and white for the edges)
Pipe grass on both the front and back halves of your eggs. Create your Easter scene on the interior of the egg and let royal icing harden.
Run a “glue line” of icing along the edge and attach the front to the back of the egg. Place upright, making sure that the bottom is flat so that the egg will stand upright. Remove any excess frosting with your finger. Hold the halves of the egg together for a couple of minutes to make sure it is secure.
With a star tip, pipe a border around the seam. Pipe around the window to finish the edge. Attach a small bead of piping to the icing decorations and decorate the outside.
Notes
Reuse the sugar removed from the inside of the eggs to make more eggs. If the sugar has become dry, add more water a few drops at a time.
Decorate the inside of the eggs from the back forward.
Nutrition Information:
Yield: 3 Serving Size: 1Amount Per Serving: Calories: 848Total Fat: 8gSaturated Fat: 3gTrans Fat: 0gUnsaturated Fat: 5gCholesterol: 124mgSodium: 108mgCarbohydrates: 195gFiber: 0gSugar: 192gProtein: 5g
*This calculation is just an estimate ~ results may vary!


what do you use as the base? it’s the same shade and I can’t figure out a base!
Hi, Michelle! I am so excited to hear that you are trying this method of making Sugar Eggs!
I used THIS silicone mold from Wilton for the base.
Are all ingredients edible? Thanks!
Yes, they are, Kay!
Hi,
I was so excited to find your recipe and I followed it exactly, but can’t get the sugar to release from the plastic mold. I’ve tried tapping, hairdryer on low, and the freezer for 15 minutes. Do you have any other ideas or should I just start over?
Maggie, my apologies for not seeing this sooner. Did you get it to release? Mine came out with no problem, but yours may have needed a little less water or more sugar. This is something that would occur if you live in a more humid climate than our dry Idaho climate. Would love to hear how things turned out for you!!!