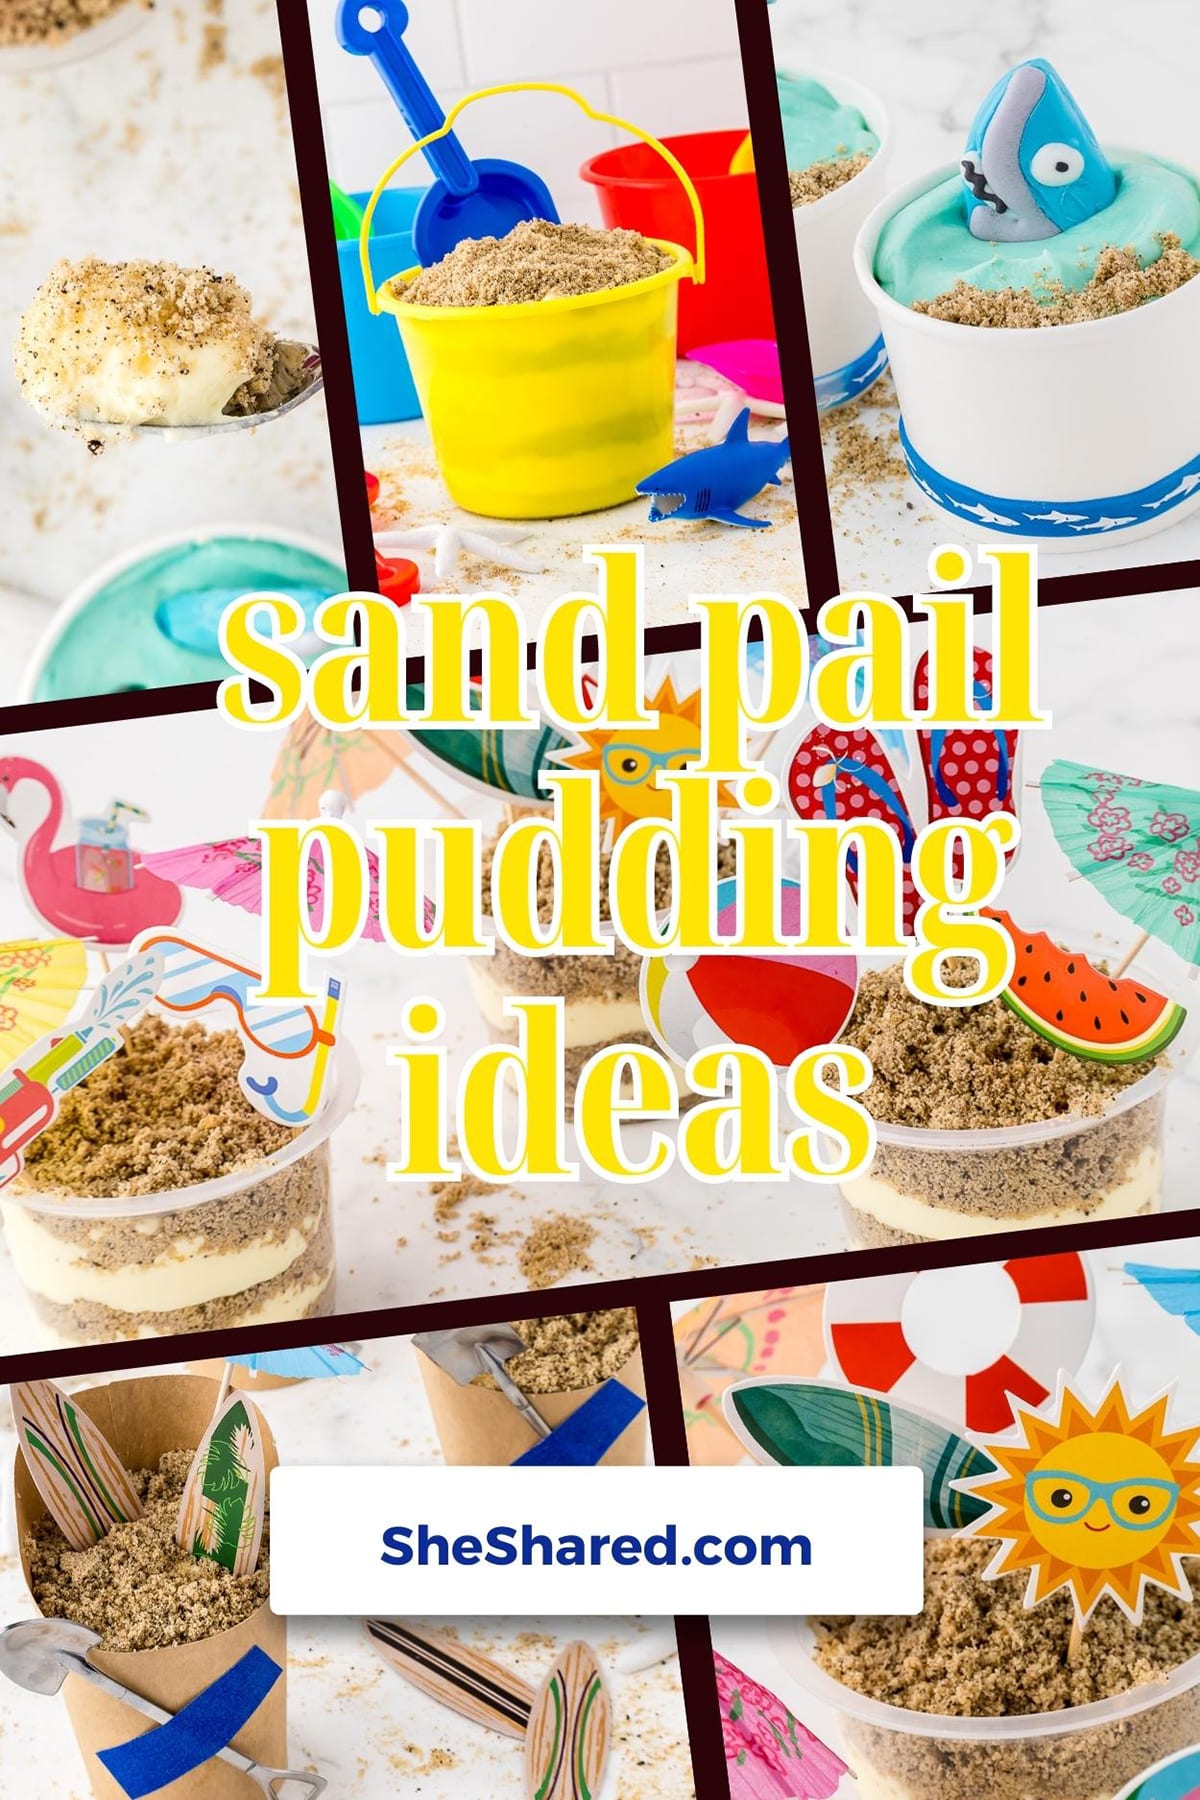
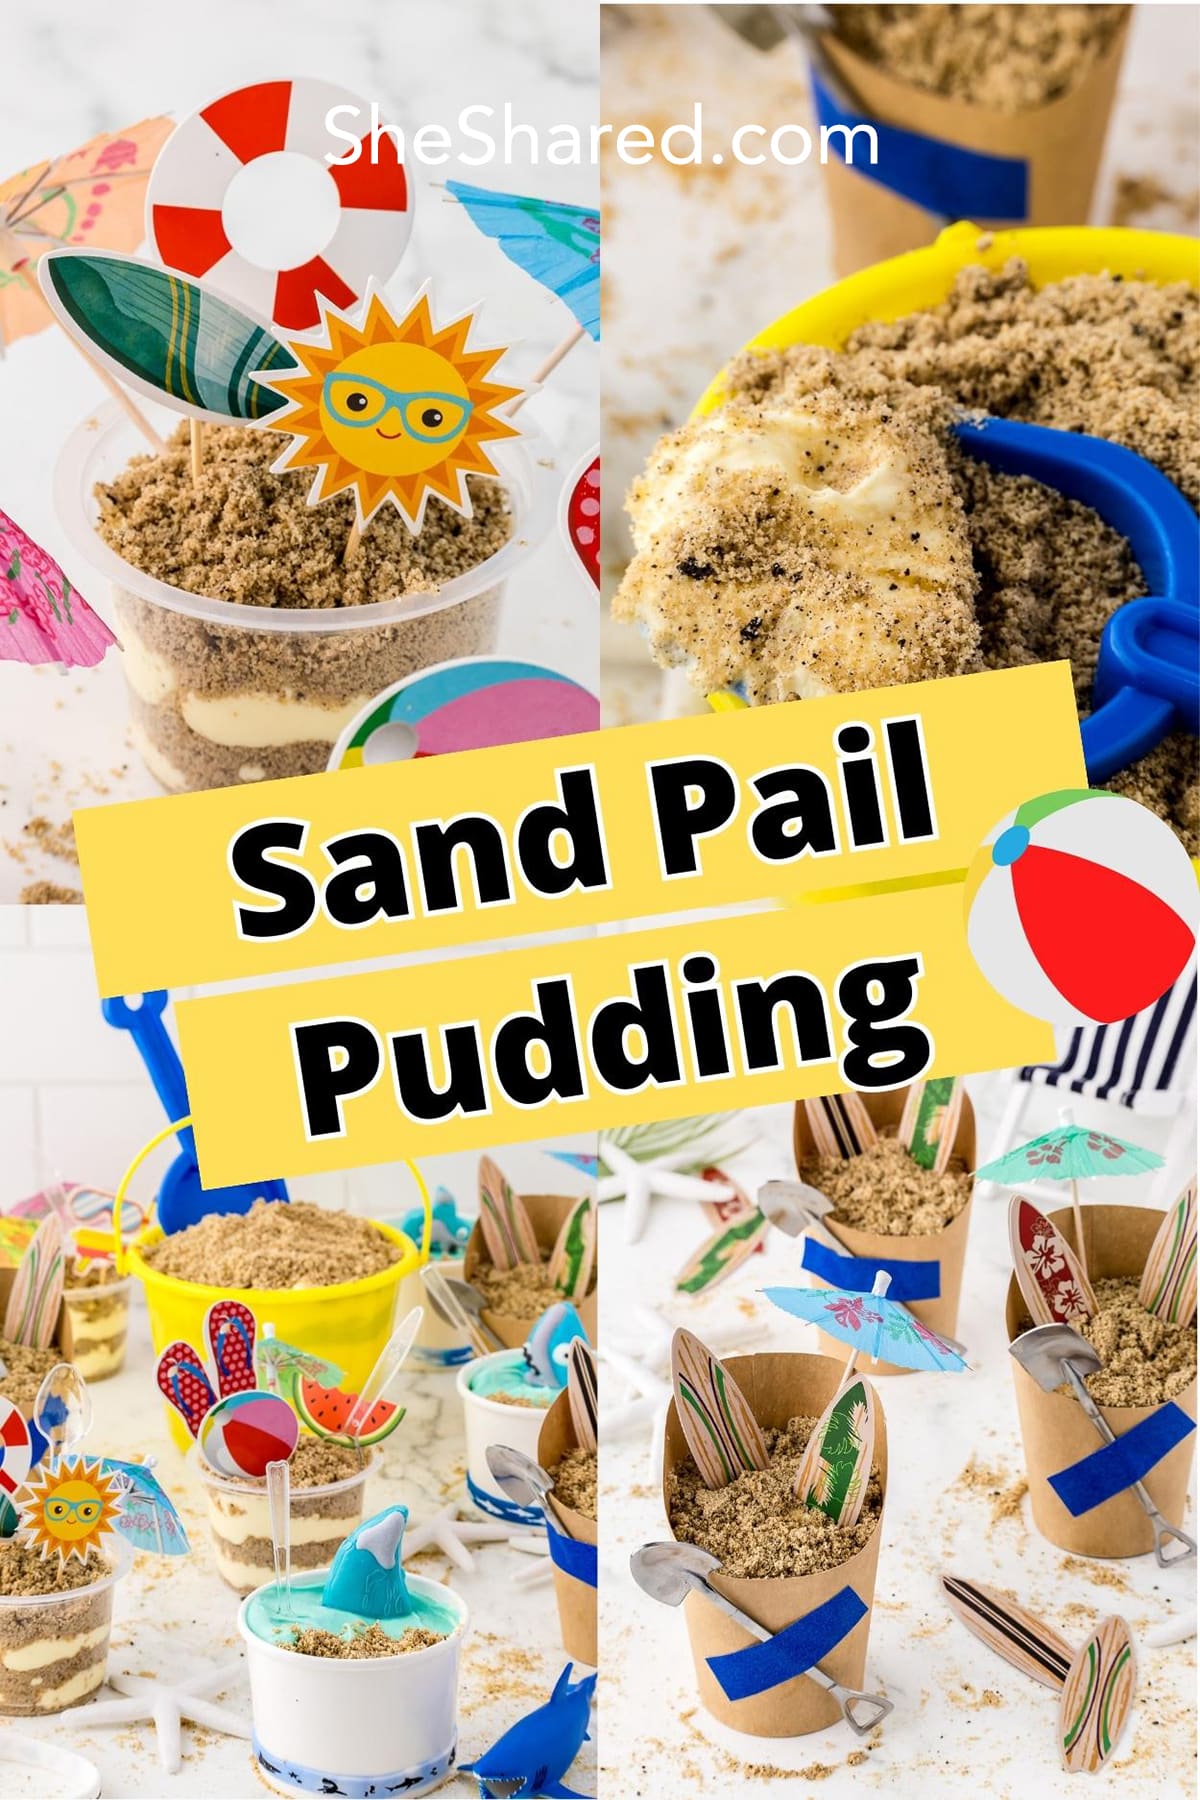
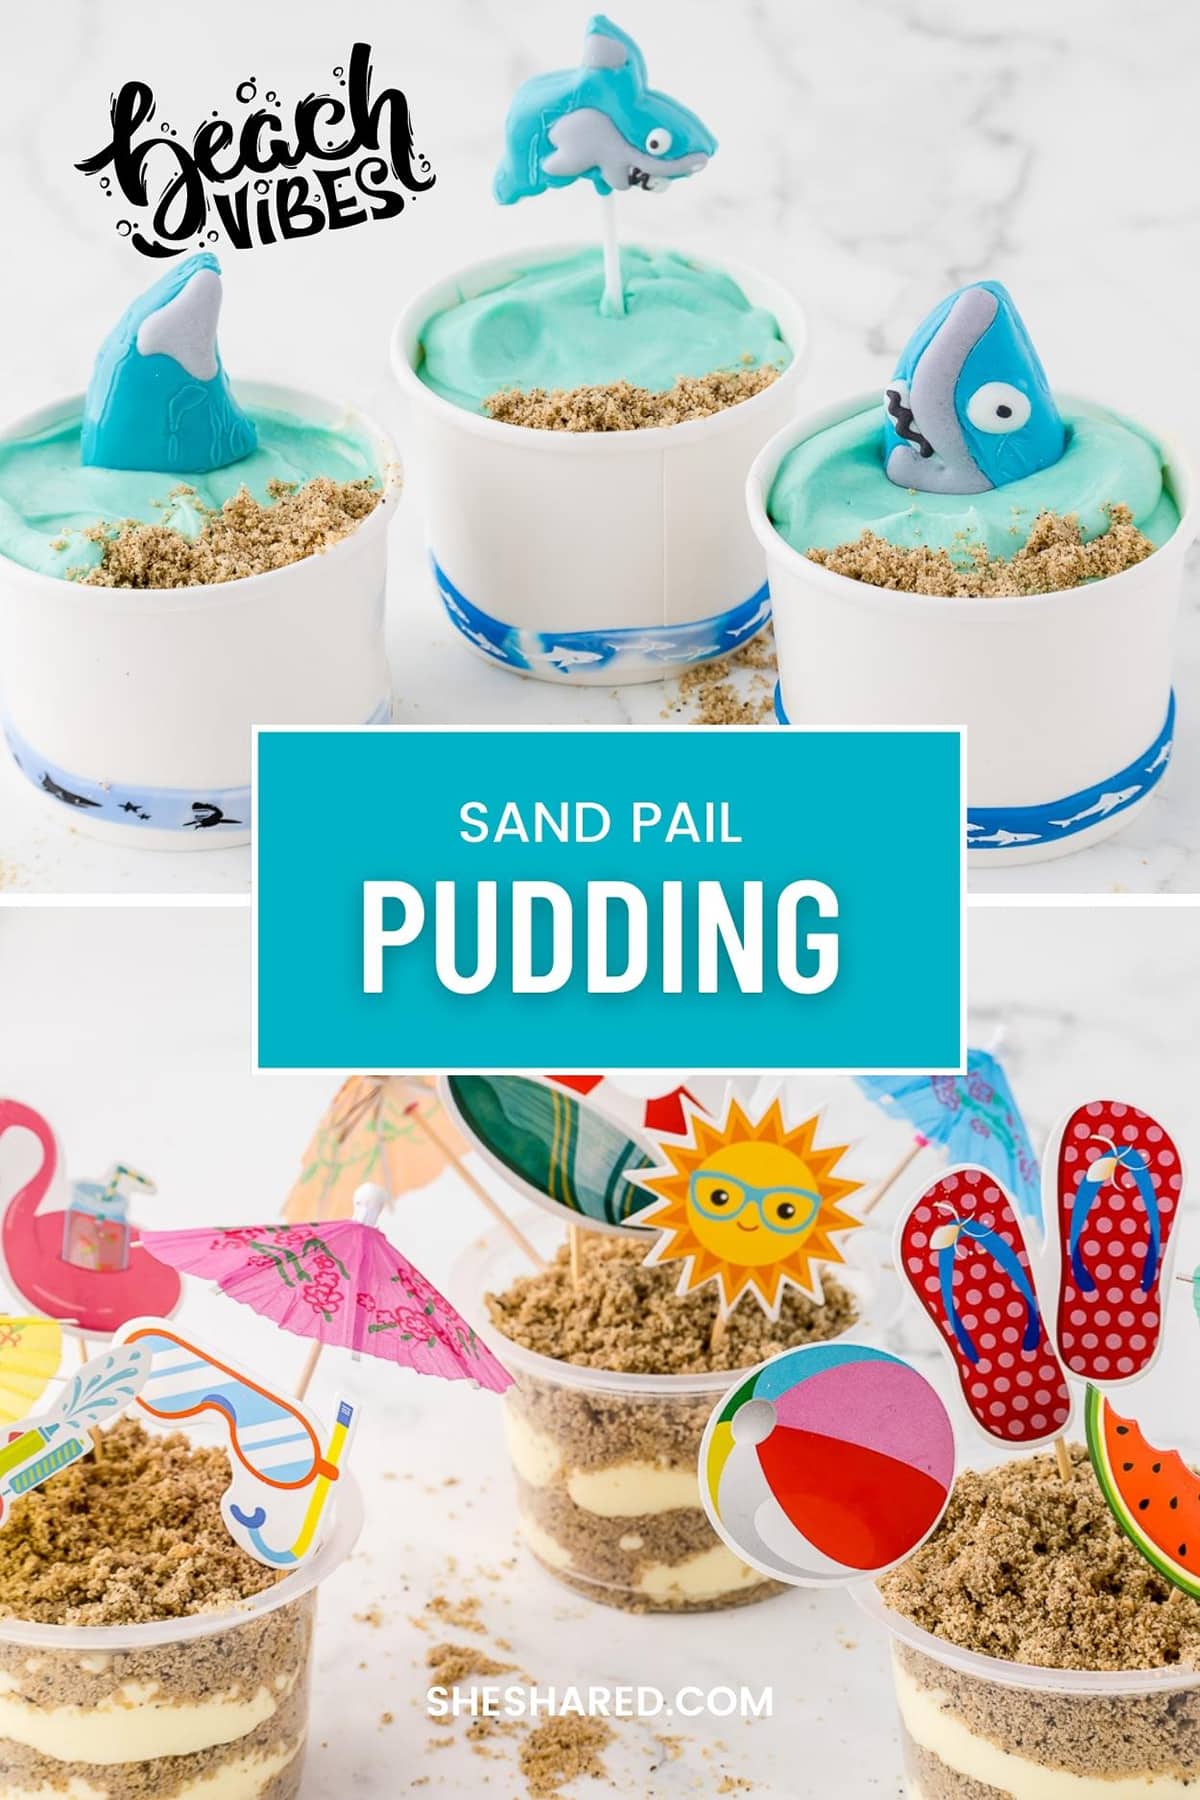
Sand Pudding Cups Recipe
This post may contain affiliate links. See our disclosure policy for more details.
Dig into this fun sand pudding dessert! Layers of pudding and crushed cookies served up with beachy vibes make this the perfect, easy summer treat!
Our sand pudding recipe tastes rich, yet refreshing, with cold creamy pudding and sweet crunchy “sand” you can make with almost any type of cookies.
Surf back here anytime! Pin this adorable pic to your favorites board on Pinterest and dig up the recipe when you want a super fun, easy, no bake dessert!
We love making this fun summer treat for a pool party, family reunion, summer picnic, or themed birthday party. Last summer we made these for a beach party in our neighborhood, and they were a big hit with kids and adults alike!
Supplies for summer sand pudding cups:
- Small bowl
- Large mixing bowl
- Hand mixer or stand mixer with whisk attachment
- Whisk
- Spatula
- Spoon
- Piping bag
- Individual cups and decorations for serving – See Variations below for lots of fun styling options!
Sand Pudding Cups Recipe
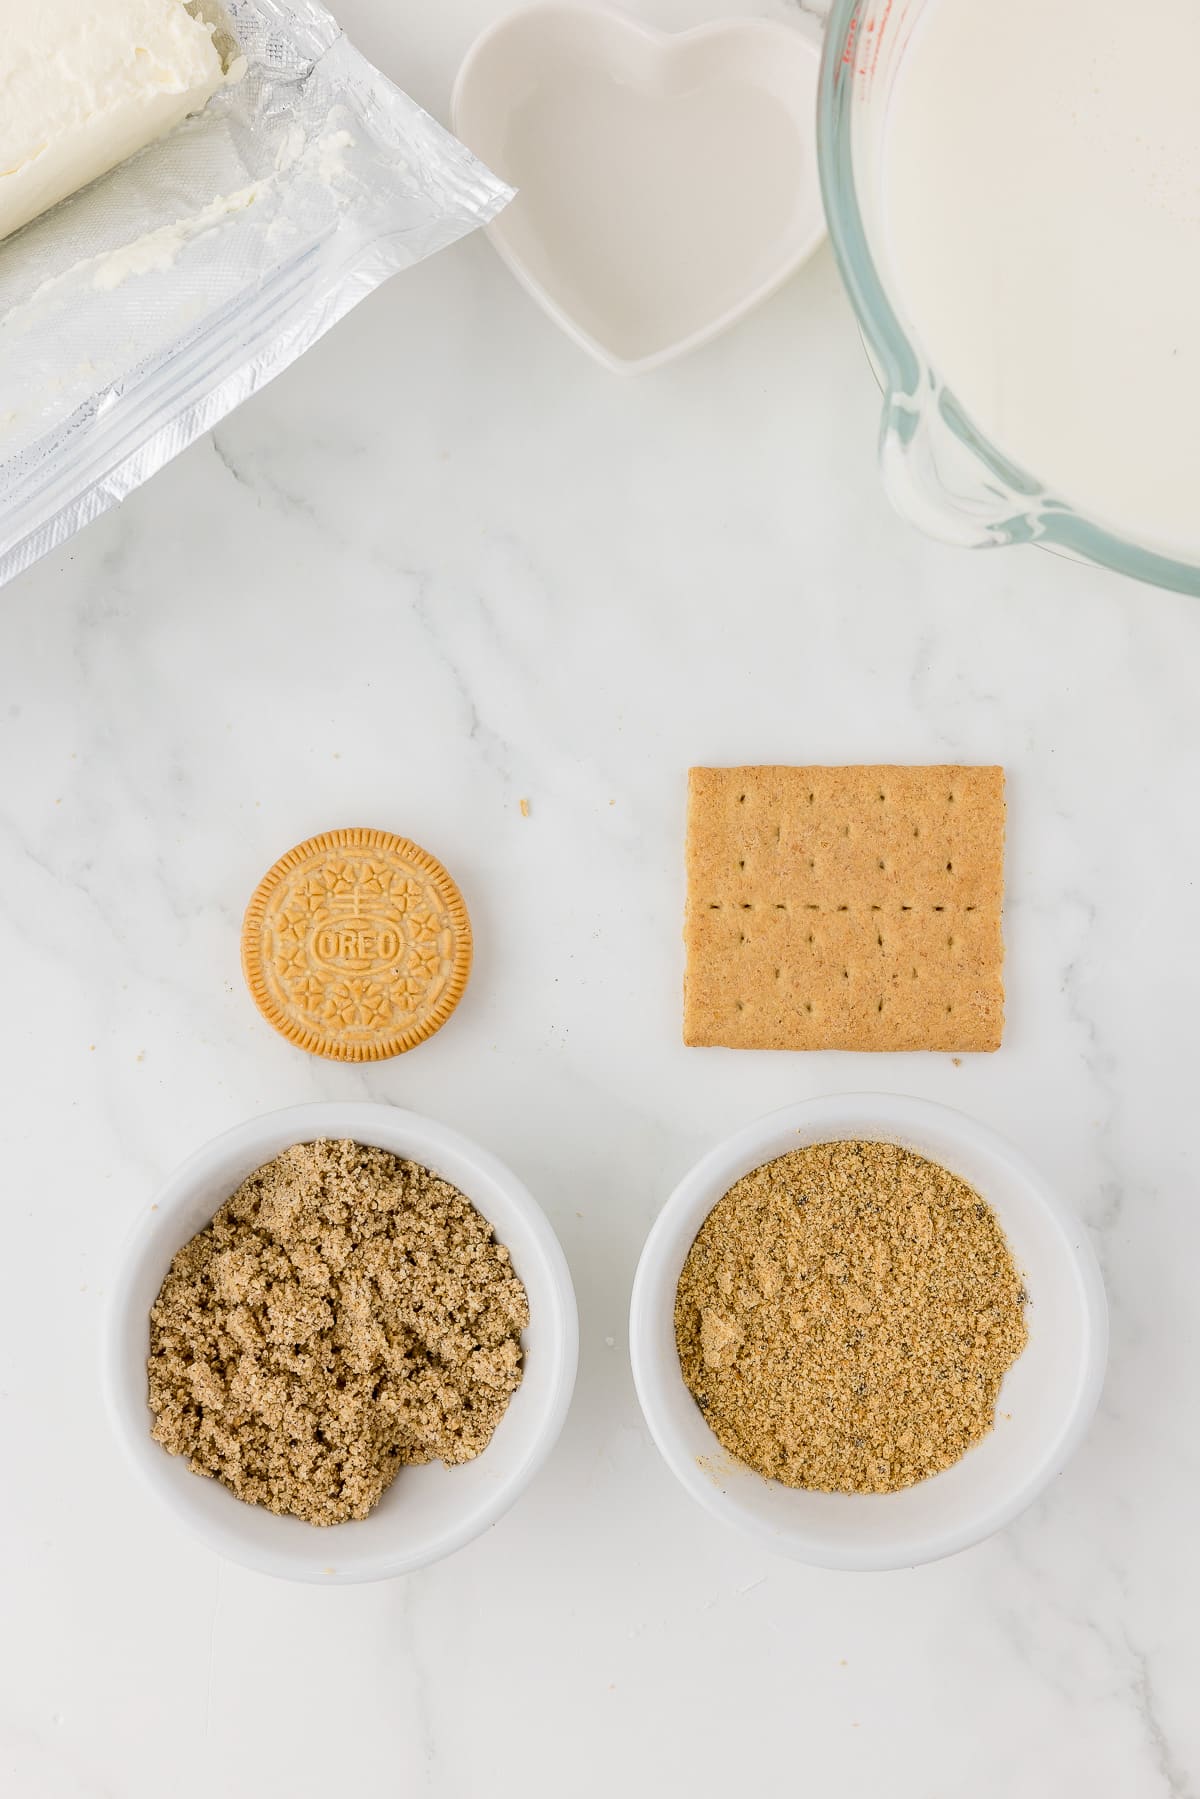
Ingredients for Sand Bucket Pudding:
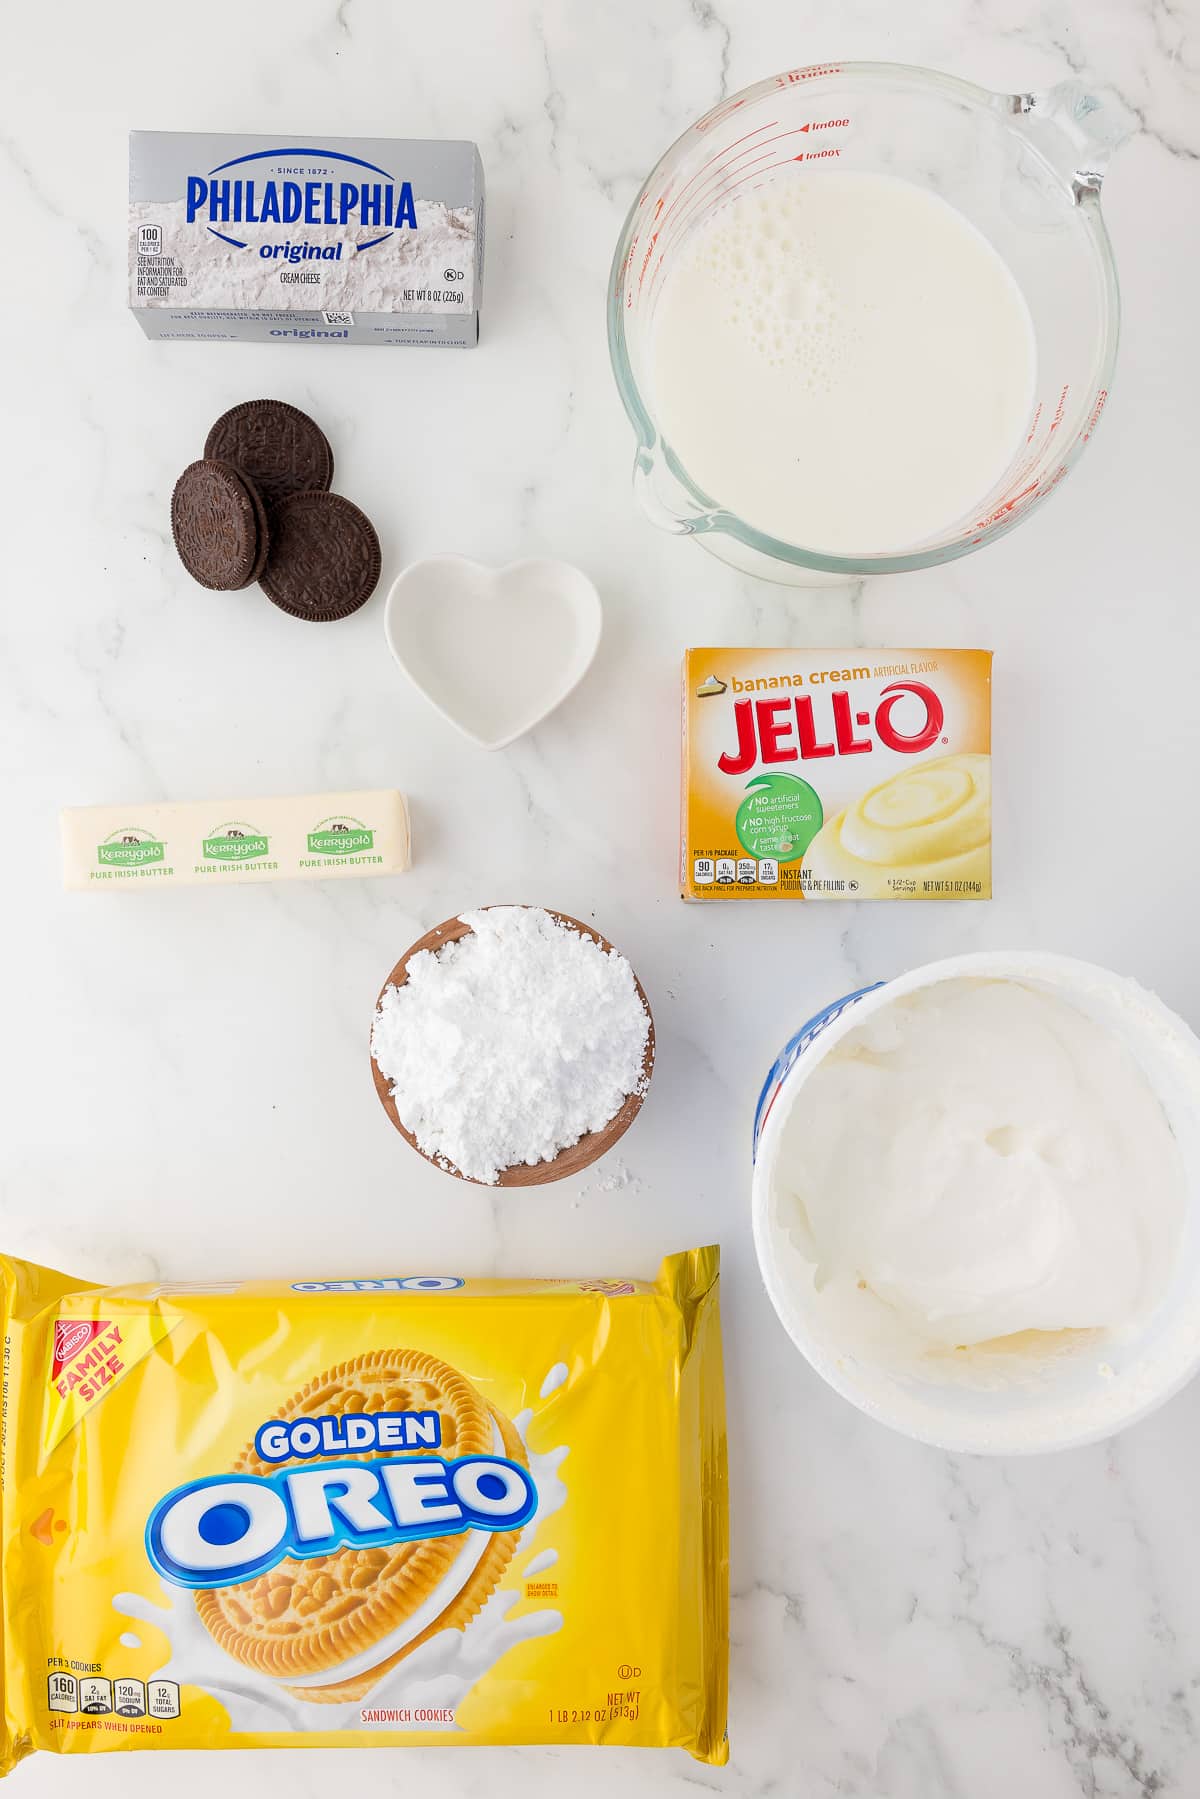
- 1 package golden Oreos
- 3 Oreo cookies
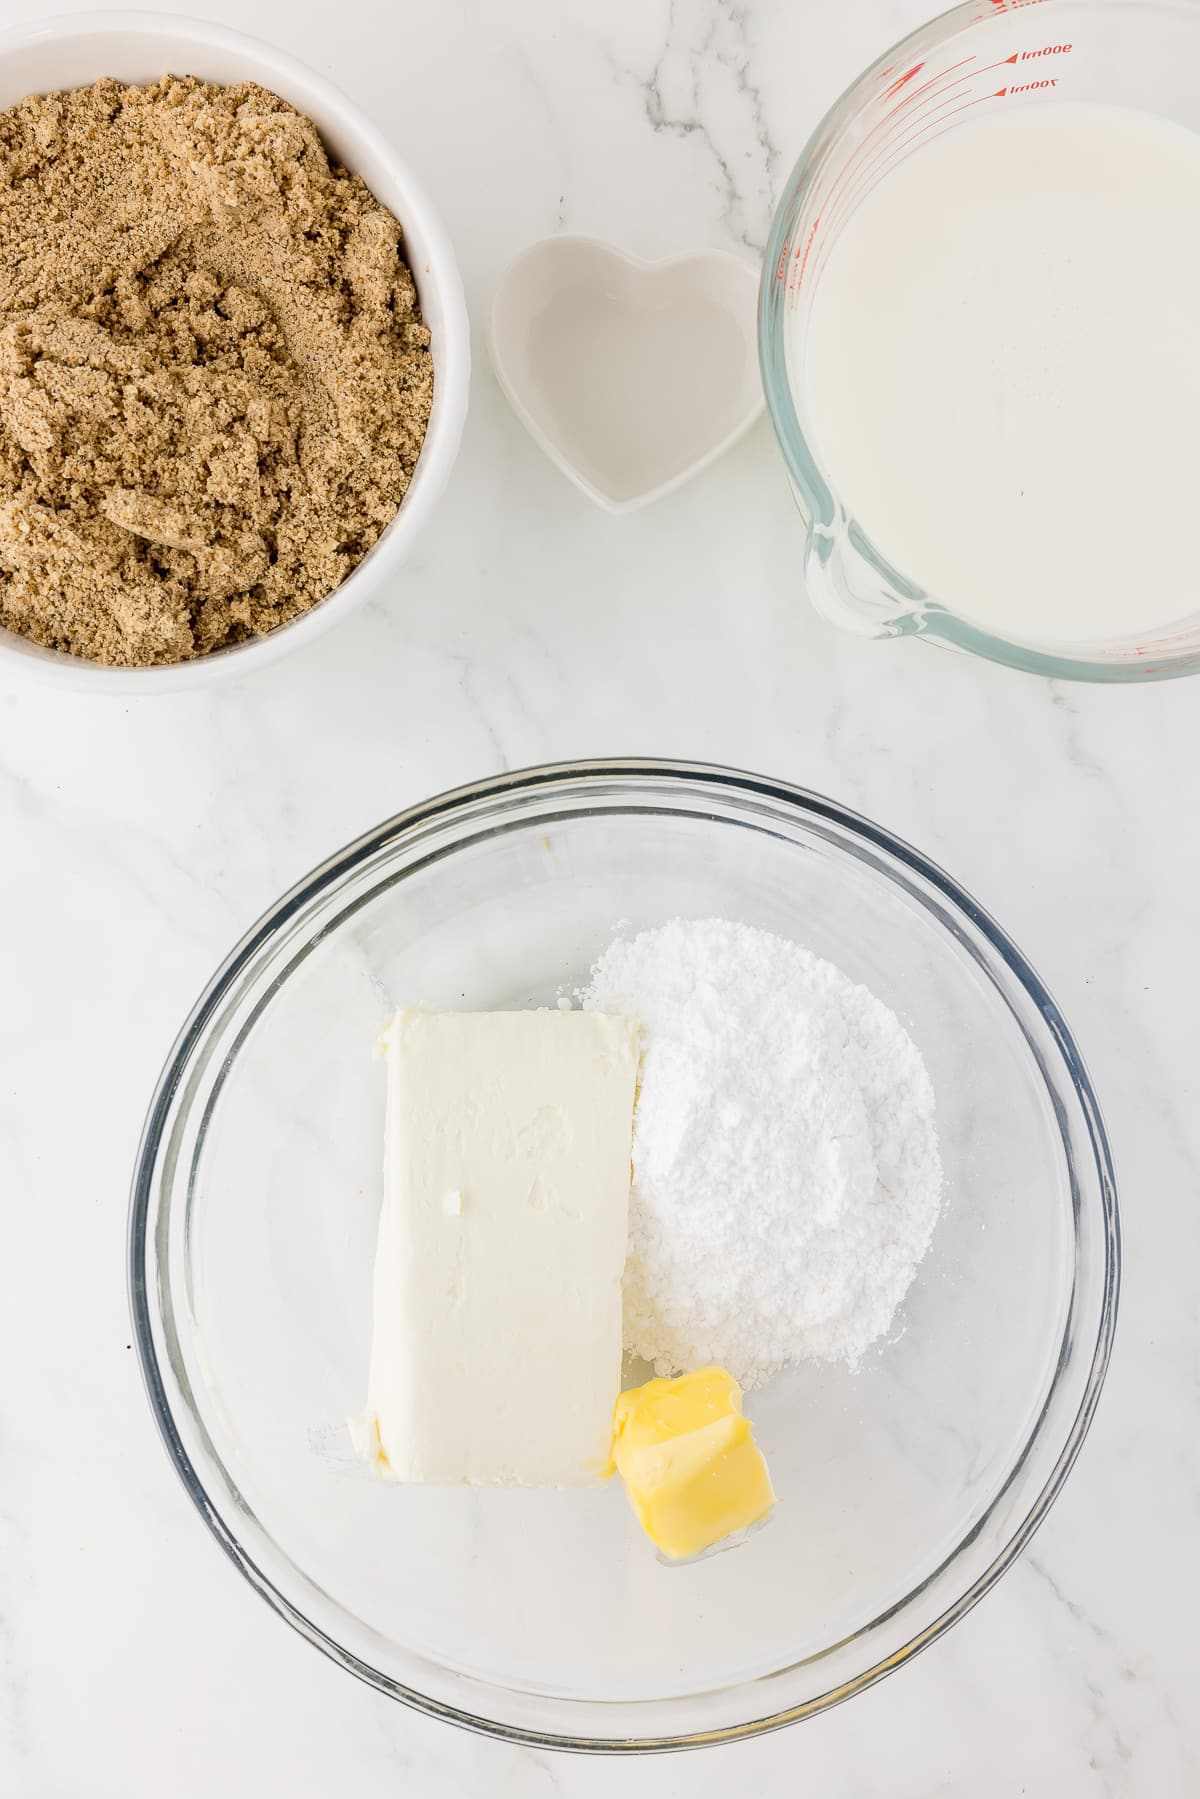
- 8 oz cream cheese, softened
- 2 tablespoons butter
- 1/2 cup powdered sugar
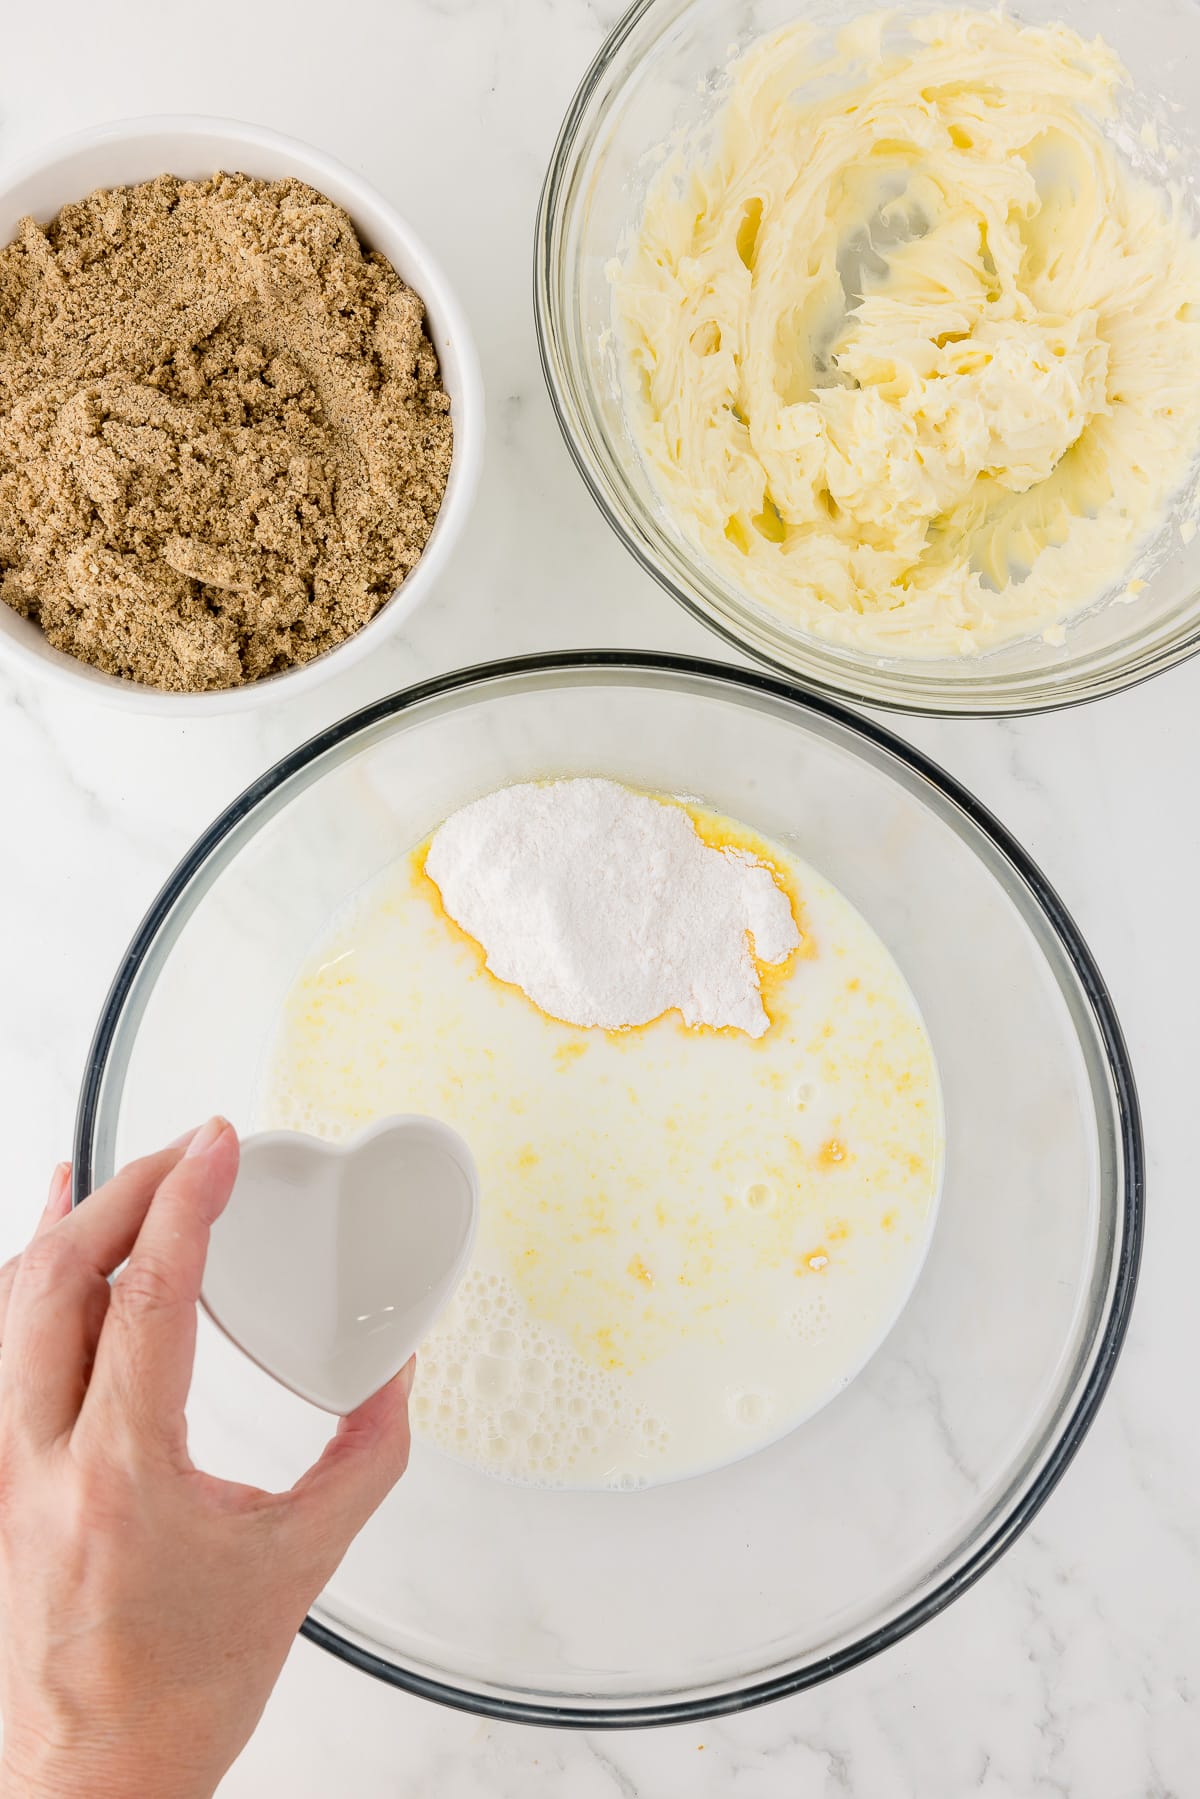
- 1 large package vanilla pudding mix
- 3 cups milk
- 1 teaspoon vanilla extract
- 8 oz whipped topping, we used Cool Whip
- Blue gel food coloring and shark candies for Shark in the Ocean scene
Directions for how to make our Sand Pudding recipe:
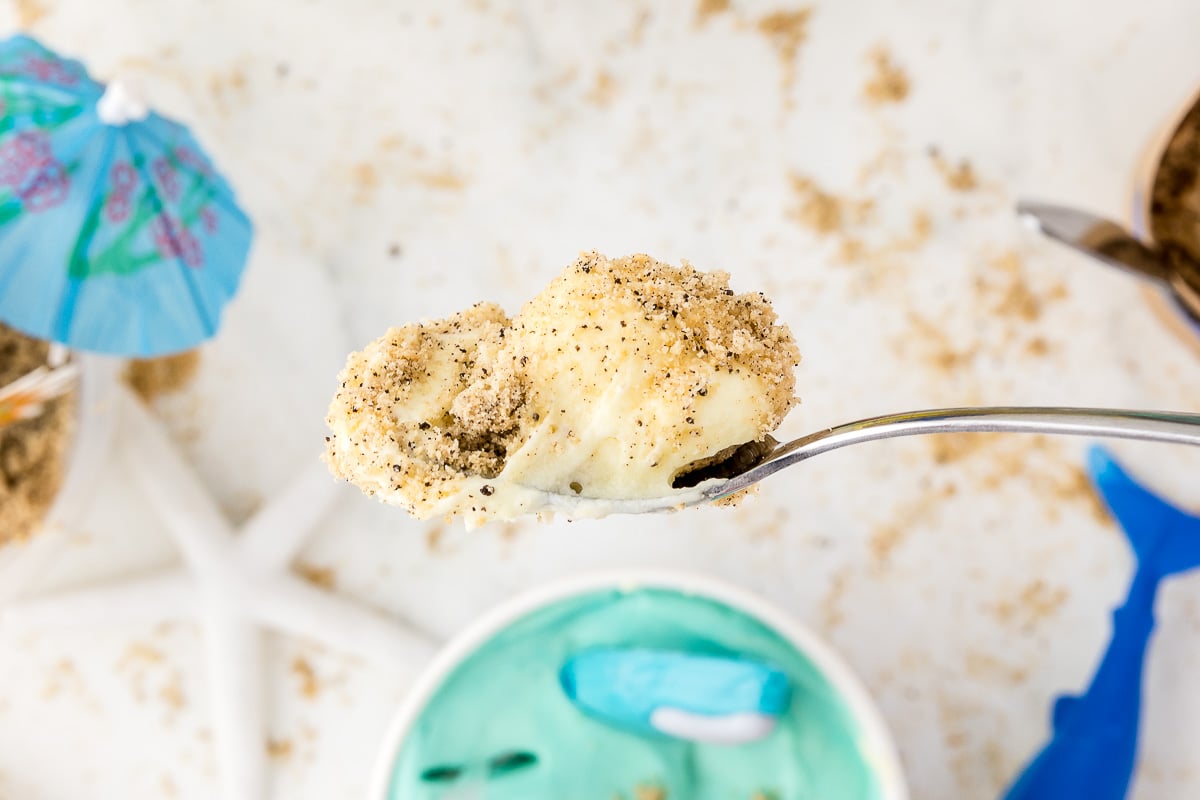
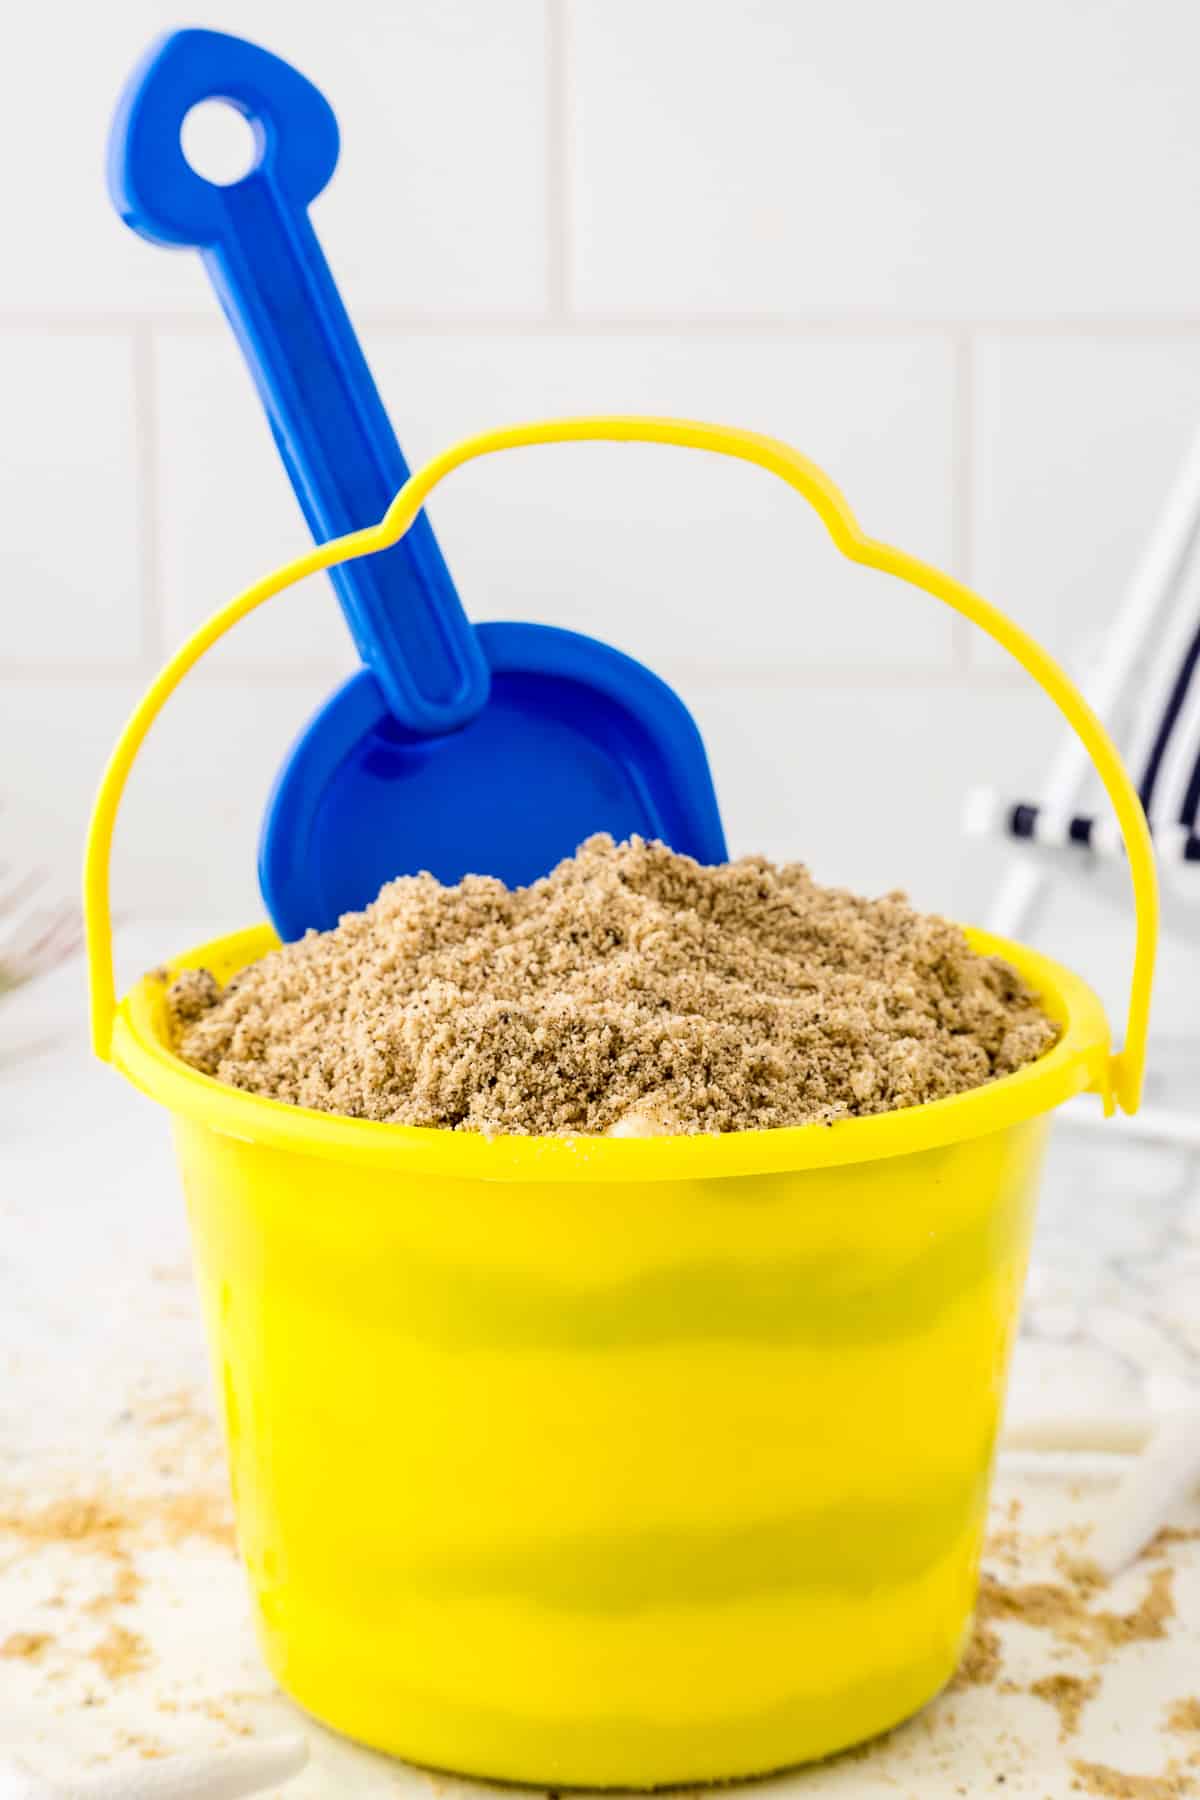
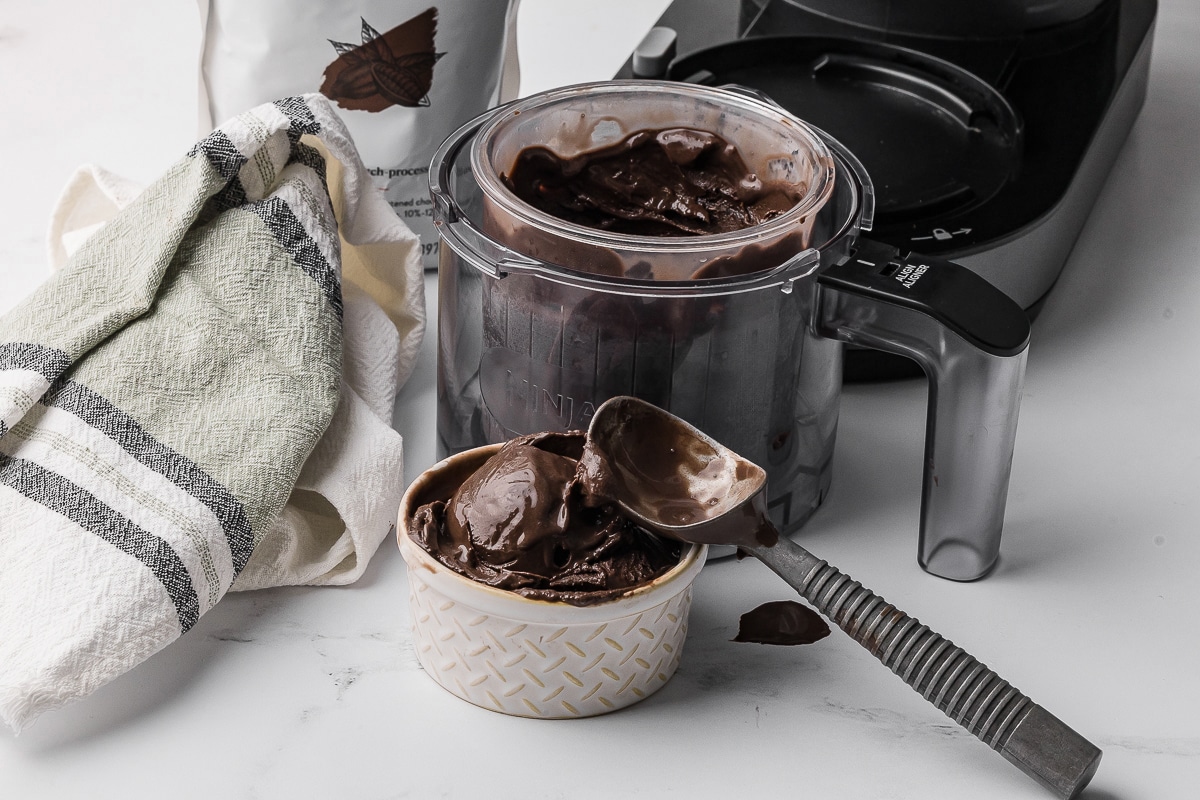
1. Pulse golden and regular Oreos in a food processor until they resemble sand.
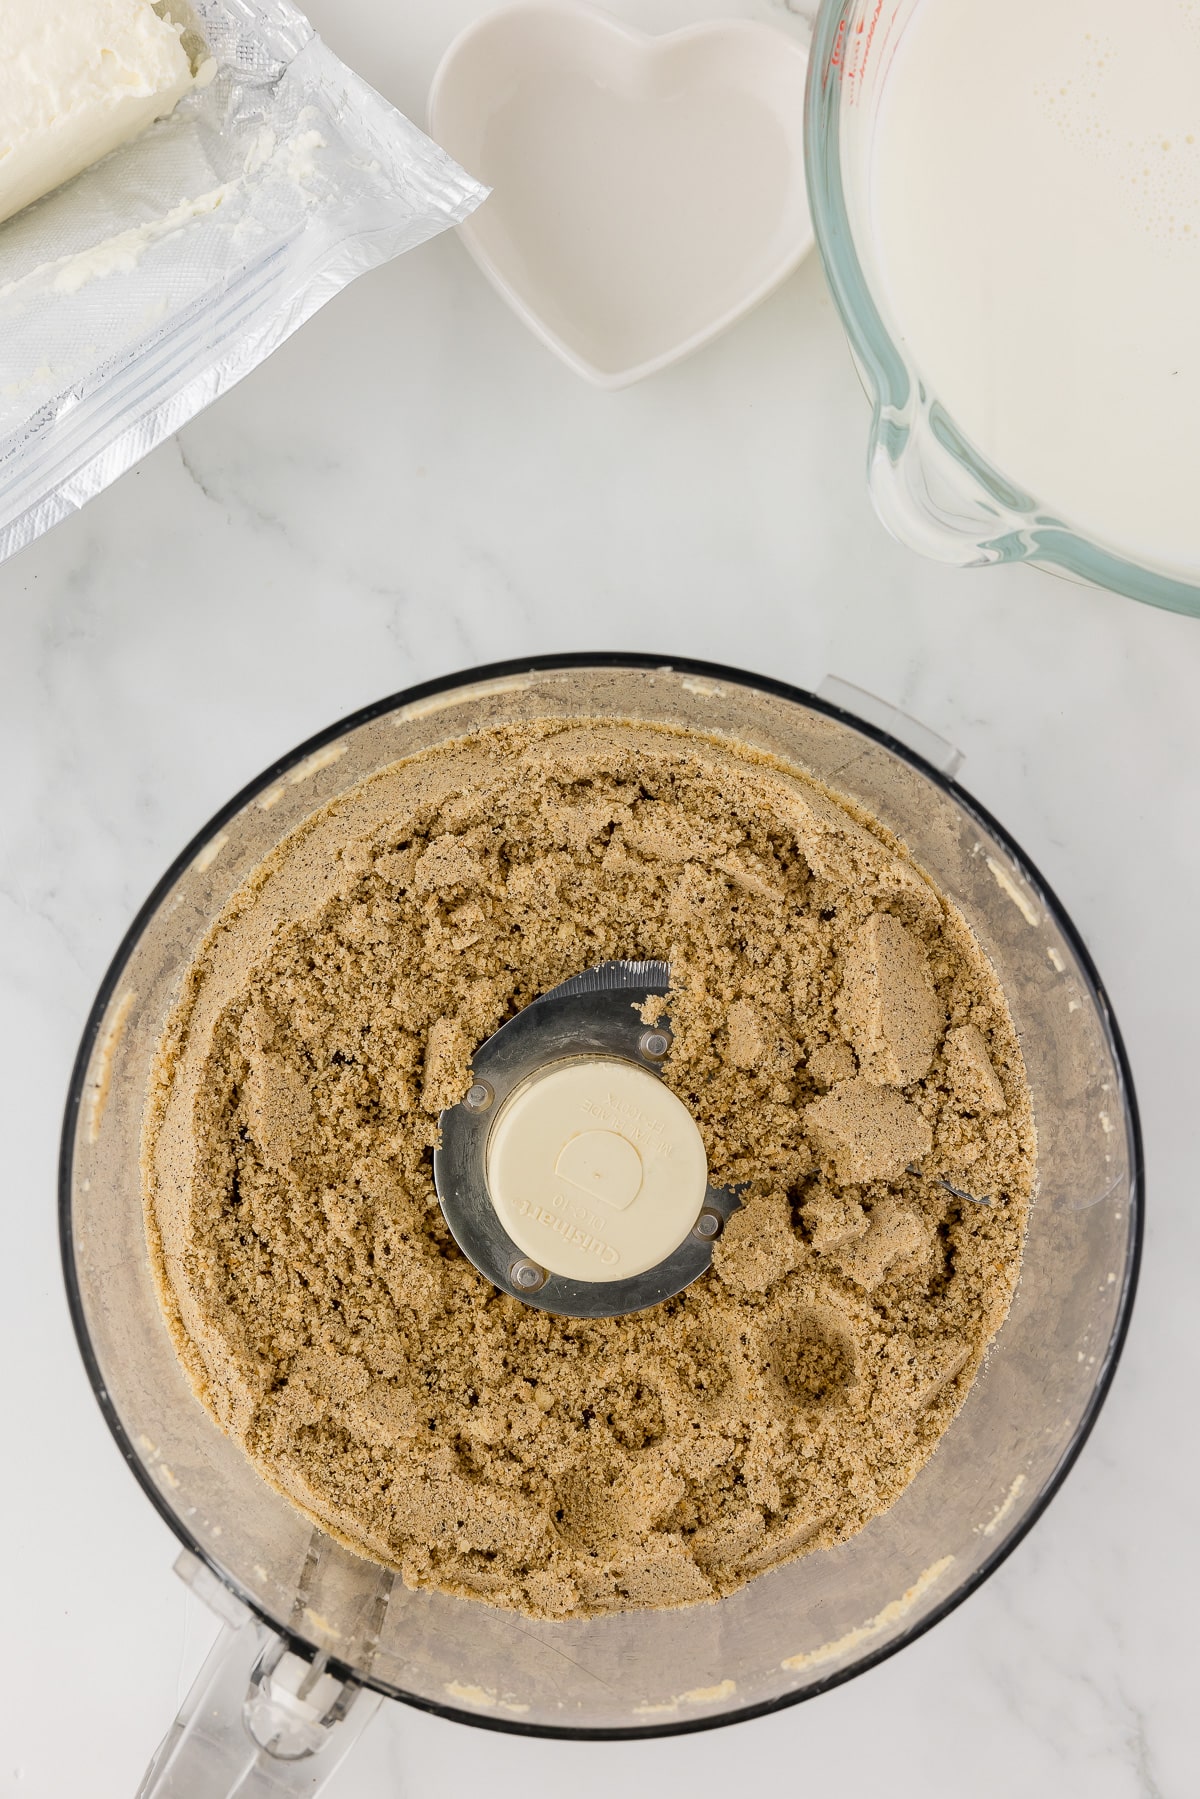
2. I prefer removing the Oreo cream for a drier texture. You can see the difference in the pictures below. On the left, we have “sand” made from Oreos with no cream. Then on the right, “sand” made from Oreos with cream.
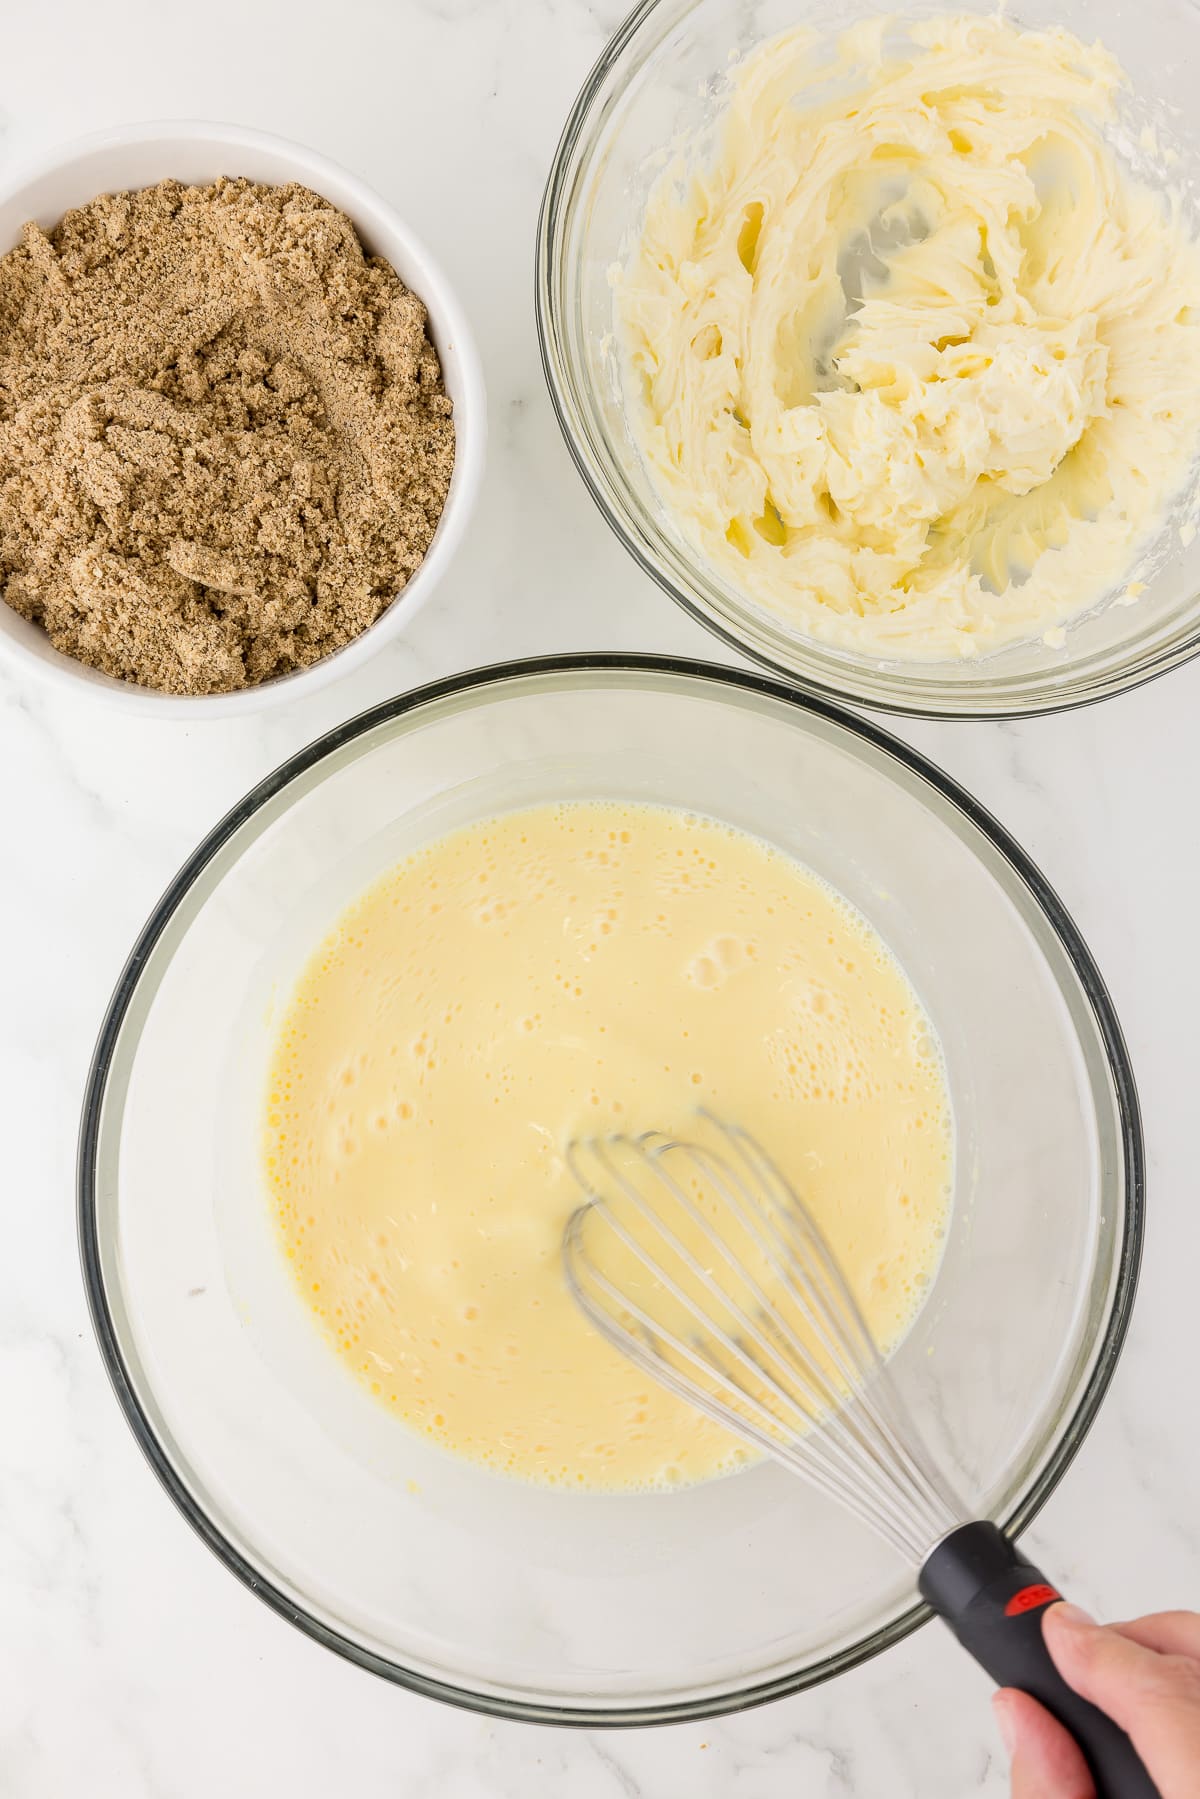
3. In a small bowl or stand mixer, use a whisk attachment to cream butter, cream cheese, and powdered sugar until smooth.
4. In a large bowl, mix instant vanilla pudding mix, milk, and vanilla extract with a whisk until well combined.
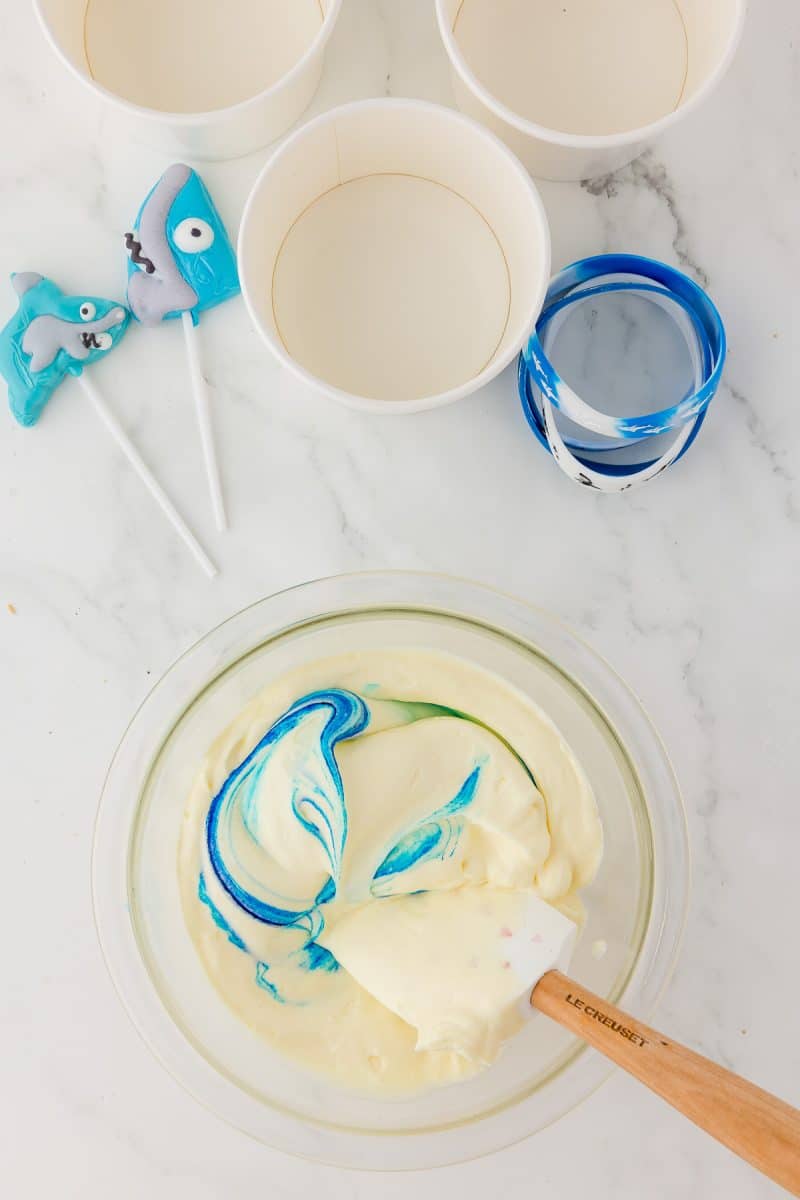
5. Gently fold in Cool Whip with a spatula. (If you’re making our Shark in the Ocean scene, add a couple of drops of blue food coloring and carefully fold in.)
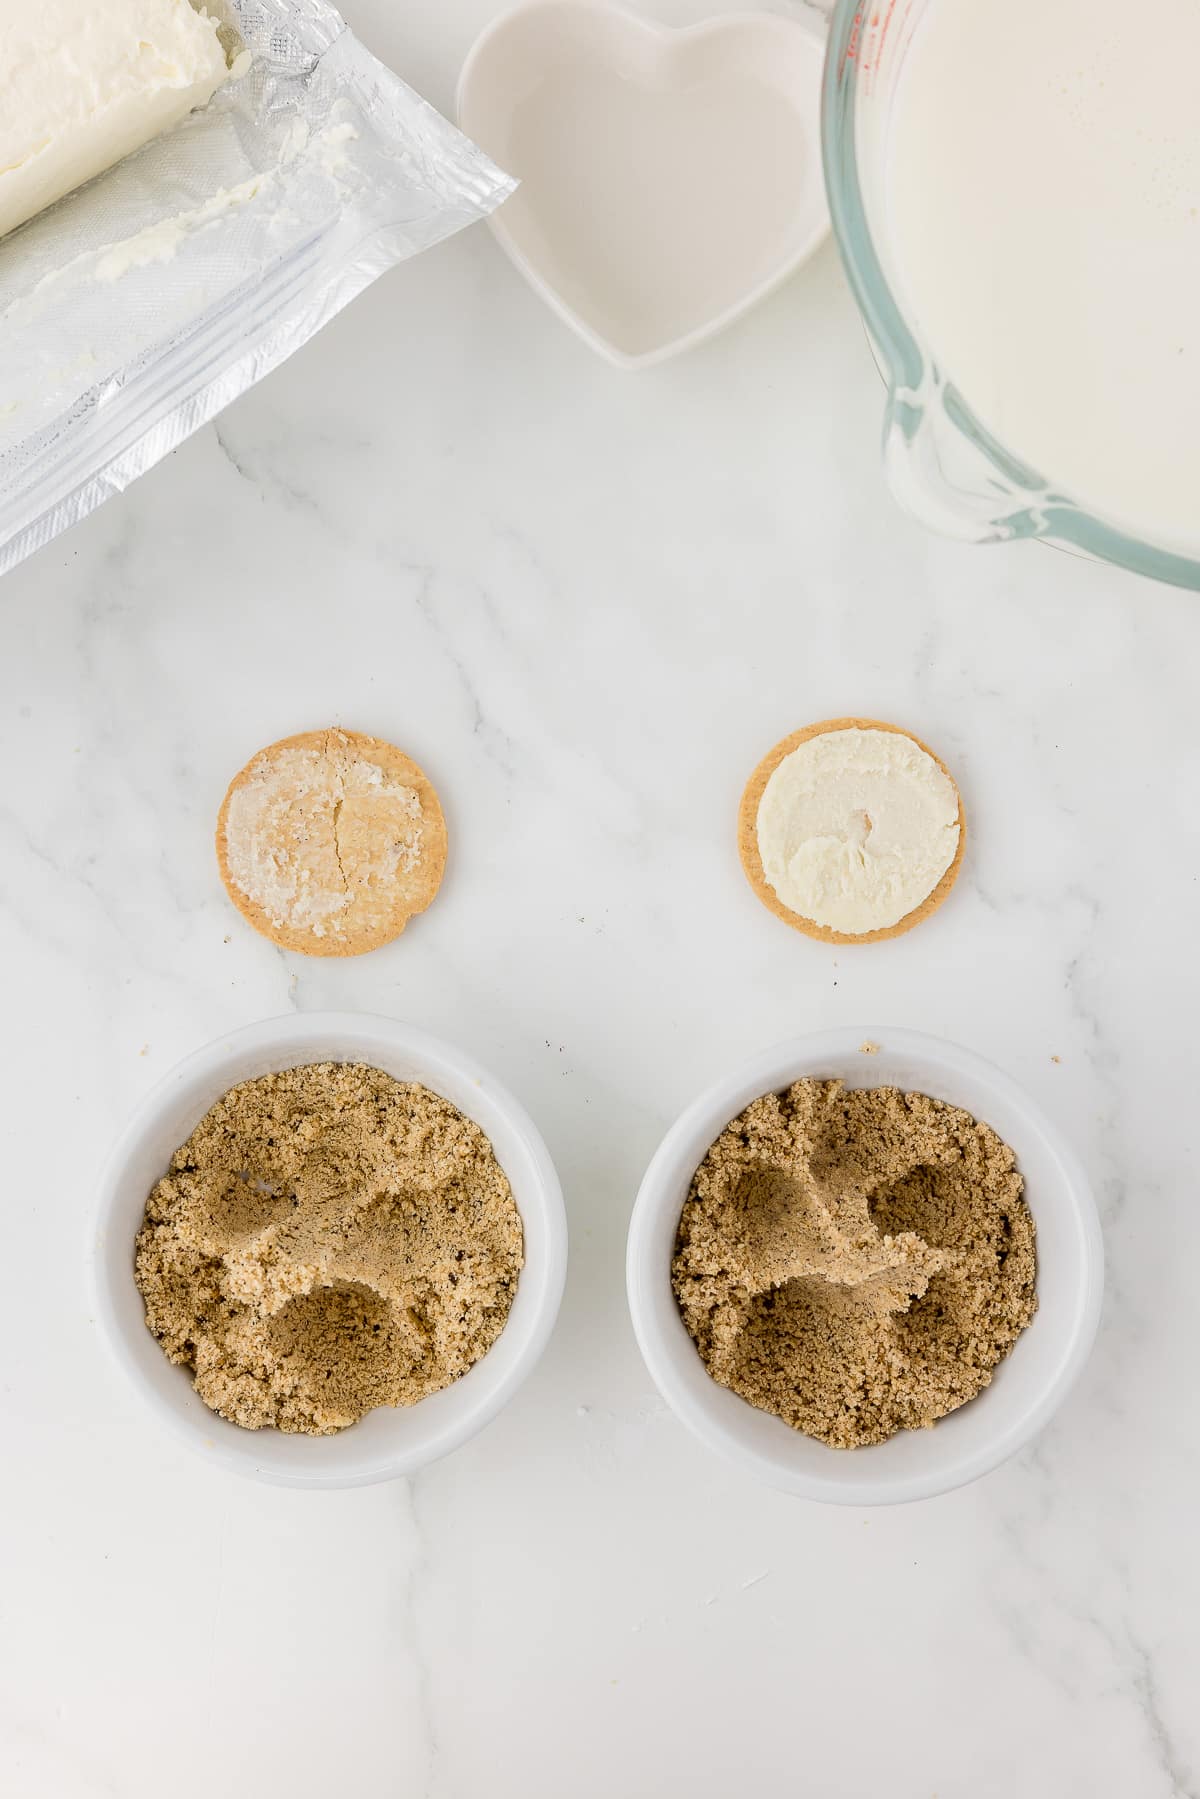
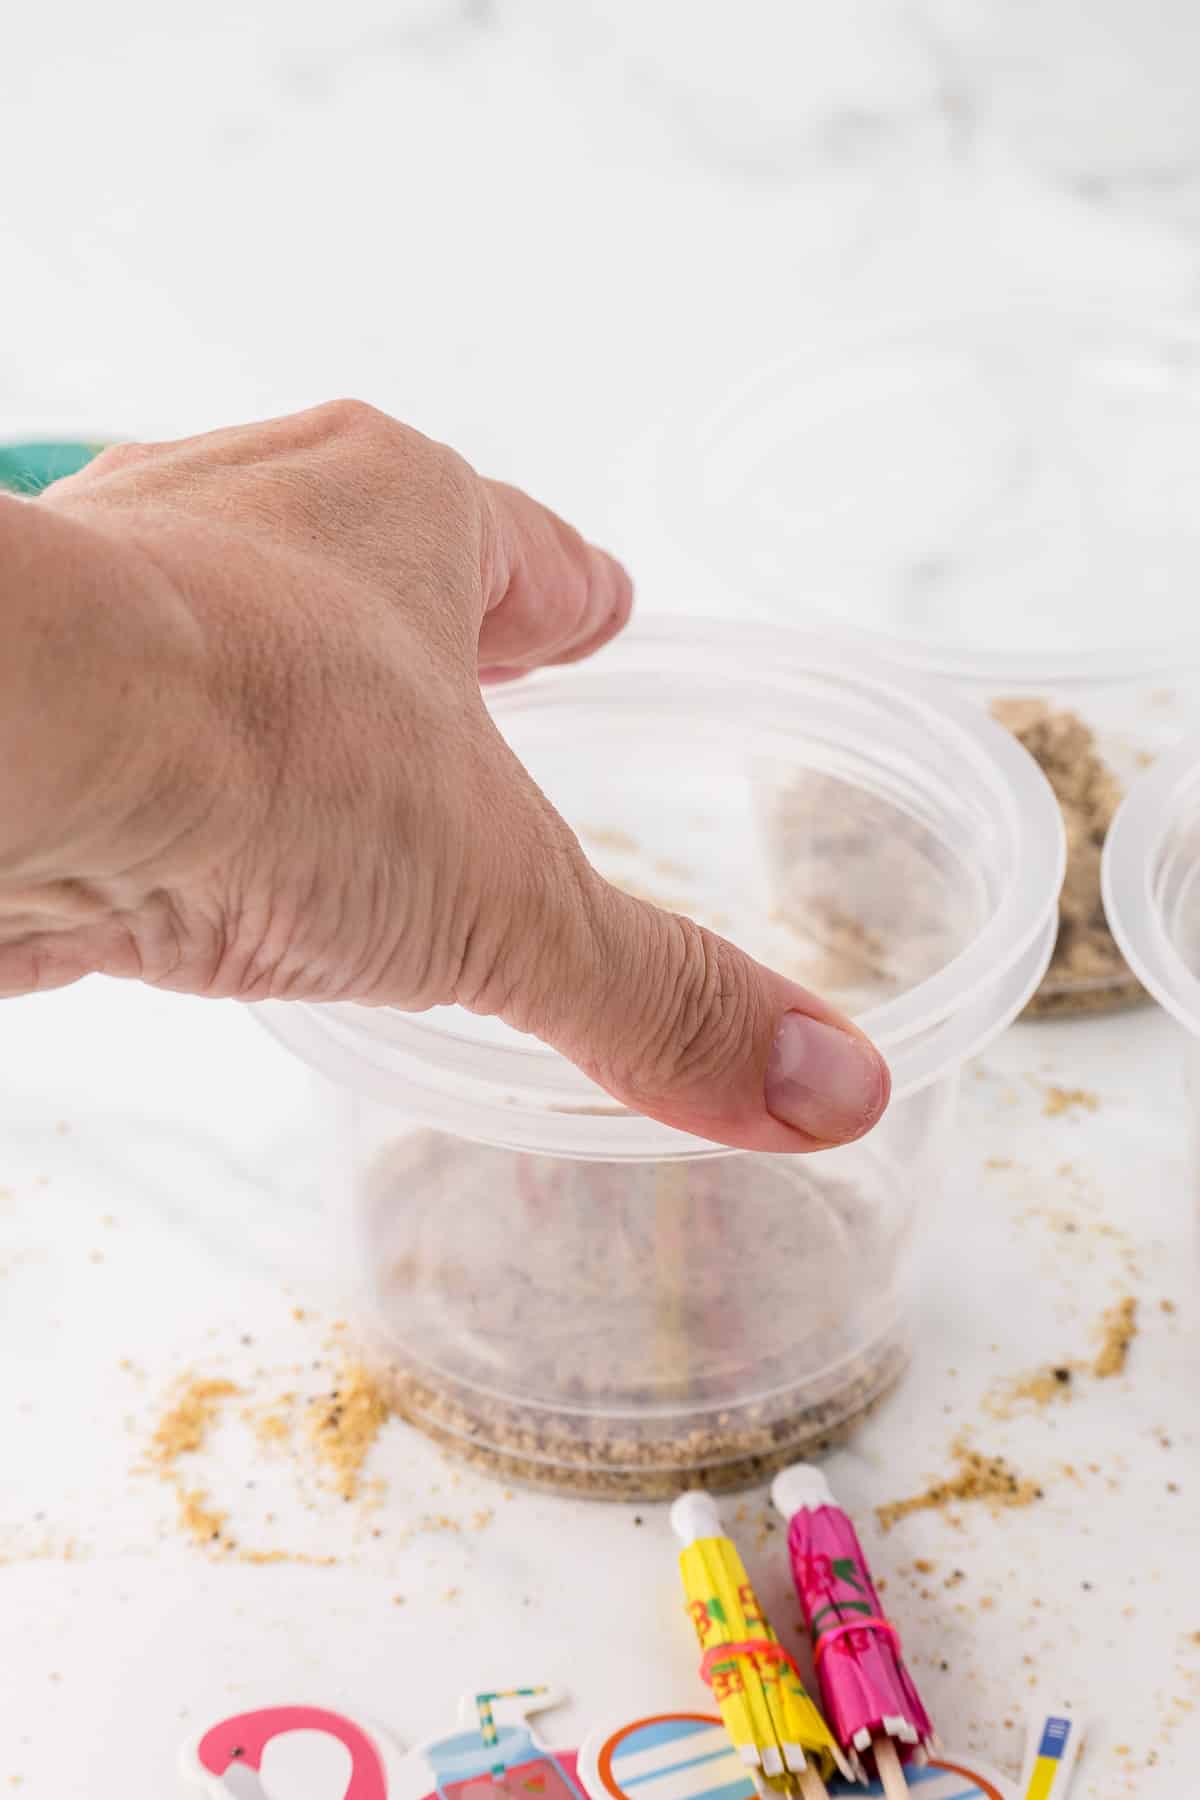
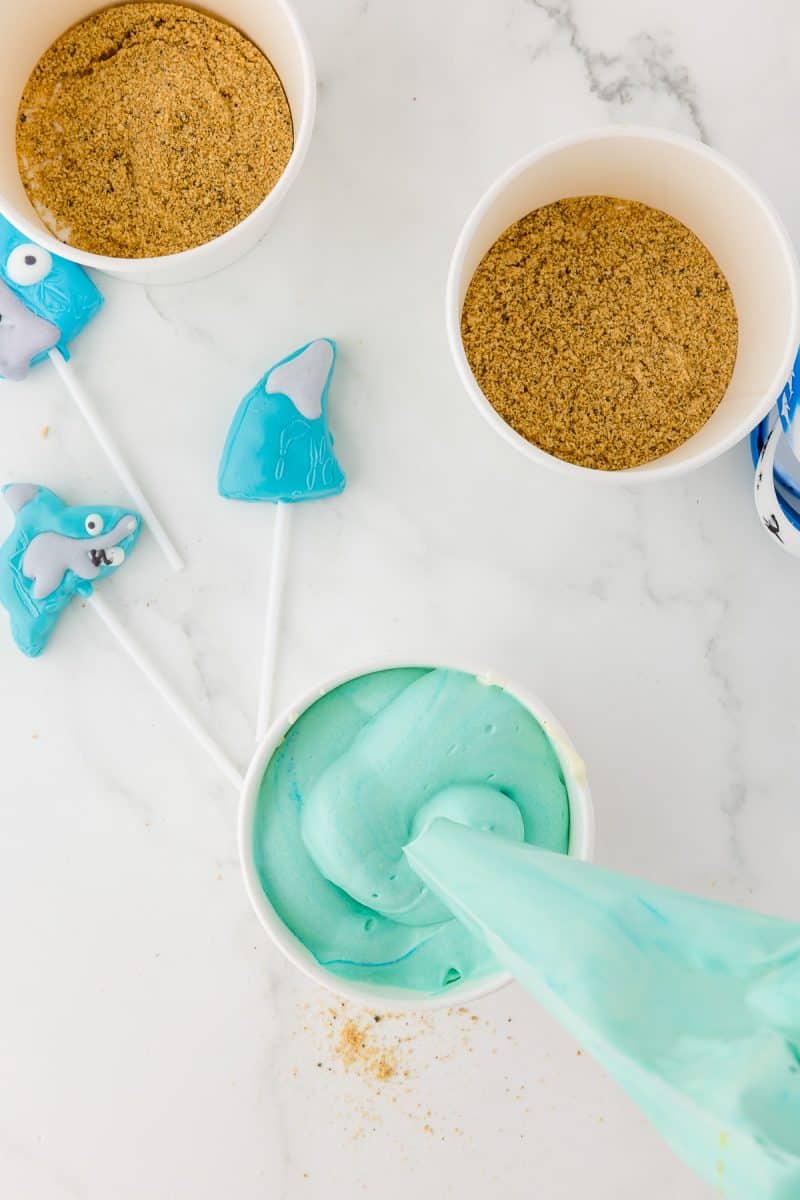
6. Spoon a layer of “sand” cookie crumbs into the bottom of each cup. Then press down on the sand with the bottom of an empty cup to help it set in place.
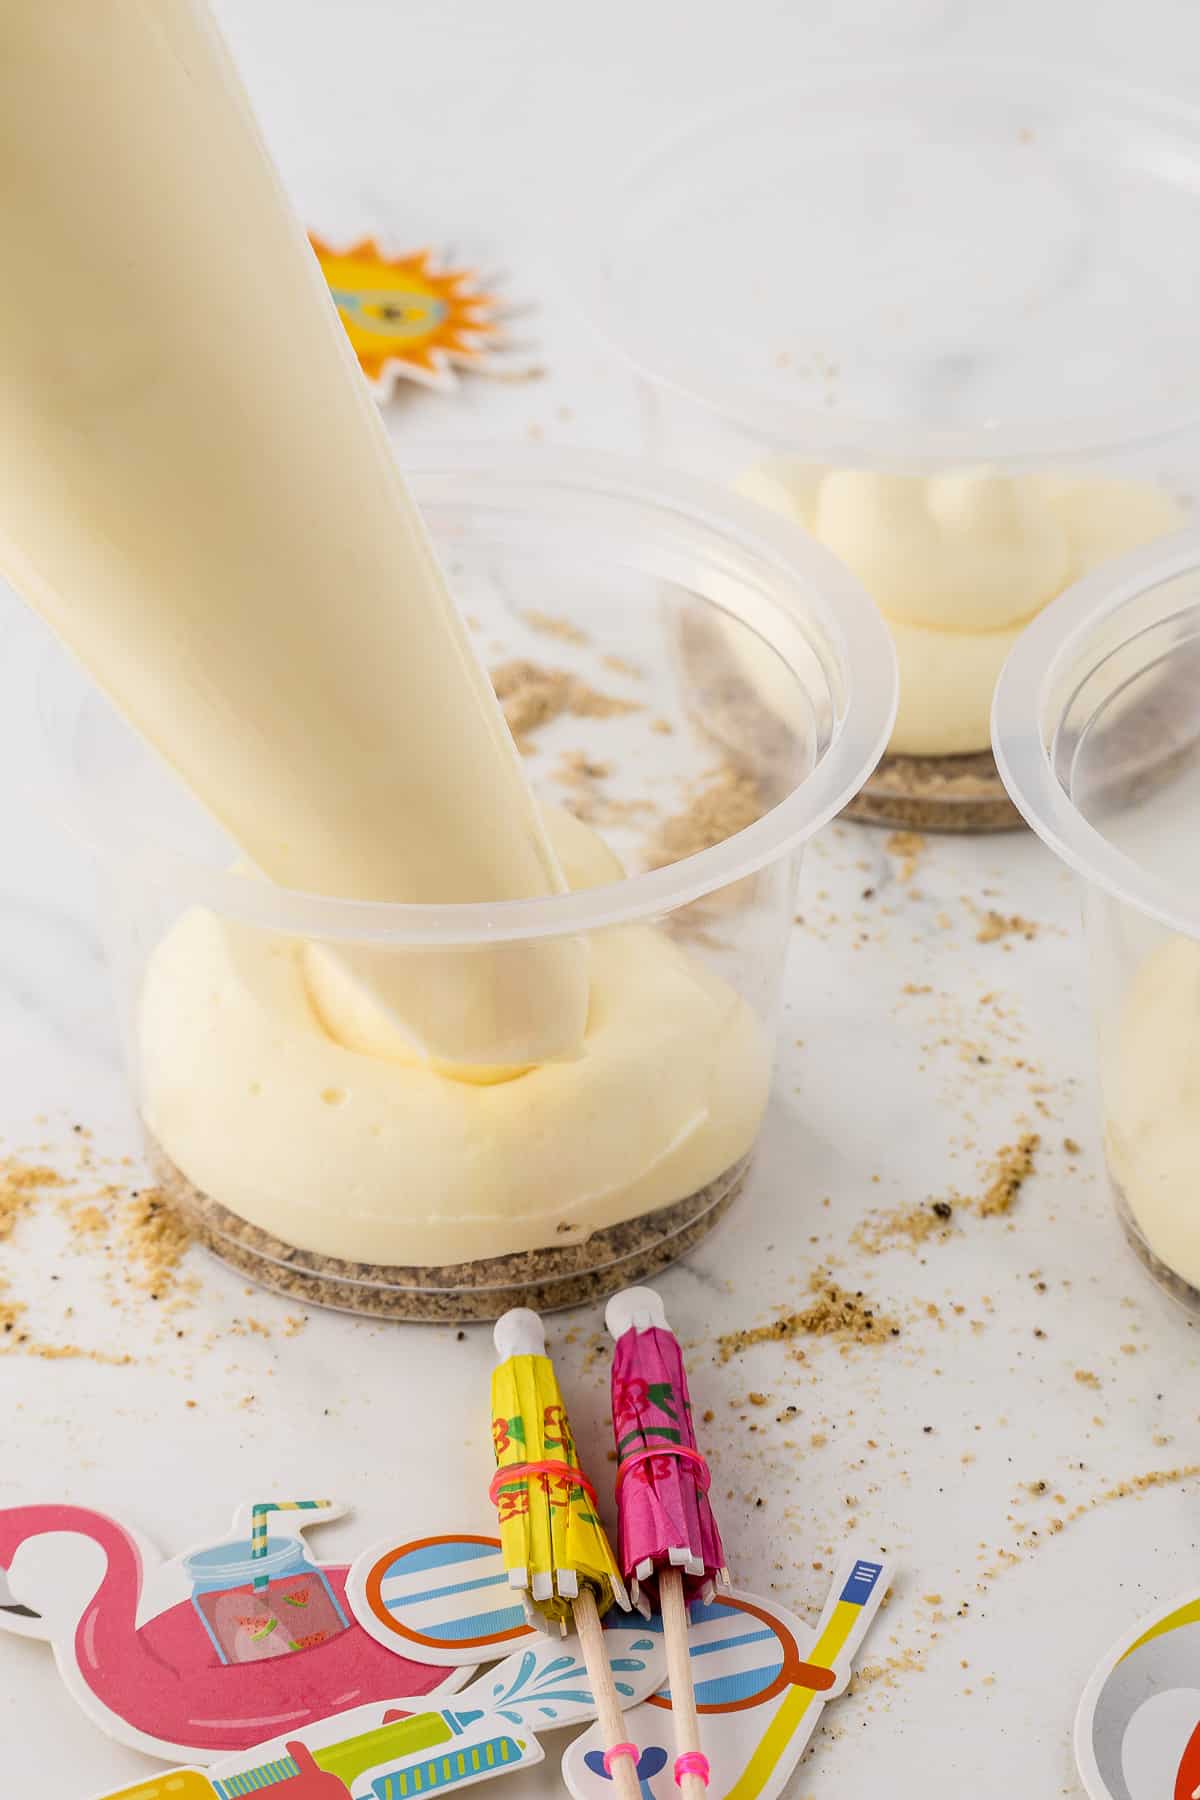
7. Pipe or scoop in a layer of pudding.
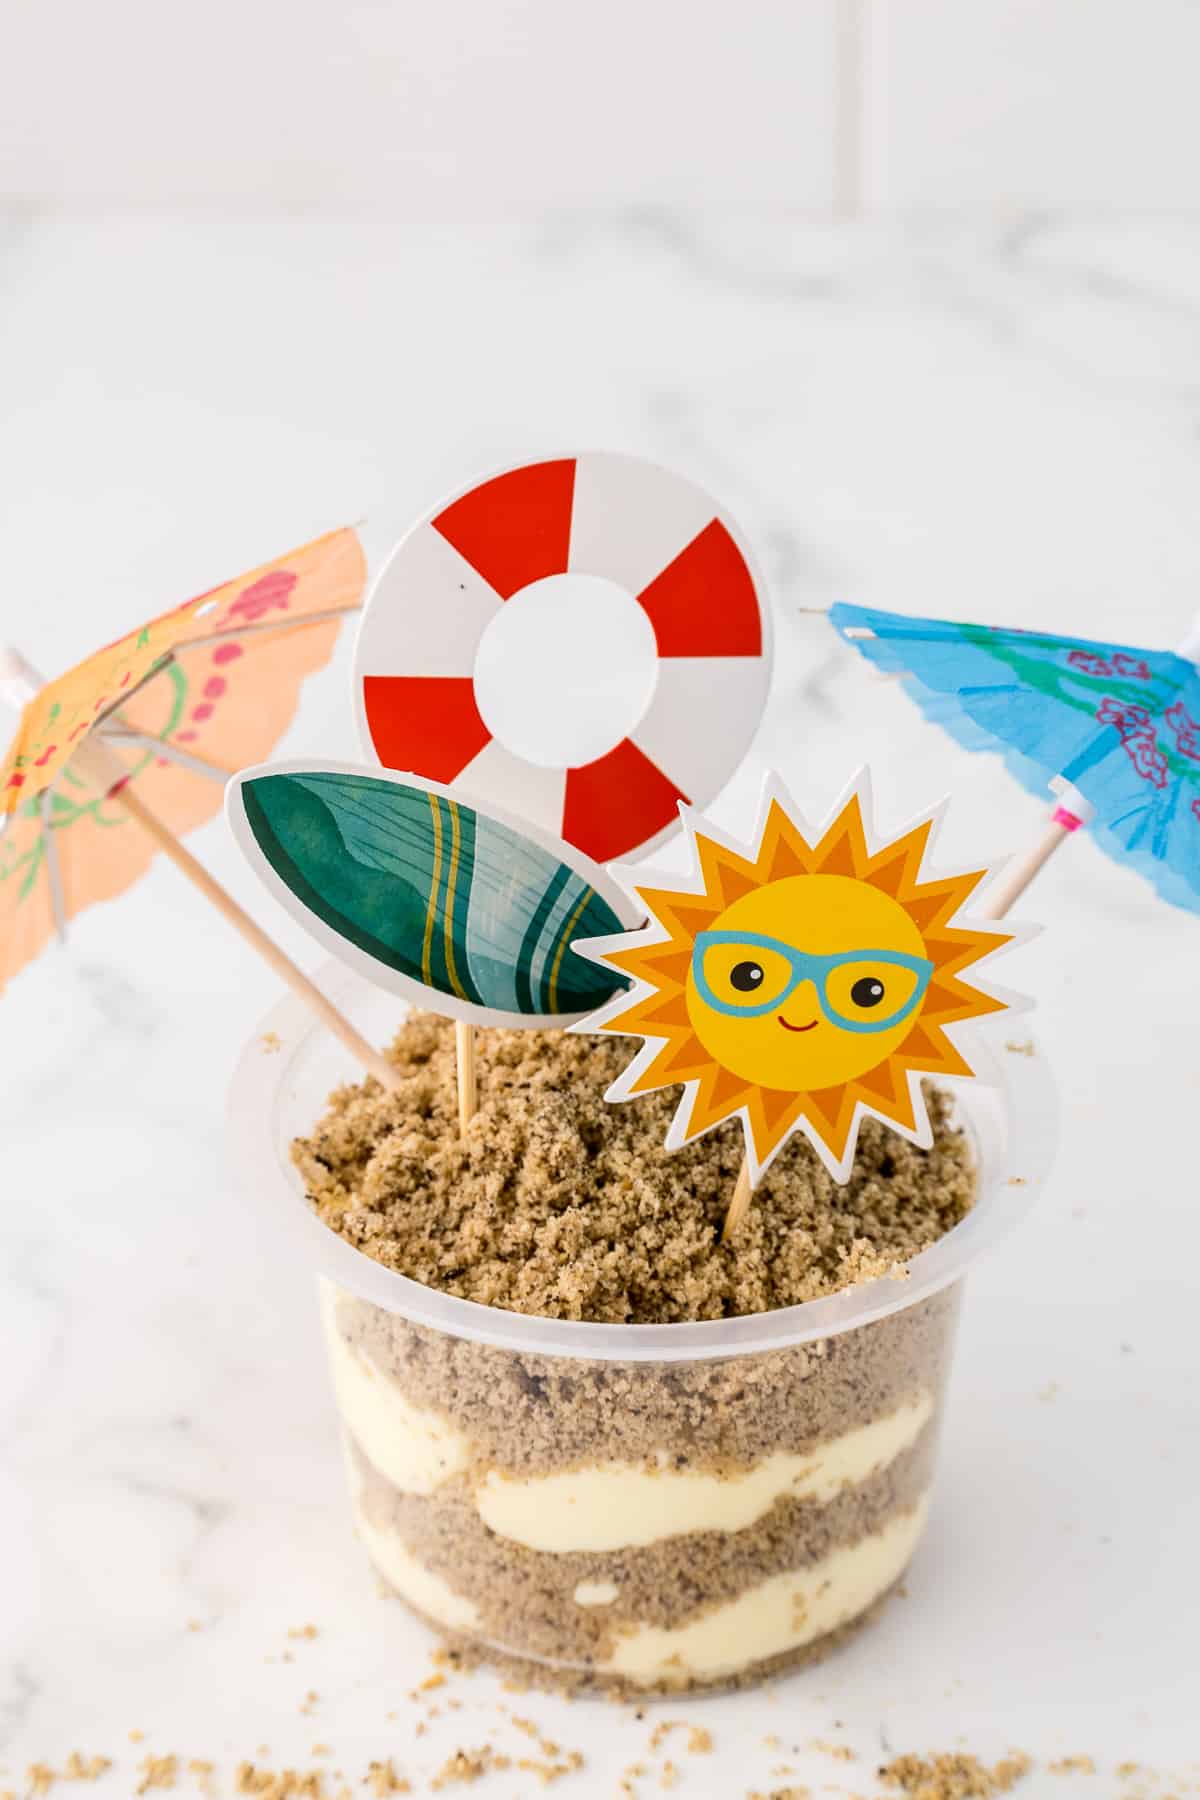
8. Then add another layer of “sand” and tamp down slightly again. Keep layering, alternating pudding and sand in each individual cup. Finish with a layer of “sand” on top.

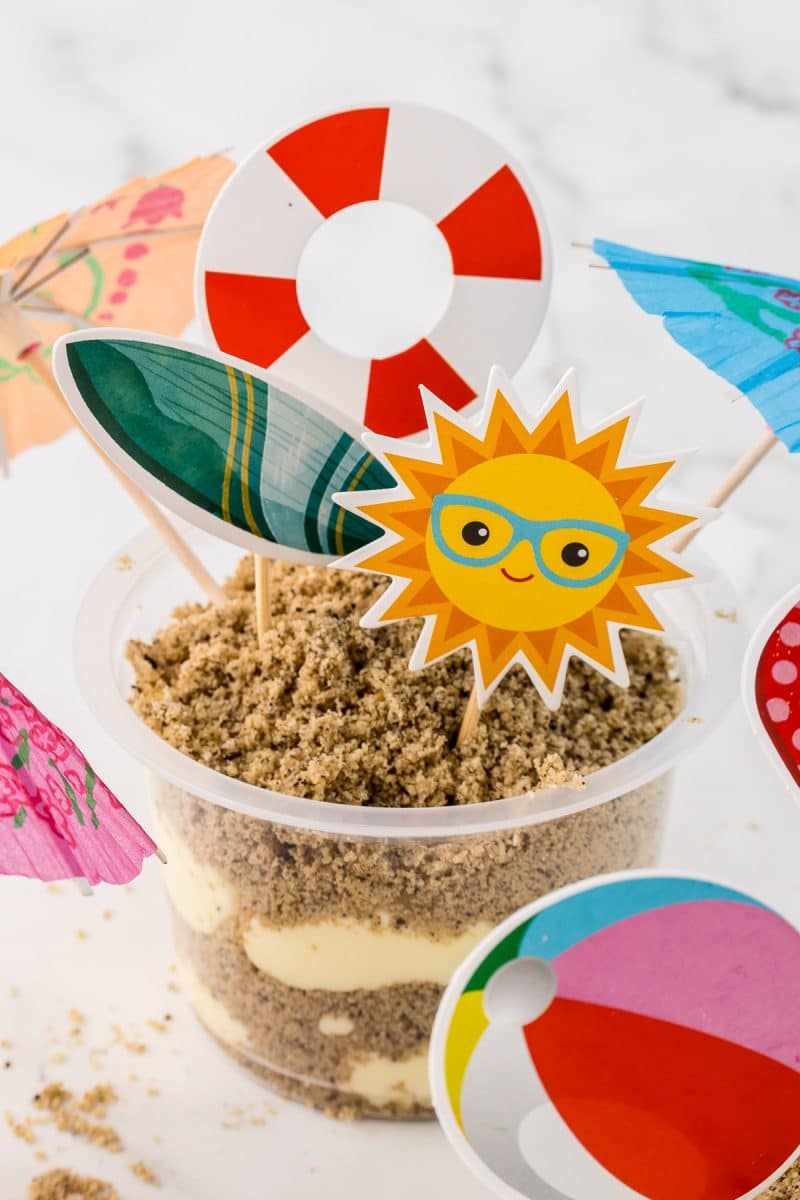
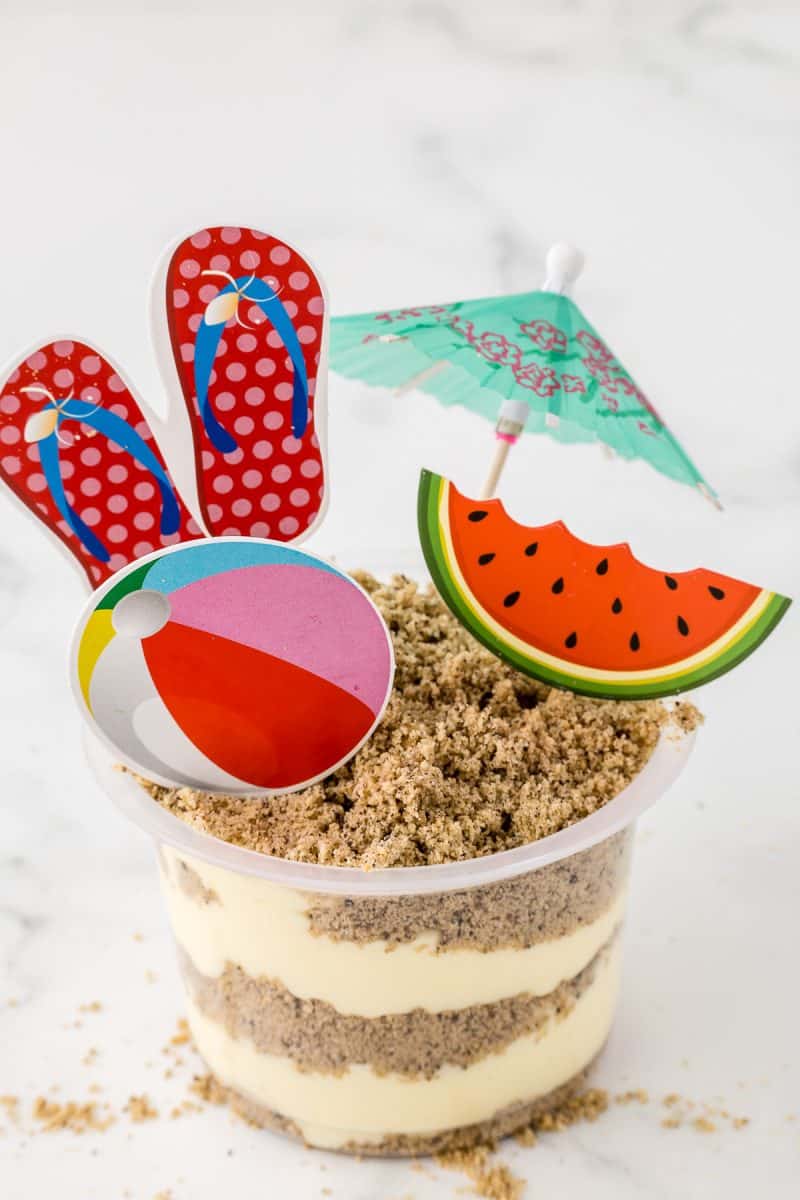
9. Chill in the refrigerator until set, about one hour. Decorate and serve cold.
Variations:
- Use vanilla wafers or graham crackers instead of golden Oreos. Check out the difference in “sand” color when you use graham crackers instead (pictures below).
- I’ve liked every cookie crumble combo I’ve tried, but I think the golden and dark Oreos without cream look the most like real sand.
- Want to add some edible decorations? Teddy Grahams on the beach or gummy worms in the sand make cute additions!
We created four fun twists on serving styles for different summer occasions, and linked all our styling supplies on Amazon, so you can easily recreate this adorable sand pudding dessert in the theme of your choice:
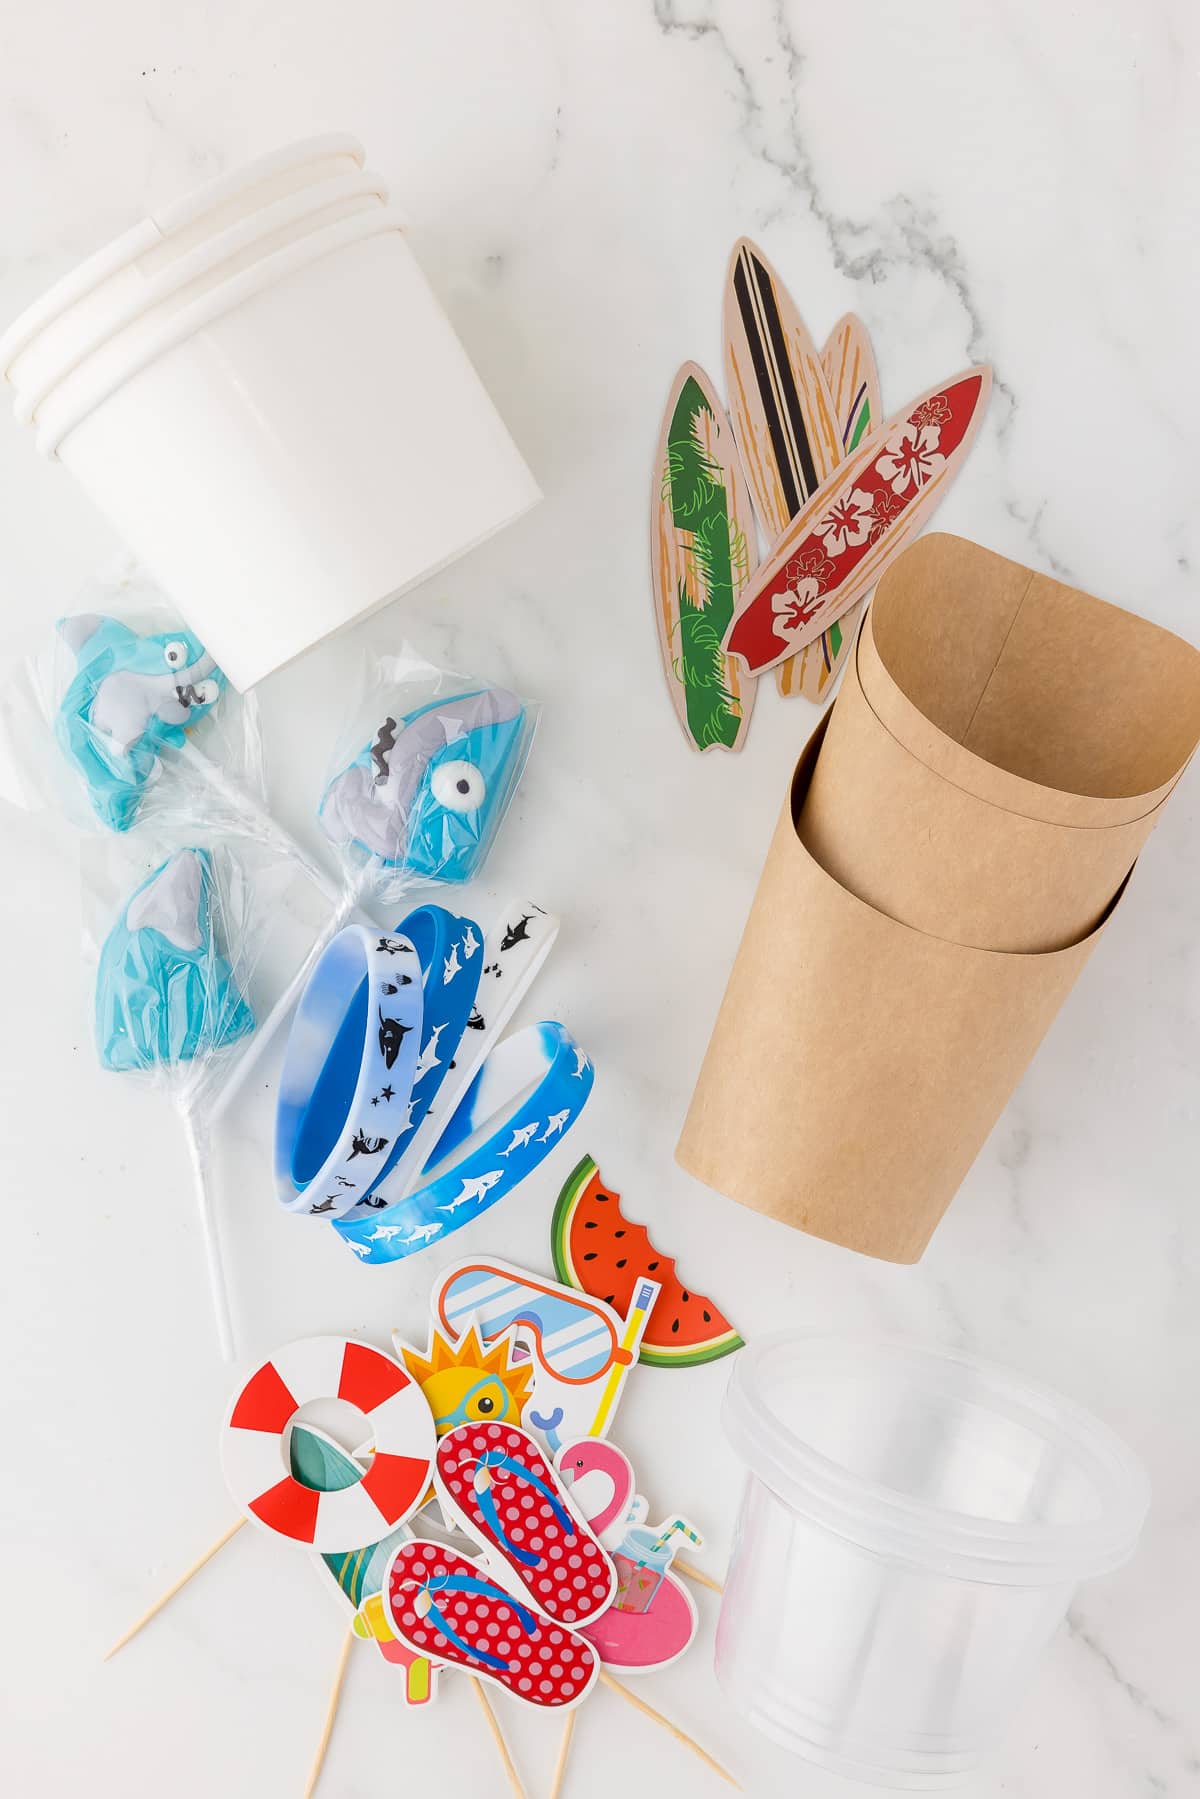
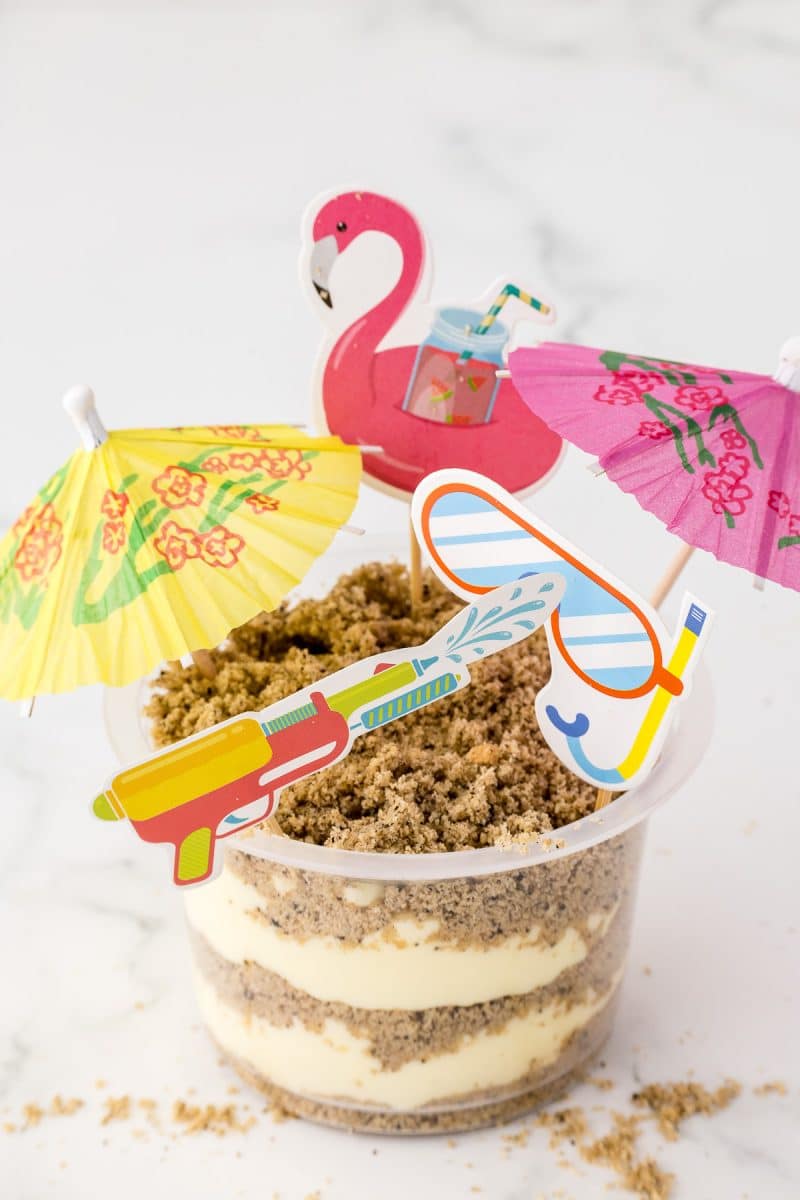
Supplies for Pool Party theme:
Our Pool Party scene:
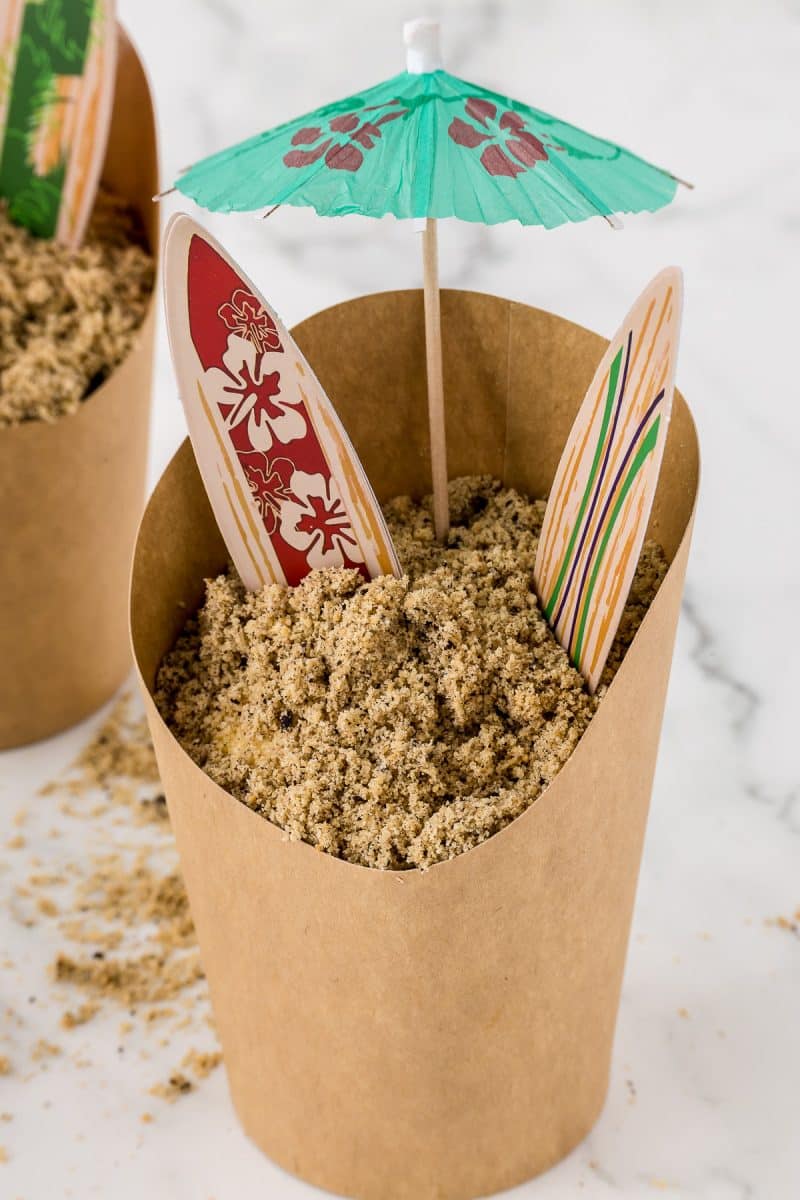
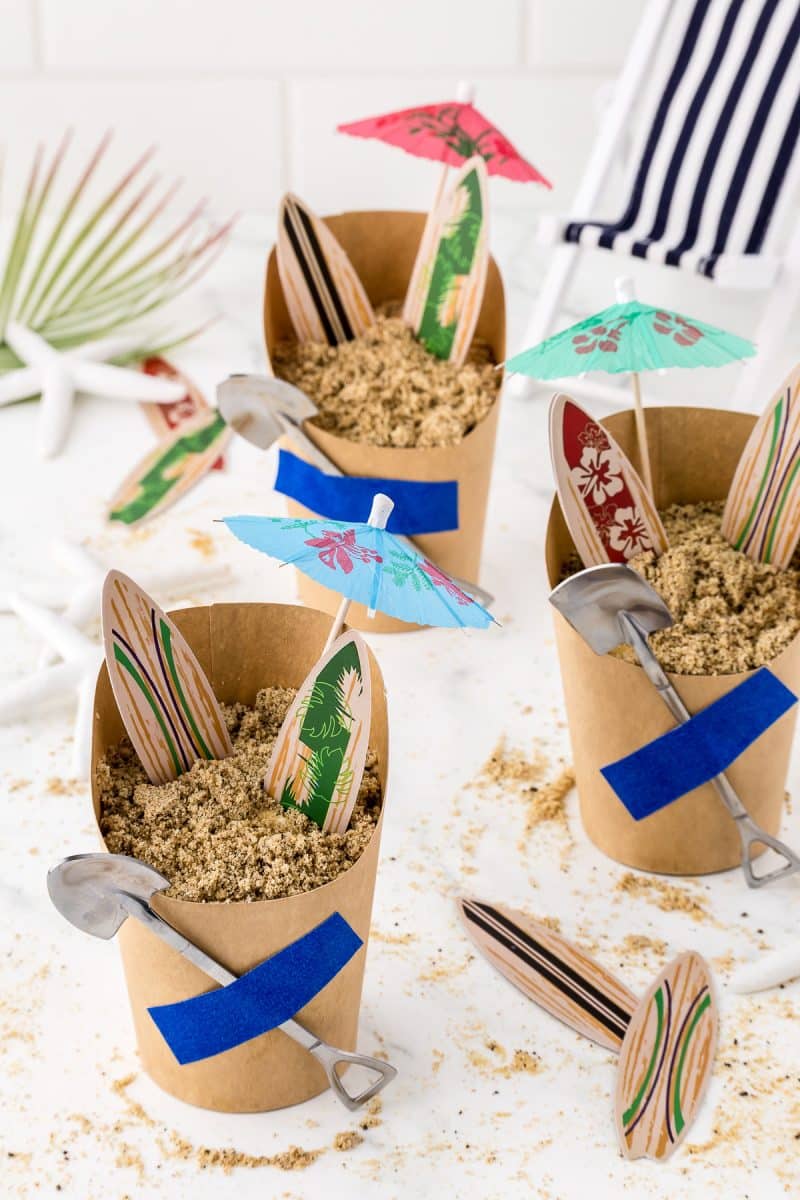
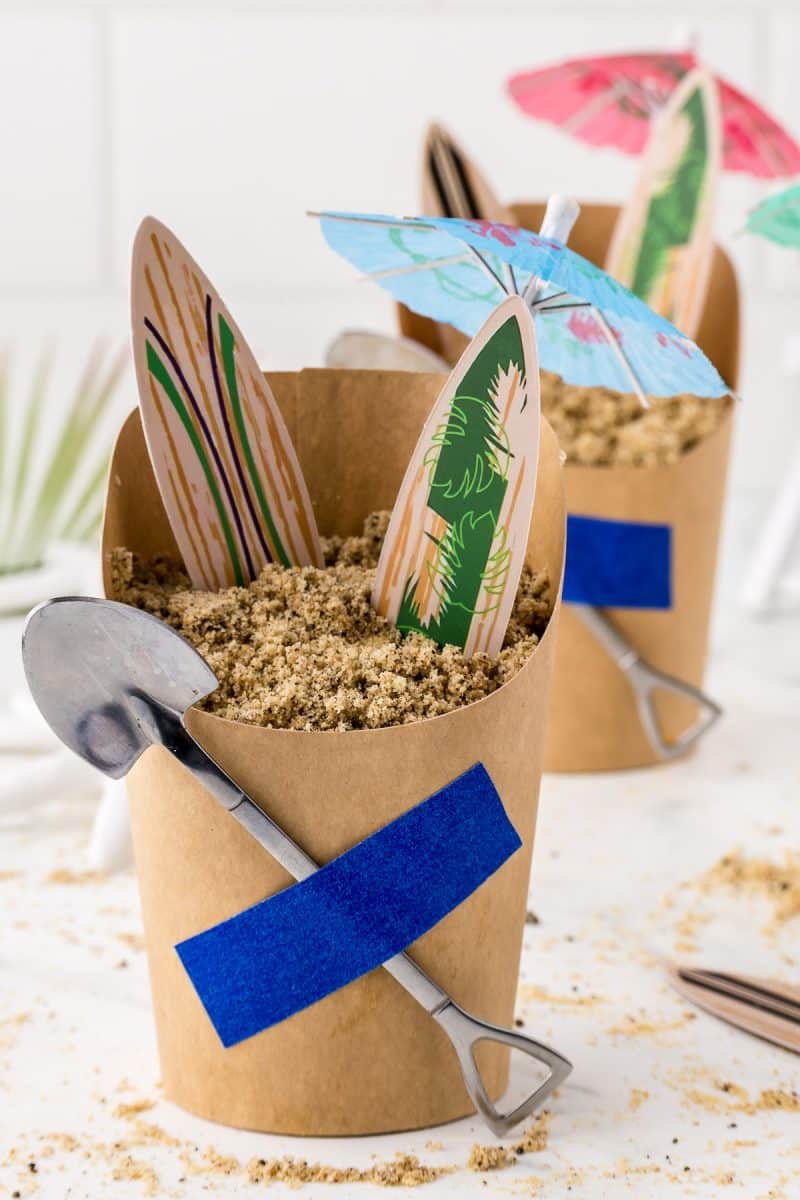
Supplies for Surfer Beach scene:
Our Surfer Beach scene:
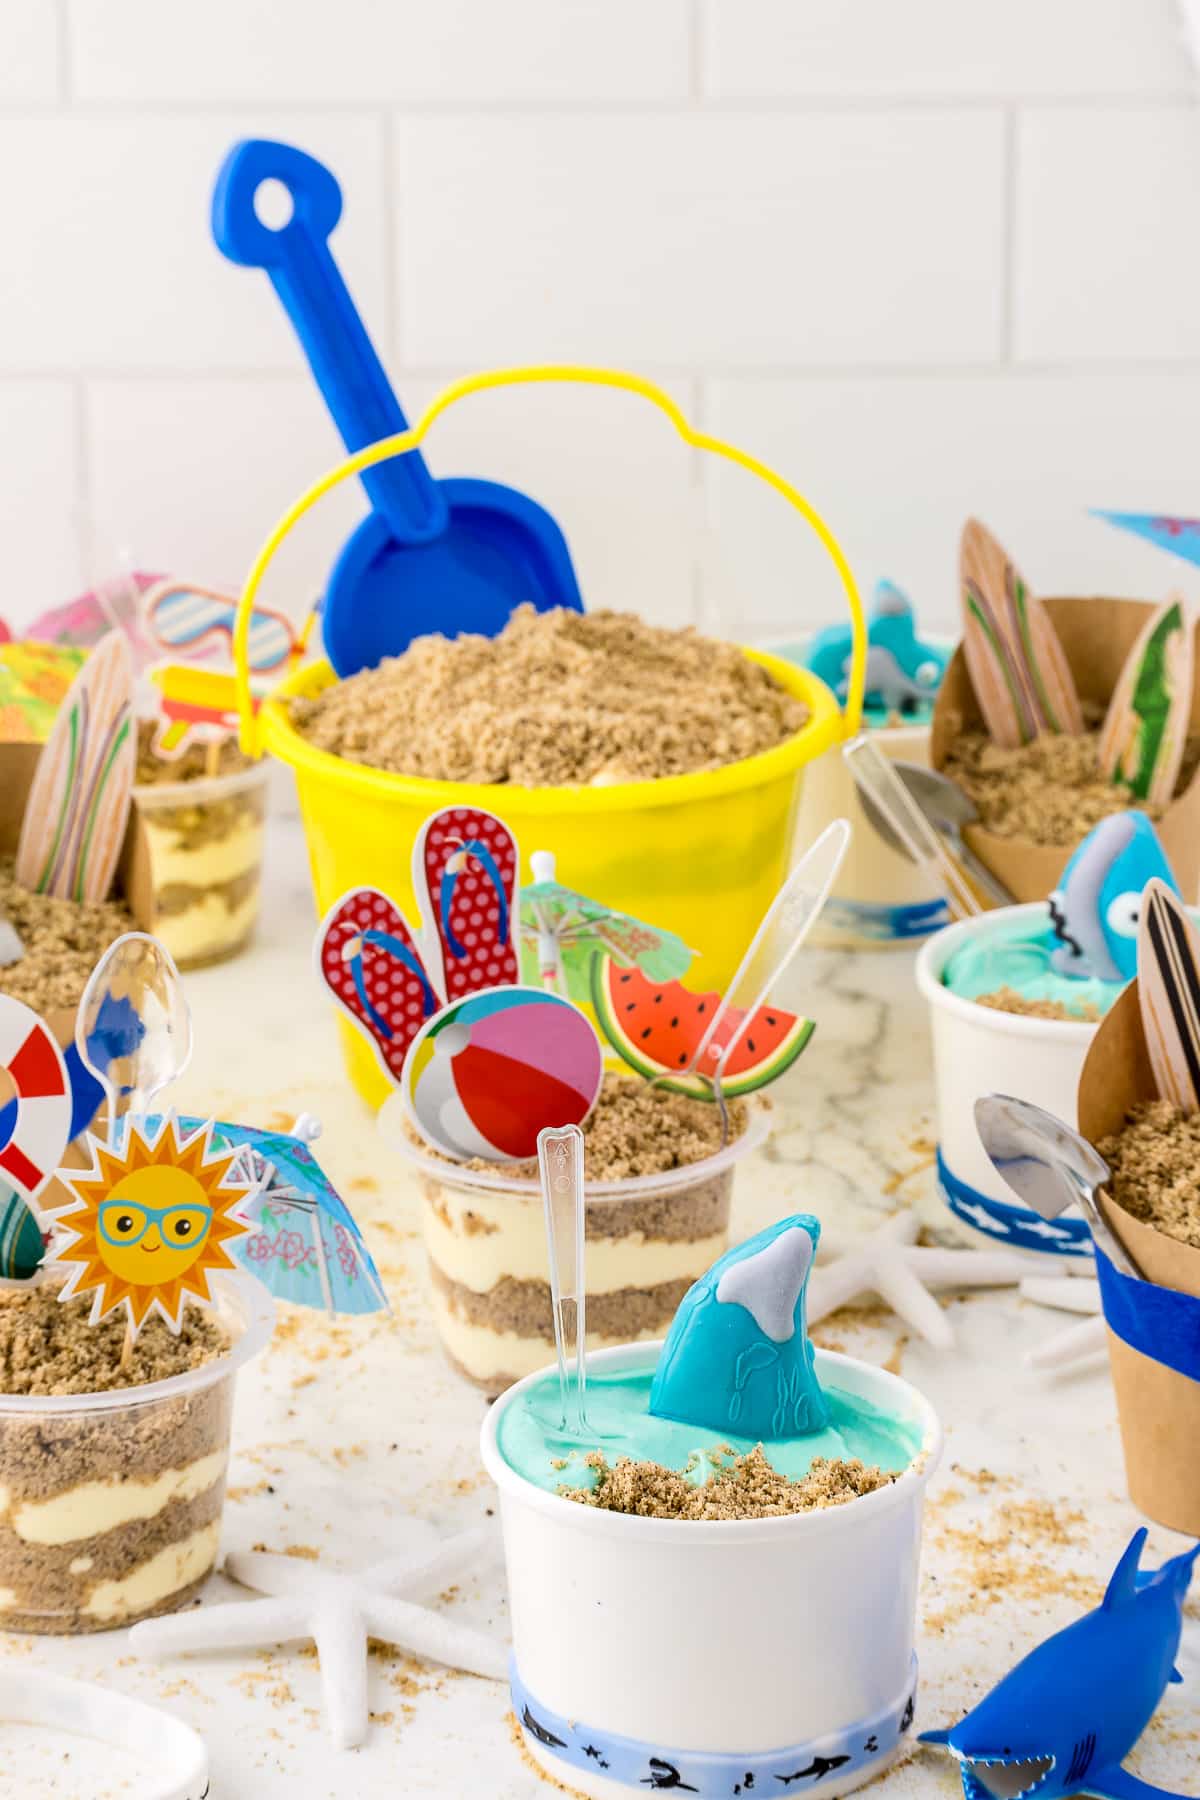
Supplies for Sand Pails servings:
Our Sand Pail servings:
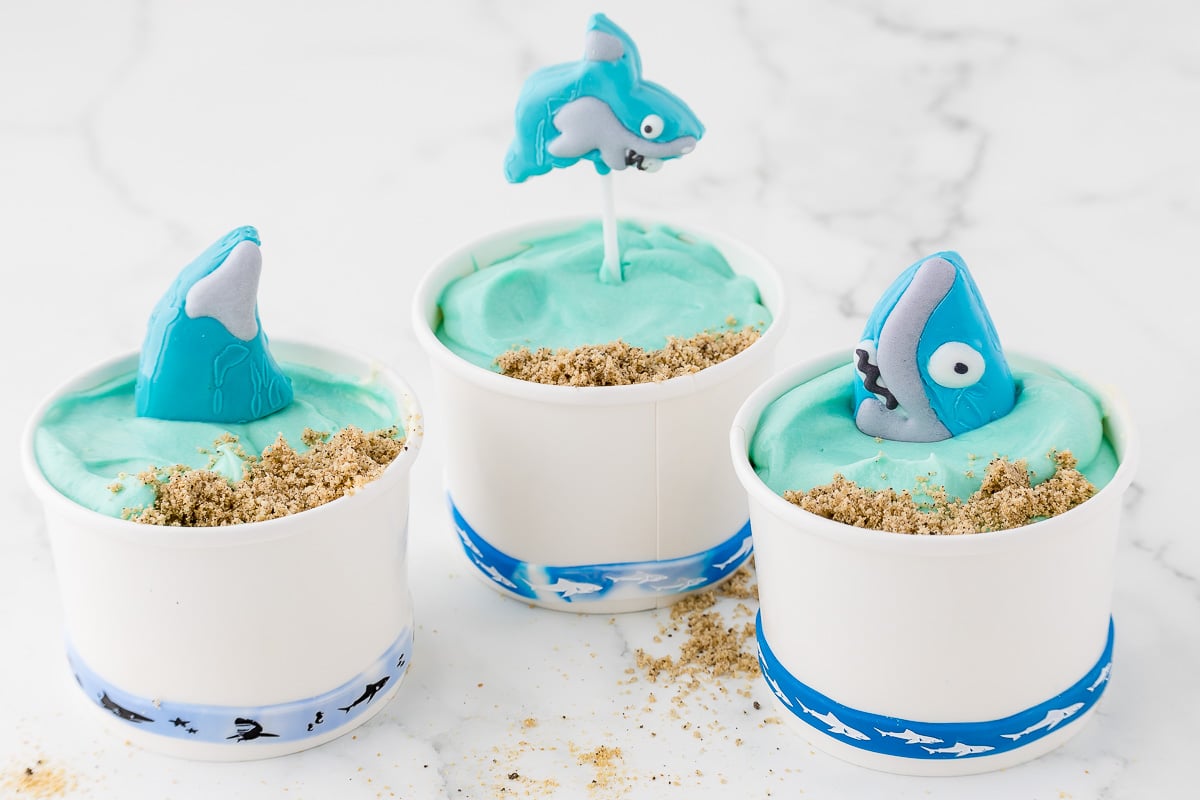
Supplies for Shark in the Ocean scene:
- Shark Lollipop
- Shark wristband to go around the white bowl (a great party favor)
- White Paper Bowls
Our Shark in the Ocean scene:
Tips and Tricks
- Don’t have a food processor handy? You can use a blender, or even a plastic bag and mallet, to create your cookie crumbles.
- Mixing up the ingredients in separate bowls and combining them in the right order guarantees the perfect pudding texture.
- You can pipe or scoop the pudding into the cups, but I think taking the extra step and piping it in makes the layers much more even and less smudge-y. If you don’t have a piping bag, you can always spoon your pudding mixture into a plastic bag and cut off one of the bottom corners.
FAQs
- How can I jazz up instant pudding mixture?
Forget the instructions on the package! Make your pudding extra rich, flavorful, and fluffy by following our method using cream cheese, butter, powdered sugar, milk, vanilla extract, and cool whip. Trust me, the extra couple of steps add a lot of wow factor to every bite.
- Can I make this sand pudding recipe ahead of time?
Our recipe keeps surprisingly well in the fridge! Make the individual servings up to two days ahead of time. The thickness of our pudding mixture prevents the cookie crumbles from getting soggy.
What makes this fun summer treat the perfect dessert? You can pass out individual servings with ease, delight the kids with fun themes, and appeal to everyone’s taste buds with almost universally-liked flavors! Your beach party is just begging for this sand pudding dessert!
When it comes to fun summer desserts, it’s hard to top these adorable sand pudding cups! Serving up these cute cups of deliciousness always stirs up lots of excitement, and never fails to satisfy a sweet tooth. Kick back and let your charming creations become the life of the pool party!
Do you dig this recipe? Spread the sunshine by giving it a 5-star rating and sharing it on Facebook. Don’t forget to pin the delectable image to your favorites board on Pinterest for your next summer event!

Sand Pudding Cups Recipe
Dig into this fun sand pudding dessert! Layers of pudding and crushed cookies served up with beachy vibes make this the perfect, easy summer treat! So simple and easy to make that this unique treat will make a great party dessert or a fun single serving snack for your beach themed birthday party or event. Plus! We are offering you several fun ideas for serving these yummy pudding cups in create ways!!
Ingredients
- 1 package golden Oreos
- 3 Oreo cookies
- 8 oz cream cheese, softened
- 2 tablespoons butter
- 1/2 cup powdered sugar
- 1 large package vanilla pudding mix
- 3 cups milk
- 1 teaspoon vanilla extract
- 8 oz whipped topping, we used Cool Whip
- Blue gel food coloring and shark candies for Shark in the Ocean scene
Instructions
1. Pulse golden and regular Oreos in a food processor until they resemble sand.
2. In a small bowl or stand mixer, use a whisk attachment to cream butter, cream cheese, and powdered sugar until smooth.
3. In a large bowl, mix instant vanilla pudding mix, milk, and vanilla extract with a whisk until well combined.
4. Gently fold in Cool Whip with a spatula. (If you're making our Shark in the Ocean scene, add a couple of drops of blue food coloring and carefully fold in.)
5. Spoon a layer of "sand" cookie crumbs into the bottom of each cup. Then press down on the sand with the bottom of an empty cup to help it set in place.
6. Pipe or scoop in a layer of pudding.
7. Then add another layer of "sand" and tamp down slightly again. Keep layering, alternating pudding and sand in each individual cup. Finish with a layer of "sand" on top.
8. Chill in the refrigerator until set, about one hour. Decorate and serve cold.
Notes
Don't have a food processor handy? You can use a blender, or even a plastic bag and mallet, to create your cookie crumbles.
Mixing up the ingredients in separate bowls and combining them in the right order guarantees the perfect pudding texture.
You can pipe or scoop the pudding into the cups, but I think taking the extra step and piping it in makes the layers much more even and less smudge-y. If you don't have a piping bag, you can always spoon your pudding mixture into a plastic bag and cut off one of the bottom corners.
Nutrition Information:
Yield: 8 Serving Size: 1Amount Per Serving: Calories: 369Total Fat: 23gSaturated Fat: 15gTrans Fat: 0gUnsaturated Fat: 6gCholesterol: 44mgSodium: 364mgCarbohydrates: 36gFiber: 0gSugar: 34gProtein: 5g
*This calculation is just an estimate ~ results may vary!
These couldn’t be any cuter! Thanks for sharing.